Kivy - 锚点布局
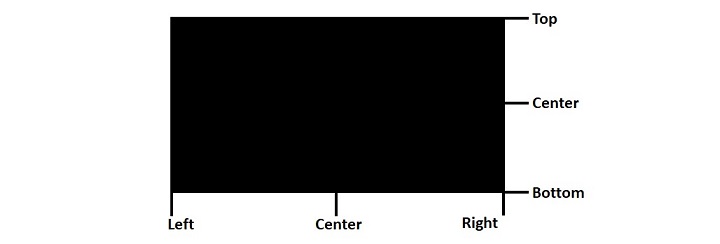
使用此布局时,我们可以在其中安排一个小部件,使其锚定在布局尺寸的某个位置。AnchorLayout 类在"kivy.uix.anchorlayout"模块中定义。
from kivy.uix.anchorlayout import AnchorLayout
lo = AnchorLayout(**kwargs)
关键字参数
anchor_x − 定义要放置的小部件的水平锚点。它是一个 OptionProperty,其值必须是"左"、"中"或"右"。默认为 'center'。
anchor_y − 定义要放置的小部件的垂直锚点。它是一个 OptionProperty,其值必须来自 'top'、'center' 或 'bottom'。默认为 'center'。
padding − 小部件框与其子项之间的填充,以像素为单位:[padding_left、padding_top、padding_right、padding_bottom]。它还接受两个参数形式 [padding_horizontal、padding_vertical] 和一个参数形式 [padding]。 padding 是一个 VariableListProperty,默认为 [0, 0, 0, 0]。

AnchorLayout 类继承了我们在前面章节中已经介绍过的两个方法"add_widget()"和"remove_widget()"。
示例 1
以下示例展示了 AnchorLayout 的典型用法 −
from kivy.app import App
from kivy.uix.label import Label
from kivy.uix.anchorlayout import AnchorLayout
from kivy.core.window import Window

Window.size = (720, 400)

class DemoApp(App):
   def build(self):
      lo = AnchorLayout(
         anchor_x='left', anchor_y='bottom'
      )
      self.l1 = Label(
         text='Hello World', font_size=20,
         size_hint=(None, None), size=(200, 75)
      )
      lo.add_widget(self.l1)
      return lo

if __name__ == '__main__':
   DemoApp().run()
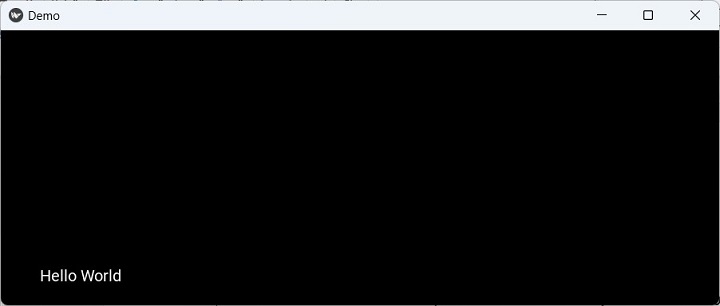
输出
可以看到标签已经锚定在布局的左下角。

带有 AnchorLayout 的 Kivy 应用也可以使用"kv"语言脚本来构建 −
AnchorLayout:
   anchor_x : 'left'
   anchor_y : 'bottom'
   Label:
      id:l1
      text: 'Hello World'
      font_size: '20pt'
      size_hint : (None, None)
      size : (200, 75)
示例 2
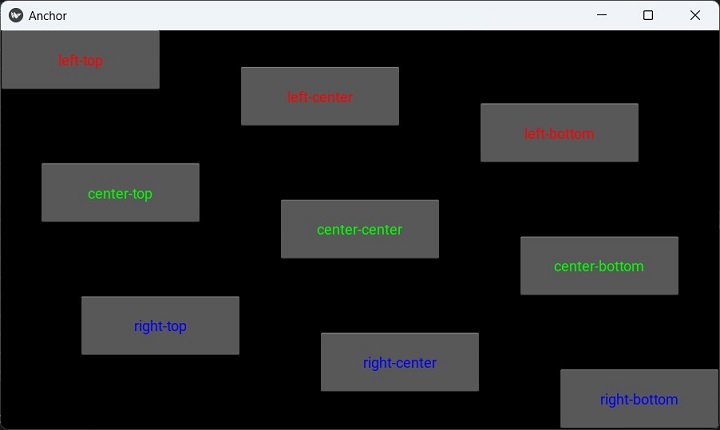
在下面的示例中,应用程序窗口有一个顶层 GridLayout,其中的小部件排列成 3 行。在每一行中,我们放置了三个 AnchorLayout,这样窗口就包含九个锚点布局,这些布局具有左上、左中、左下、中上、中中、中下、右上、右中和右下 anchor-x 和 anchor-y 属性。
在每个布局中,按钮小部件都按照锚点配置放置。
from kivy.app import App
from kivy.uix.button import Button
from kivy.config import Config
from kivy.uix.anchorlayout import AnchorLayout
from kivy.uix.gridlayout import GridLayout

Config.set('graphics', 'width', '720')
Config.set('graphics', 'height', '400')
Config.set('graphics', 'resizable', '1')

class AnchorApp(App):
   def build(self):
      lo = GridLayout(rows=3)
      ax = ['left', 'center', 'right']
      ay = ['top', 'center', 'bottom']
      c = 0

      # 3X3 grid with anchor layout in each
      for i in range(3):
         for j in range(3):
            print(ax[i], ay[j])
            anchrlo = AnchorLayout(
               anchor_x=ax[i], anchor_y=ay[j]
         )
         b = Button(
            text=ax[i] + "-" + ay[j],
            size_hint=(None, None),
            size=(200, 75), halign=ax[i]
         )

         # red text color for top row,
         # green for middle row,
         # blue for bottom row
         if i == 0: b.color = [1, 0, 0, 1]
         if i == 1: b.color = [0, 1, 0, 1]
         if i == 2: b.color = [0, 0, 1, 1]

         anchrlo.add_widget(b)
         lo.add_widget(anchrlo)
      return lo
AnchorApp().run()
输出
当你运行这段代码时,它将产生以下输出窗口−


