ReactJS - Http 客户端编程
Http 客户端编程使应用程序能够通过 JavaScript 连接并从 http 服务器获取数据。它减少了客户端和服务器之间的数据传输,因为它只获取所需的数据而不是整个设计,从而提高了网络速度。它提高了用户体验,成为每个现代 Web 应用程序不可或缺的功能。
如今,许多服务器端应用程序通过 REST API(HTTP 协议上的功能)公开其功能,并允许任何客户端应用程序使用该功能。
React 不提供自己的 http 编程 api,但它支持浏览器的内置 fetch() api 以及第三方客户端库(如 axios)来进行客户端编程。让我们在本章中学习如何在 React 应用程序中进行 http 编程。开发人员应该具备 Http 编程的基本知识才能理解本章。
Expense Rest API 服务器
进行 Http 编程的先决条件是具备 Http 协议和 REST API 技术的基本知识。Http 编程涉及两个部分,服务器和客户端。React 提供创建客户端应用程序的支持。 Express 是一个流行的 Web 框架,它支持创建服务器端应用程序。
首先,让我们使用 express 框架创建一个 Expense Rest Api 服务器,然后使用浏览器内置的 fetch api 从我们的 ExpenseManager 应用程序访问它。
打开命令提示符并创建一个新文件夹 express-rest-api。
cd /go/to/workspace
mkdir apiserver
cd apiserver
使用以下命令初始化新的节点应用程序 −
npm init
npm init 将提示并要求我们输入基本项目详细信息。让我们输入 apiserver 作为项目名称,输入 server.js 作为入口点。其他配置保留默认选项。
This utility will walk you through creating a package.json file.
It only covers the most common items, and tries to guess sensible defaults.

See `npm help json` for definitive documentation on these fields and exactly what they do.

Use `npm install <pkg>` afterwards to install a package and
save it as a dependency in the package.json file.

Press ^C at any time to quit.
package name: (apiserver)
version: (1.0.0)
description: Rest api for Expense Application
entry point: (index.js) server.js
test command:
git repository:
keywords:
author:
license: (ISC)
About to write to \path	o\workspace\expense-rest-api\package.json:
{
   "name": "expense-rest-api",
   "version": "1.0.0",
   "description": "Rest api for Expense Application",
   "main": "server.js",
   "scripts": {
      "test": "echo \"Error: no test specified\" && exit 1"
   },
   "author": "",
   "license": "ISC"
}
Is this OK? (yes) yes
接下来,使用以下命令安装 express、nedb 和 cors 模块 −
npm install express nedb cors
express 用于创建服务器端应用程序。
nedb 是用于存储费用数据的数据存储。
cors 是 express 框架的中间件,用于配置客户端访问详细信息。
接下来,让我们创建一个文件 data.csv 并用初始费用数据填充它以进行测试。文件的结构是每行包含一个费用条目。
Pizza,80,2020-10-10,Food
Grape Juice,30,2020-10-12,Food
Cinema,210,2020-10-16,Entertainment
Java Programming book,242,2020-10-15,Academic
Mango Juice,35,2020-10-16,Food
Dress,2000,2020-10-25,Cloth
Tour,2555,2020-10-29,Entertainment
Meals,300,2020-10-30,Food
Mobile,3500,2020-11-02,Gadgets
Exam Fees,1245,2020-11-04,Academic
接下来,创建一个文件 expensedb.js,并包含将初始费用数据加载到数据存储中的代码。代码检查数据存储中的初始数据,并且仅在数据在存储中不可用时才加载。
var store = require("nedb")
var fs = require('fs');
var expenses = new store({ filename: "expense.db", autoload: true })
expenses.find({}, function (err, docs) {
   if (docs.length == 0) {
      loadExpenses();
   }
})
function loadExpenses() {
   readCsv("data.csv", function (data) {
      console.log(data);

      data.forEach(function (rec, idx) {
         item = {}
         item.name = rec[0];
         item.amount = parseFloat(rec[1]);
         item.spend_date = new Date(rec[2]);
         item.category = rec[3];

         expenses.insert(item, function (err, doc) {
            console.log('Inserted', doc.item_name, 'with ID', doc._id);
         })
      })
   })
}
function readCsv(file, callback) {
   fs.readFile(file, 'utf-8', function (err, data) {
      if (err) throw err;
      var lines = data.split('
');
      var result = lines.map(function (line) {
         return line.split(',');
      });
      callback(result);
   });
}
module.exports = expenses
接下来,创建一个文件 server.js,并包含列出、添加、更新和删除费用条目的实际代码。
var express = require("express")
var cors = require('cors')
var expenseStore = require("./expensedb.js")
var app = express()
app.use(cors());
var bodyParser = require("body-parser");
app.use(bodyParser.urlencoded({ extended: false }));
app.use(bodyParser.json());
var HTTP_PORT = 8000
app.listen(HTTP_PORT, () => {
   console.log("Server running on port %PORT%".replace("%PORT%", HTTP_PORT))
});
app.get("/", (req, res, next) => {
   res.json({ "message": "Ok" })
});
app.get("/api/expenses", (req, res, next) => {
   expenseStore.find({}, function (err, docs) {
      res.json(docs);
   });
});
app.get("/api/expense/:id", (req, res, next) => {
   var id = req.params.id;
   expenseStore.find({ _id: id }, function (err, docs) {
      res.json(docs);
   })
});
app.post("/api/expense/", (req, res, next) => {
   var errors = []
   if (!req.body.item) {
      errors.push("No item specified");
   }
   var data = {
      name: req.body.name,
      amount: req.body.amount,
      category: req.body.category,
      spend_date: req.body.spend_date,
   }
   expenseStore.insert(data, function (err, docs) {
      return res.json(docs);
   });
})
app.put("/api/expense/:id", (req, res, next) => {
   var id = req.params.id;
   var errors = []
   if (!req.body.item) {
      errors.push("No item specified");
   }
   var data = {
      _id: id,
      name: req.body.name,
      amount: req.body.amount,
      category: req.body.category,
      spend_date: req.body.spend_date,
   }
   expenseStore.update( { _id: id }, data, function (err, docs) {
      return res.json(data);
   });
})
app.delete("/api/expense/:id", (req, res, next) => {
   var id = req.params.id;
   expenseStore.remove({ _id: id }, function (err, numDeleted) {
      res.json({ "message": "deleted" })
   });
})
app.use(function (req, res) {
   res.status(404);
});
现在,是时候运行应用程序了。
npm run start
接下来,打开浏览器并在地址栏中输入 http://localhost:8000/。
{
   "message": "Ok"
}
这证实我们的应用程序运行正常。
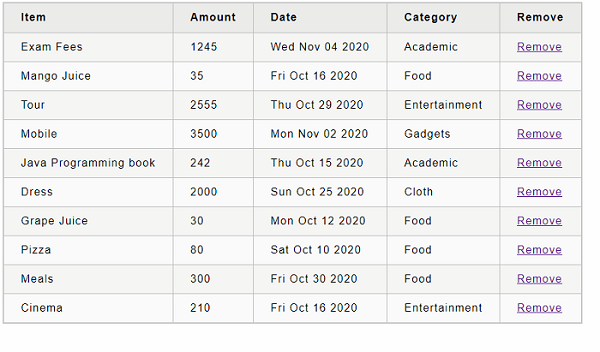
最后,将 url 更改为 http://localhost:8000/api/expense 并按 Enter。浏览器将以 JSON 格式显示初始费用条目。
[
   ...
   {
      "name": "Pizza",
      "amount": 80,
      "spend_date": "2020-10-10T00:00:00.000Z",
      "category": "Food",
      "_id": "5H8rK8lLGJPVZ3gD"
   },
   ...
]
让我们在下一节中通过 fetch() api 在我们的 Expense Manager(费用管理器)应用程序中使用我们新创建的费用服务器。
fetch() API
让我们创建一个新的应用程序来展示 React 中的客户端编程。
首先,按照创建 React 应用程序一章中的说明,使用 Create React App 或 Rollup 捆绑器创建一个新的 React 应用程序 react-http-app。
接下来,在您最喜欢的编辑器中打开该应用程序。
接下来,在应用程序的根目录下创建 src 文件夹。
接下来,在 src 文件夹下创建 components 文件夹。
接下来,在 下创建一个文件 ExpenseEntryItemList.css src/components 文件夹并包含通用表格样式。
html {
   font-family: sans-serif;
}
table {
   border-collapse: collapse;
   border: 2px solid rgb(200,200,200);
   letter-spacing: 1px;
   font-size: 0.8rem;
}
td, th {
   border: 1px solid rgb(190,190,190);
   padding: 10px 20px;
}
th {
   background-color: rgb(235,235,235);
}
td, th {
   text-align: left;
}
tr:nth-child(even) td {
   background-color: rgb(250,250,250);
}
tr:nth-child(odd) td {
   background-color: rgb(245,245,245);
}
caption {
   padding: 10px;
}
tr.highlight td {
    background-color: #a6a8bd;
}
接下来,在 src/components 文件夹下创建一个文件 ExpenseEntryItemList.js 并开始编辑。
接下来,导入 React 库。
import React from 'react';
接下来,创建一个类 ExpenseEntryItemList 并使用 props 调用构造函数。
class ExpenseEntryItemList extends React.Component {
   constructor(props) {
      super(props);
   }
}
接下来,在构造函数中使用空列表初始化状态。
this.state = {
   isLoaded: false,
   items: []
}
接下来,创建一个方法 setItems 来格式化从远程服务器接收的项目,然后将其设置到组件的状态中。
setItems(remoteItems) {
   var items = [];
   remoteItems.forEach((item) => {
      let newItem = {
         id: item._id,
         name: item.name,
         amount: item.amount,
         spendDate: item.spend_date,
         category: item.category
      }
      items.push(newItem)
   });
   this.setState({
      isLoaded: true,
      items: items
   });
}
接下来,添加一个方法 fetchRemoteItems 来从服务器获取项目。
fetchRemoteItems() {
   fetch("http://localhost:8000/api/expenses")
      .then(res => res.json())
      .then(
         (result) => {
            this.setItems(result);
         },
         (error) => {
            this.setState({
               isLoaded: false,
               error
            });
         }
      )
}
这里,
fetch api 用于从远程服务器获取项目。
setItems 用于格式化和存储状态中的项目。
接下来,添加一个方法,deleteRemoteItem 以从远程服务器删除该项目。
deleteRemoteItem(id) {
   fetch('http://localhost:8000/api/expense/' + id, { method: 'DELETE' })
      .then(res => res.json())
      .then(
         () => {
            this.fetchRemoteItems()
         }
      )
}
这里,
fetch api 用于从远程服务器删除和获取项目。
setItems 再次用于格式化和存储状态中的项目。
接下来,调用 componentDidMount 生命周期 api 在组件的安装阶段将项目加载到组件中。
componentDidMount() {
   this.fetchRemoteItems();
}
接下来,编写一个事件处理程序以从列表中删除该项目。
handleDelete = (id, e) => {
   e.preventDefault();
   console.log(id);

   this.deleteRemoteItem(id);
}
接下来编写render方法。
render() {
   let lists = [];
   if (this.state.isLoaded) {
      lists = this.state.items.map((item) =>
         <tr key={item.id} onMouseEnter={this.handleMouseEnter} onMouseLeave={this.handleMouseLeave}>
            <td>{item.name}</td>
            <td>{item.amount}</td>
            <td>{new Date(item.spendDate).toDateString()}</td>
            <td>{item.category}</td>
            <td><a href="#" onClick={(e) => this.handleDelete(item.id, e)}>Remove</a></td>
         </tr>
      );
   }
   return (
      <div>
         <table onMouseOver={this.handleMouseOver}>
            <thead>
               <tr>
                  <th>Item</th>
                  <th>Amount</th>
                  <th>Date</th>
                  <th>Category</th>
                  <th>Remove</th>
               </tr>
            </thead>
            <tbody>
               {lists}
            </tbody>
         </table>
      </div>
   );
}
最后,导出组件。
export default ExpenseEntryItemList;
接下来,在 src 文件夹下创建一个文件 index.js 并使用 ExpenseEntryItemList 组件。
import React from 'react';
import ReactDOM from 'react-dom';
import ExpenseEntryItemList from './components/ExpenseEntryItemList';

ReactDOM.render(
   <React.StrictMode>
         <ExpenseEntryItemList />
   </React.StrictMode>,
   document.getElementById('root')
);
最后,在根文件夹下创建public文件夹,并创建index.html文件。
<!DOCTYPE html>
<html lang="en">
   <head>
      <meta charset="utf-8">
      <title>React App</title>
   </head>
   <body>
      <div id="root"></div>
      <script type="text/JavaScript" src="./index.js"></script>
   </body>
</html>
接下来,打开一个新的终端窗口并启动我们的服务器应用程序。
cd /go/to/server/application
npm start
接下来,使用 npm 命令为客户端应用程序提供服务。
npm start
接下来,打开浏览器并在地址栏中输入 http://localhost:3000 并按 Enter。
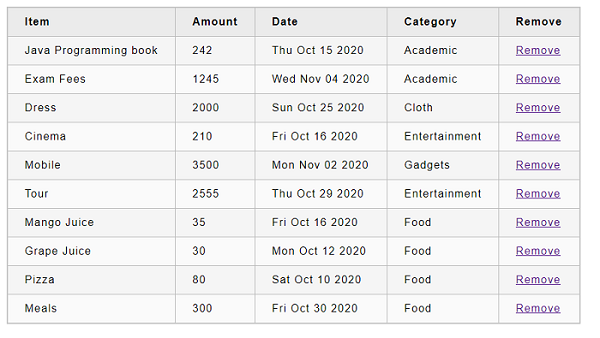
尝试通过单击删除链接来删除该项目。