Ionic - Javascript 页脚
此指令将在屏幕底部添加页脚栏。
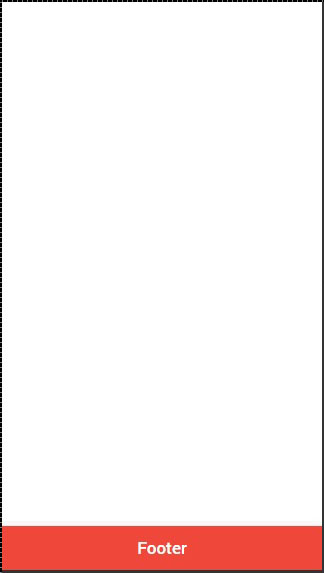
使用页脚
可以通过应用 ion-footer-bar 类来添加 Ionic 页脚。使用方法与使用页眉相同。我们可以添加标题,并使用 align-title 属性将其放置在屏幕的左侧、中间或右侧。使用前缀 bar,我们可以使用 Ionic 颜色。让我们创建一个红色的页脚,标题位于中间。
<ion-footer-bar align-title = "center" class = "bar-assertive">
<h1 class = "title">标题!</h1>
</ion-footer-bar>
上述代码将在屏幕中产生以下内容 −
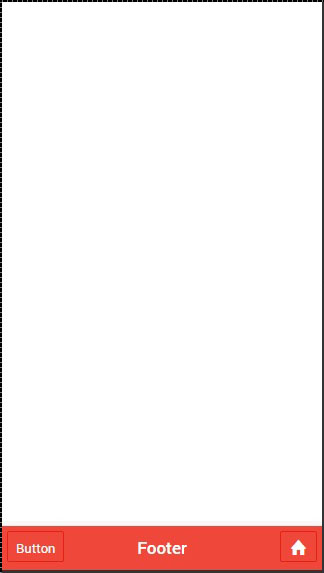
添加元素
我们可以将按钮图标或其他元素添加到 ion-footer-bar,它们的样式将被应用。让我们在页脚中添加一个按钮和一个图标。
<ion-footer-bar class = "bar-assertive">
   <div class = "buttons">
      <button class = "button">Button</button>
   </div>

   <h1 class = "title">Footer</h1>

   <div class = "buttons">
      <button class = "button icon ion-home"></button>
   </div>
</ion-footer-bar>
上述代码将生成以下屏幕−
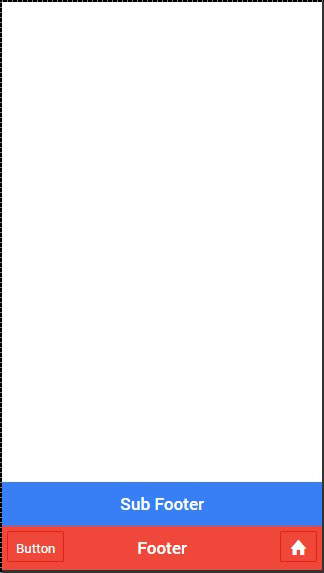
添加子页脚
我们向您展示了如何使用子标题。子页脚的创建方式相同。它将位于页脚栏上方。我们需要做的就是将 bar-subfooter 类添加到我们的 ion-footer-bar 元素。
在下面的示例中,我们将在之前创建的页脚栏上方添加子页脚。
<ion-footer-bar class = "bar-subfooter bar-positive">
   <h1 class = "title">Sub Footer</h1>
</ion-footer-bar>

<ion-footer-bar class = "bar-assertive">
   <div class = "buttons">
      <button class = "button">Button</button>
   </div>

   <h1 class = "title">Footer</h1>

   <div class = "buttons" ng-click = "doSomething()">
      <button class = "button icon ion-home"></button>
   </div>
</ion-footer-bar>
上述代码将在屏幕产生以下内容 −