Google AMP - Html 页面到 Amp 页面
在本章中,我们将了解如何将普通 html 页面转换为 amp 页面。我们还将验证页面是否为 amp,并在最后检查输出。
首先,让我们以普通 html 页面为例,如下所示 −
test.html
<!DOCTYPE html>
<html>
   <head>
      <meta charset = "utf-8">
      <title>Tutorials</title>
      <link href = "style.css" rel = "stylesheet" />
      <meta name = "viewport" content = "width = device-width, initial-scale = 1.0">
      <script src = "js/jquery.js"></script>
   </head>
   <body>
      <header role = "banner">
         <h2>Tutorials</h2>
      </header>
      <h2>Some Important Tutorials List</h2>
      <article>
         <section>
            <img src = "images/tut1.png" width="90%" height = "90%"/>
         </section>
         <section>
            <img src = "images/tut2.png" width="90%" height = "90%"/>
         </section>
         <section>
            <img src = "images/tut3.png" width="90%" height = "90%"/>
         </section>
         <section>
            <img src = "images/tut4.png" width="90%" height = "90%"/>
         </section>
      </article>
      <footer>
         <p>For More tutorials Visit <a href =
         "https://tutorialspoint.com/">Tutorials Point</a></p>
      </footer>
   </body>
</html>
请注意,我们在其中使用了 style.css,css 文件的详细信息如下所示 −
h1 {color: blue;text-align: center;}
   h2 {text-align: center;}
      img {
         border: 1px solid #ddd;
         border-radius: 4px;
         padding: 5px;
      }
      article {
         text-align: center;
      }
      header{
         width: 100%;
         height: 50px;
         margin: 5px auto;
         border: 1px solid #000000;
         text-align: center;
         background-color: #ccc;
      }
      footer {
         width: 100%;
         height: 35px;
         margin: 5px auto;
         border: 1px solid #000000;
         text-align: center;
         background-color: yellow;
      }
请注意,我们还在上面列出的 .html 中使用了 jquery.js 文件。
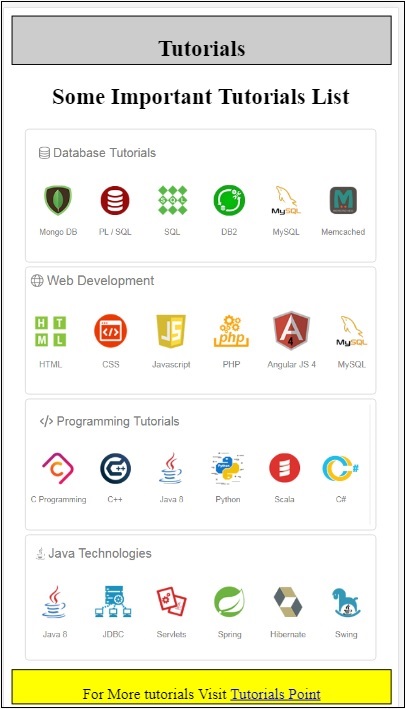
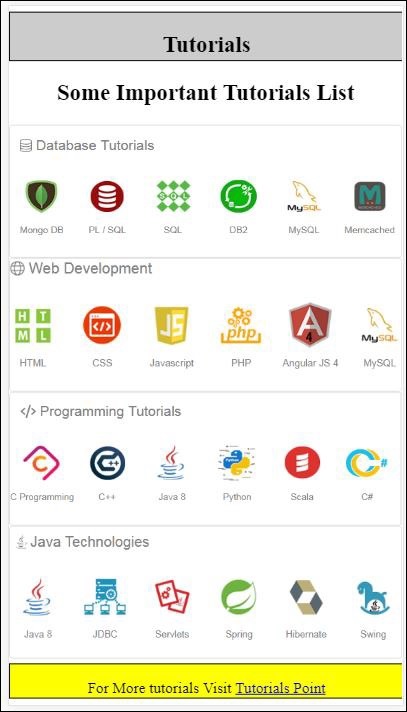
现在,在本地托管 test.html 并查看此处给出的链接中的输出 −
http://localhost:8080/googleamp/test.html
现在,让我们一步一步将上面的 test.html 文件更改为 test_amp.html 文件。
首先,我们必须将 test.html 保存为 test_amp.html,然后按照下面给出的步骤操作。
步骤 1 −在 head 部分添加 amp 库,如下所示 −
<script async src = "https://cdn.ampproject.org/v0.js">
</script>
例如,一旦添加到 test_amp.html,它将如下所示 −
<head>
   <meta charset = "utf-8">
   <title>Tutorials</title>
   <script async src = "https://cdn.ampproject.org/v0.js">
   </script>
   <link href = "style.css" rel = "stylesheet" />
   <meta name = "viewport" content = "width = device-width, initial-scale = 1.0">
      <script src = "js/jquery.js"></script>
</head>
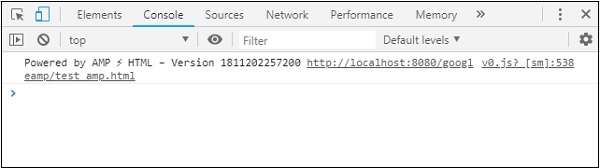
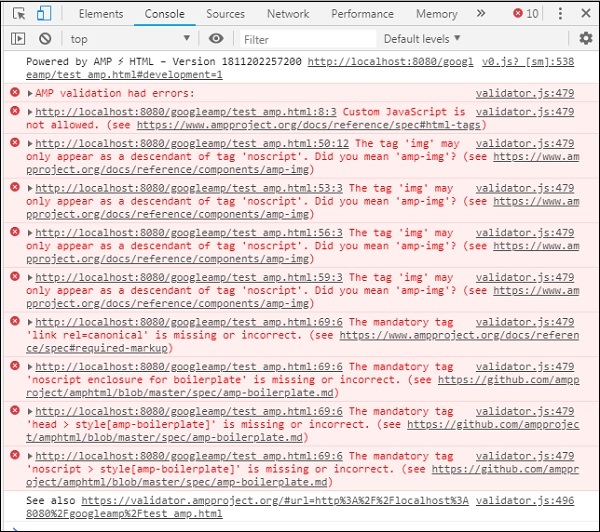
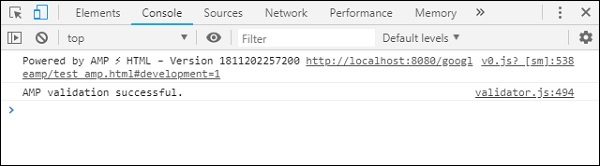
现在在浏览器中运行页面 test_amp.html 并打开浏览器控制台。它将显示控制台消息,如下所示 −
要知道您的 html 文件是否为有效的 amp,请在末尾的 html 页面网址中添加 #development=1,如下所示 −
http://localhost:8080/googleamp/test_amp.html#development=1
在浏览器和 Google Chrome 控制台中点击上述网址。它将列出 amp 认为从 amp 规范角度来看无效的错误。
我们遇到的 test_amp.html 错误显示在此处 −
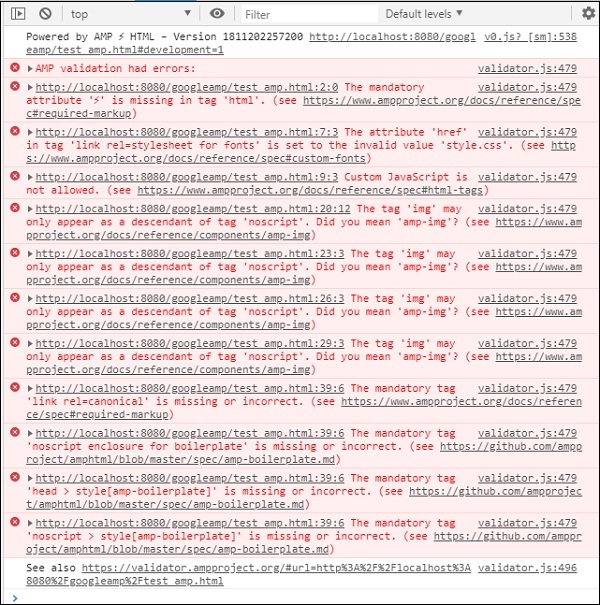
现在让我们逐一修复它们,直到我们收到 amp 成功消息。
步骤 2 − 我们可以在控制台中看到以下错误 −

我们可以通过在 html 标签中添加 ⚡ 或 amp 来修复它。我们将 amp 添加到 html 标签,如下所示 −
<html amp>
步骤 3 − 请确保 head 标签中的 meta 标签包含 charset 和 name="viewport",如下所示 −
<head>
   <meta charset = "utf-8">
   <meta name = "viewport" content = "width = device-width, initial-scale = 1.0">
</head>
步骤 4 − 我们遇到的下一个错误显示在这里 −

它在 link rel=stylesheet 中显示 href,即以下链接抛出错误。这是因为 amp 不允许使用带有 href 的链接将外部样式表放在页面内。
<link href = "style.css" rel = "stylesheet" />
我们可以在 style.css 中添加所有 css,如下所示 −
<style amp-custom>
    /*请在此处添加 style.css 中的所有样式 */
</style>
因此 style.css 中存在的 css 数据必须添加到具有 amp-custom 属性的样式中。
<style amp-custom>
   h1 {color: blue;text-align: center;}
   h2 {text-align: center;}
      img {
         border: 1px solid #ddd;
         border-radius: 4px;
         padding: 5px;
      }
      article {
         text-align: center;
      }
      header{
         width: 100%;
         height: 50px;
         margin: 5px auto;
         border: 1px solid #000000;
         text-align: center;
         background-color: #ccc;
      }
      footer {
         width: 100%;
         height: 35px;
         margin: 5px auto;
         border: 1px solid #000000;
         text-align: center;
         background-color: yellow;
      }
</style>
将 style 标签添加到您的 amp 页面。现在让我们在浏览器中使用上述 style 标签进行测试。我们迄今为止对 test_amp.html 所做的更改显示在此处 −
<!DOCTYPE html>
<html amp>
   <head>
      <meta charset = "utf-8">
      <title>Tutorials</title>
      <script async src = "https://cdn.ampproject.org/v0.js">
      </script>
      <meta name = "viewport" content = "width = device-width, initial-scale = 1.0">
      <script src = "js/jquery.js"></script>
      <style amp-custom>
         h1 {color: blue;text-align: center;}
         h2 {text-align: center;}
            img {
               border: 1px solid #ddd;
               border-radius: 4px;
               padding: 5px;
            }

            article {
               text-align: center;
            }
            header{
               width: 100%;
               height: 50px;
               margin: 5px auto;
               border: 1px solid #000000;
               text-align: center;
               background-color: #ccc;
            }
            footer {
               width: 100%;
               height: 35px;
               margin: 5px auto;
               border: 1px solid #000000;
               text-align: center;
               background-color: yellow;
            }
      </style>
   </head>
   <body>
      <header role = "banner">
         <h2>Tutorials</h2>
      </header>
      <h2>Some Important Tutorials List</h2>
      <article>
         <section>
            <img src = "images/tut1.png" width = "90%" height = "90%"/>
         </section>
         <section>
            <img src = "images/tut2.png" width = "90%" height = "90%"/>
         </section>
         <section>
            <img src = "images/tut3.png" width = "90%" height = "90%"/>
         </section>
         <section>
            <img src = "images/tut4.png" width="90%" height = "90%"/>
         </section>
      </article>
      <footer>
         <p>For More tutorials Visit <a href =
         "https://tutorialspoint.com/">Tutorials Point</a></p>
      </footer>
   </body>
</html>
让我们看看上面页面控制台中的输出和错误。观察以下屏幕截图 −
控制台中显示的错误如下 −
现在,您可以看到,对于 amp 的一些错误,样式已被删除。现在让我们修复剩余的错误。
步骤 5 −我们在列表中看到的下一个错误如下 −

我们添加了调用 jquery 文件的脚本标记。请注意,amp 页面不允许页面中出现任何自定义 javascript。我们必须将其删除并确保使用可用的 amp-component。
例如,如果需要任何动画,我们有 amp-animation;如果我们想将 Google Analytics 代码添加到页面,我们有 amp-analytics。同样,我们有 amp-ad 组件来显示要在页面上显示的广告。还有一个 amp-iframe 组件,我们可以将 src 指向相同的来源,并在 amp-iframe 中调用任何自定义 javascript(如果需要)。
现在,让我们从页面中删除脚本标记。
第 6 步 − 显示的下一个错误显示在此处 −
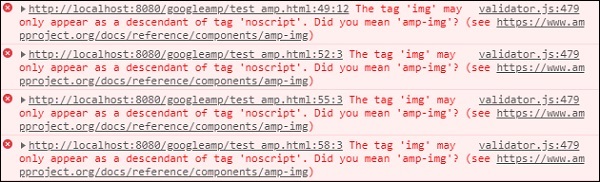
上述错误指向我们在页面上使用的图像标记。Amp 不允许在页面内使用 <img src="" /> 标签。请注意,我们需要改用 amp-img 标签。
让我们用 <amp-img> 替换 <img> 标签,如下所示 −
<section>
   <amp-img alt = "Beautiful Flower"
      src = "images/tut1.png"
      width = "500"
      height = "160"
      layout = "responsive">
   </amp-img>
</section>
<section>
   <amp-img alt = "Beautiful Flower"
      src = "images/tut2.png"
      width = "500"
      height = "160"
      layout = "responsive">
   </amp-img>
</section>
<section>
   <amp-img alt = "Beautiful Flower"
      src = "images/tut3.png"
      width = "500"
      height = "160"
      layout = "responsive">
   </amp-img>
</section>
<section>
   <amp-img alt = "Beautiful Flower"
      src = "images/tut4.png"
      width = "500"
      height = "160"
      layout = "responsive">
   </amp-img>
</section>
如上所示,我们已将所有 <img> 标签替换为 <amp-img>。现在,让我们在浏览器中运行页面以查看输出和错误 −
错误
观察错误现在越来越少了。
第 7 步 −控制台中显示的下一个错误如下 −

我们需要在 head 部分添加 link rel=canonical 标签。请注意,这是一个必需的标签,应始终在 head 中添加,如下所示 −
<link rel = "canonical" href ="http://example.ampproject.org/article-metadata.html">
步骤 8 −控制台中显示的下一个错误是缺少 noscript 标签,如下所示 −

我们需要在 head 部分添加用 amp-boilerplate 括起来的 <noscript> 标签,如下所示 −
<noscript>
   <style amp-boilerplate>
      body{
         -webkit-animation:none;
         -moz-animation:none;
         -ms-animation:none;
         animation:none}
   </style>
</noscript>
第 9 步 − 显示的下一个错误如下所示 −

另一个必需标签是带有 amp-boilerplate 的 style 标签,必须放在 noscript 标签之前。带有 amp-boilerplate 的 style 标签如下所示 −
<style amp-boilerplate>
   body{
      -webkit-animation:
      -amp-start 8s steps(1,end) 0s 1 normal both;-moz-animation:
      -amp-start 8s steps(1,end) 0s 1 normal both;-ms-animation:
      -amp-start 8s steps(1,end) 0s 1 normal both;animation:
      -amp-start 8s steps(1,end) 0s 1 normal both
   }
   @-webkit-keyframes
   -amp-start{from{visibility:hidden}to{visibility:visible}}@-moz-keyframes
   -amp-start{from{visibility:hidden}to{visibility:visible}}@-ms-keyframes
   -amp-start{from{visibility:hidden}to{visibility:visible}}@-o-keyframes
   -amp-start{from{visibility:hidden}to{visibility:visible}}@keyframes
   -amp-start{from{visibility:hidden}to{visibility:visible}}
</style>
将上述样式标签添加到 test_amp.html 页面。
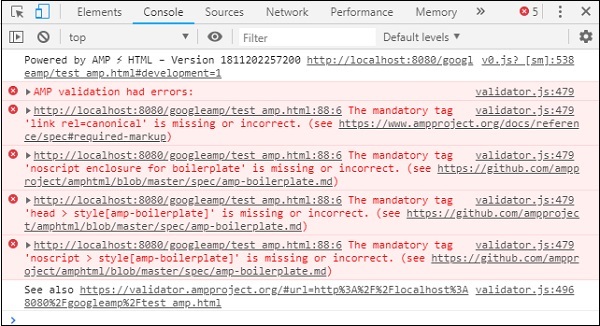
完成后,在浏览器中测试页面以查看输出和控制台 −
控制台详细信息显示在此处 −
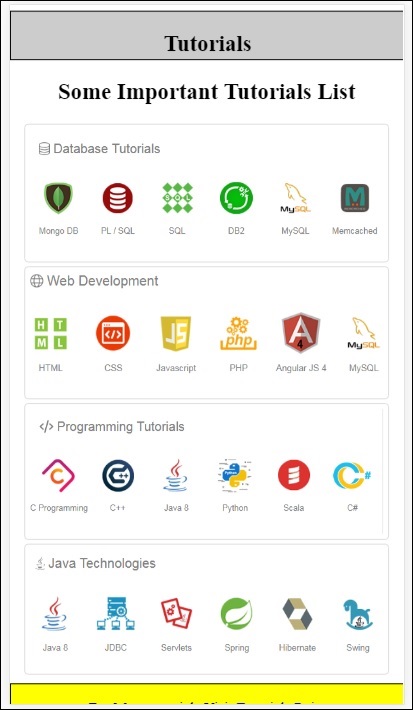
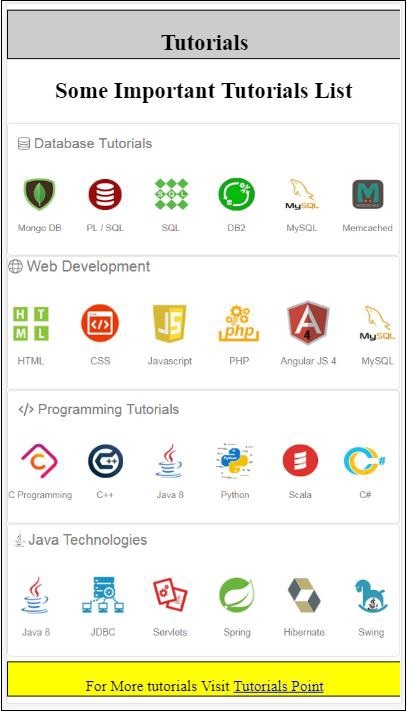
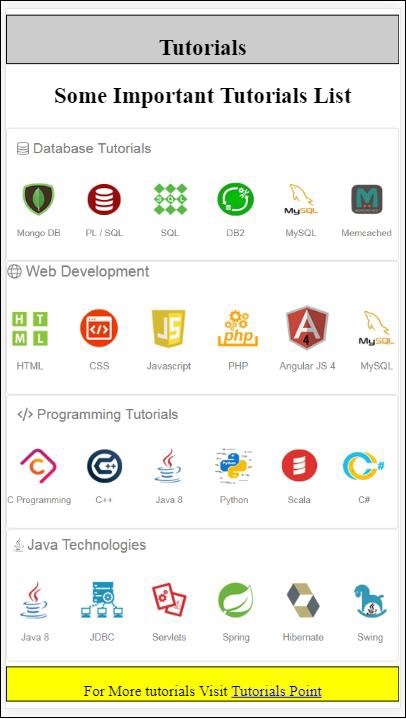
因此,我们终于解决了所有错误,现在页面 test_amp.html 是一个有效的 amp 页面。
由于页眉和页脚被截断,因此需要添加一些样式,我们可以在添加的自定义样式中更新它们。因此我们从页眉和页脚中删除了 width:100%。
这是最终输出 −
最终 test_amp.html 文件
<!DOCTYPE html>
<html amp>
   <head>
      <meta charset = "utf-8">
      <title>Tutorials</title>
      <link rel = "canonical" href=
      "http://example.ampproject.org/article-metadata.html">
      <script async src = "https://cdn.ampproject.org/v0.js">
      </script>
      <meta name = "viewport" content = "width = device-width,
      initial-scale = 1.0">

      <style amp-boilerplate>
         body{
            -webkit-animation:
            -amp-start 8s steps(1,end) 0s 1 normal both;-moz-animation:
            -amp-start 8s steps(1,end) 0s 1 normal both;-ms-animation:
            -amp-start 8s steps(1,end) 0s 1 normal both;animation:
            -amp-start 8s steps(1,end) 0s 1 normal both
         }
         @-webkit-keyframes
         -amp-start{from{visibility:hidden}to{visibility:visible}}@-moz-keyframes
         -amp-start{from{visibility:hidden}to{visibility:visible}}@-ms-keyframes
         -amp-start{from{visibility:hidden}to{visibility:visible}}@-o-keyframes
         -amp-start{from{visibility:hidden}to{visibility:visible}}@keyframes
         -amp-start{from{visibility:hidden}to{visibility:visible}}
      </style>
      <noscript>
         <style amp-boilerplate>
            body{
               -webkit-animation:none;
               -moz-animation:none;
               -ms-animation:none;
               animation:none}
         </style>
      </noscript>
      <style amp-custom>
         h1 {color: blue;text-align: center;}
         h2 {text-align: center;}
            amp-img {
               border: 1px solid #ddd;
               border-radius: 4px;
               padding: 5px;
            }
            article {
               text-align: center;
            }
            header{
               height: 50px;
               margin: 5px auto;
               border: 1px solid #000000;
               text-align: center;
               background-color: #ccc;
            }
            footer {
               height: 35px;
               margin: 5px auto;
               border: 1px solid #000000;
               text-align: center;
               background-color: yellow;
            }
      </style>
   </head>
   <body>
      <header role = "banner">
         <h2>Tutorials</h2>
      </header>
      <h2>Some Important Tutorials List</h2>
      <article>
         <section>
            <amp-img
               alt = "Beautiful Flower"
               src = "images/tut1.png"
               width = "500"
               height = "160"
               layout = "responsive">
            </amp-img>
         </section>
         <section>
            <amp-img
               alt = "Beautiful Flower"
               src = "images/tut2.png"
               width = "500"
               height = "160"
               layout = "responsive">
            </amp-img>
         </section>
         <section>
            <amp-img
               alt = "Beautiful Flower"
               src = "images/tut3.png"
               width = "500"
               height = "160"
               layout = "responsive">
            </amp-img>
         </section>
         <section>
            <amp-img
               alt = "Beautiful Flower"
               src = "images/tut4.png"
               width = "500"
               height = "160"
               layout = "responsive">
            </amp-img>
         </section>
      </article>
      <footer>
         <p>For More tutorials Visit <a href =
         "https://tutorialspoint.com/">
            Tutorials Point</a>
         </p>
      </footer>
   </body>
</html>
这样,我们终于完成了将普通 html 文件转换为 amp 的工作。


