BabylonJS - 变形网格
变形通过某种过渡方式将一个对象的形状改变为另一个对象的形状。我们已经看到了形状的可更新参数;否则,该参数设置为 false。对于变形,将其设置为 true,并更新网格以改变形状。
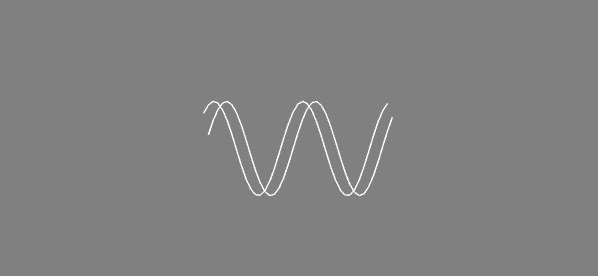
下面给出的演示显示了线条、丝带的变形。
带线条的演示
<!doctype html>
<html>
   <head>
      <meta charset = "utf-8">
      <title>BabylonJs - Basic Element-Creating Scene</title>
      <script src = "babylon.js"></script>
      <style>
         canvas {width: 100%; height: 100%;}
      </style>
   </head>

   <body>
      <canvas id = "renderCanvas"></canvas>
      <script type = "text/javascript">
         var canvas = document.getElementById("renderCanvas");
         var engine = new BABYLON.Engine(canvas, true);

         var createScene  = function() {
            var scene = new BABYLON.Scene(engine);
            scene.clearColor = new BABYLON.Color3( .5, .5, .5);

            var camera = new BABYLON.ArcRotateCamera("camera1",  0, 0, 0, new BABYLON.Vector3(0, 0, -0), scene);
            camera.setPosition(new BABYLON.Vector3(0, 0, -100));
            camera.attachControl(canvas, true);

            var light = new BABYLON.HemisphericLight("light1", new BABYLON.Vector3(1, 0.5, 0), scene);
            light.intensity = 0.7;

            var pl = new BABYLON.PointLight("pl", new BABYLON.Vector3(0, 0, 0), scene);
            pl.diffuse = new BABYLON.Color3(1, 1, 1);
            pl.specular = new BABYLON.Color3(1, 0, 0);
            pl.intensity = 0.95;

            // 创建线条
            var sinpath = [];
            for(var i = -20; i < 20; i++) {
               var x = i;
               var y = 0;
               var z = 0;
               sinpath.push(new BABYLON.Vector3(x, y, z));
            }
            var sinmesh = BABYLON.Mesh.CreateLines("lines", sinpath, scene, true);

            // 创建线条
            var cospath = [];
            for(var i = 20; i > -20; i--) {
               var x = i;
               var y = 0;
               var z = 0;
               cospath.push(new BABYLON.Vector3(x, y, z));
            }
            console.log(cospath);
            var cosmesh = BABYLON.Mesh.CreateLines("lines", cospath, scene, true);

            var updatePath = function(sinpath, k) {
               for (var i = 0; i < sinpath.length; i++) {
                  var x = sinpath[i].x;
                  var z = sinpath[i].z;
                  var y = 10 * Math.sin(i / 3 + k); // 在 y 轴上使用 sin
                  sinpath[i].x = x;
                  sinpath[i].y = y;
                  sinpath[i].z = z;
               }
            };

            var updatePath1 = function(cospath, k) {
               for (var i = 0; i < cospath.length; i++) {
                  var x = cospath[i].x;
                  var z = cospath[i].z;
                  var y = 10 * Math.cos(i / 3 + k); //using cos on y -axis
                  cospath[i].x = x;
                  cospath[i].y = y;
                  cospath[i].z = z;
               }
            };

            // morphing
            var k = 0;
            scene.registerBeforeRender(function() {
               updatePath(sinpath, k);
               updatePath1(cospath, k);
               //updateLines(mesh, path);
               sinmesh = BABYLON.Mesh.CreateLines(null, sinpath, null, null, sinmesh);
               cosmesh = BABYLON.Mesh.CreateLines(null, cospath, null, null, cosmesh);
               k += 0.10;
               pl.position = camera.position;
            });
            return scene;
         };
         var scene = createScene();
         engine.runRenderLoop(function() {
            scene.render();
         });
      </script>
   </body>
</html>
输出
上述代码行生成以下输出 −

说明
使用正弦和余弦角更新和变形线条。
从路径 -20 到 20 创建 2 条线。稍后使用 y 轴上的正弦和余弦更新线条。
使用可更新选项的网格设置为 true,以便稍后可以更新。请考虑以下示例以了解此 −
var sinmesh = BABYLON.Mesh.CreateLines("lines", sinpath, scene, true);
稍后所有值都设置为 null,仅更新路径。请考虑以下示例以了解这一点。
sinmesh = BABYLON.Mesh.CreateLines(null, sinpath, null, null, sinmesh);
最后一个参数是所用网格的名称。
变形带
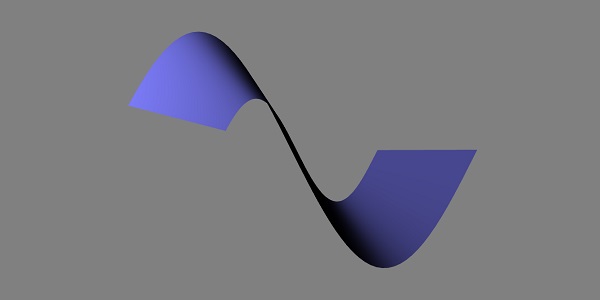
现在让我们看看如何创建变形带。
演示
<!doctype html>
<html>
   <head>
      <meta charset = "utf-8">
      <title>BabylonJs - Basic Element-Creating Scene</title>
      <script src = "babylon.js"></script>
      <style>
         canvas {width: 100%; height: 100%;}
      </style>
   </head>

   <body>
      <canvas id = "renderCanvas"></canvas>
      <script type = "text/javascript">
         var canvas = document.getElementById("renderCanvas");
         var engine = new BABYLON.Engine(canvas, true);

         var createScene  = function() {
            var scene = new BABYLON.Scene(engine);
            scene.clearColor = new BABYLON.Color3( .5, .5, .5);
            var camera = new BABYLON.ArcRotateCamera("camera1",  0, 0, 0, new BABYLON.Vector3(0, 0, -0), scene);
            camera.setPosition(new BABYLON.Vector3(0, 0, -100));
            camera.attachControl(canvas, true);

            var light = new BABYLON.HemisphericLight("light1", new BABYLON.Vector3(1, 0.5, 0), scene);
            light.intensity = 0.7;

            var pl = new BABYLON.PointLight("pl", new BABYLON.Vector3(0, 0, 0), scene);
            pl.diffuse = new BABYLON.Color3(1, 1, 1);
            pl.specular = new BABYLON.Color3(1, 0, 0);
            pl.intensity = 0.95;

            var mat = new BABYLON.StandardMaterial("mat1", scene);
            mat.alpha = 1.0;
            mat.diffuseColor = new BABYLON.Color3(0.5, 0.5, 1.0);
            mat.backFaceCulling = false;
            //mat.wireframe = true;

            // path function
            var pathFunction = function(k) {
               var path = [];
               for (var i = 60; i > 0; i--) {
                  var x =  i - 30;
                  var y = 0;
                  var z = k;
                  path.push(new BABYLON.Vector3(x, y, z));
               }
               return path;
            };

            // ribbon creation
            var sideO = BABYLON.Mesh.BACKSIDE;
            var pathArray = [];
            for (var i = -20; i < 20; i++) {
               pathArray.push(pathFunction(i * 2));
            }

            console.log(pathArray);
            var mesh = BABYLON.Mesh.CreateRibbon("ribbon", pathArray, false, false, 0, scene, true, sideO);
            mesh.material = mat;

            var updatePath = function(path) {
               for (var i = 0; i < path.length; i++) {
                  var x = path[i].x;
                  var z = path[i].z;
                  var y = -20 * Math.sin(i/ 10);
                  path[i].x = x;
                  path[i].y = y;
                  path[i].z = z;
               }
            };

            // animation
            scene.registerBeforeRender(function() {
               for(var p = 0; p < pathArray.length; p++) {
                  updatePath(pathArray[p]);
               }
               mesh = BABYLON.Mesh.CreateRibbon(null, pathArray, null, null, null, null, null, null, mesh);
               pl.position = camera.position;
            });
            return scene;
         };
         var scene = createScene();
         engine.runRenderLoop(function() {
            scene.render();
         });
      </script>
   </body>
</html>
输出
上述代码行生成以下输出 −

说明
对于 Ribbon,首先使用以下命令创建路径 −
var mesh = BABYLON.Mesh.CreateRibbon("ribbon", pathArray, false, false, 0, scene, true, sideO);
方向从默认侧更改为 var sideO = BABYLON.Mesh.BACKSIDE;。
网格保持可更新。使用以下命令更改 pathArray 并将其再次更新为功能区网格 −
mesh = BABYLON.Mesh.CreateRibbon(null, pathArray, null, null, null, null, null, null, null, mesh);
传递给功能区的所有值均为空,只有更新的 pathArray 被更改并发送。
 babylonjs_mesh.html

