BabylonJS - 位置
演示
<!doctype html>
<html>
   <head>
      <meta charset = "utf-8">
      <title>BabylonJs - Basic Element-Creating Scene</title>
      <script src = "babylon.js"></script>
      <style>
         canvas {width: 100%; height: 100%;}
      </style>
   </head>

   <body>
      <canvas id = "renderCanvas"></canvas>
      <script type = "text/javascript">
         var canvas = document.getElementById("renderCanvas");

         var engine = new BABYLON.Engine(canvas, true);
         var createScene  = function() {
            var scene = new BABYLON.Scene(engine);
            scene.clearColor = new BABYLON.Color3(0, 1, 0);

            var camera = new BABYLON.ArcRotateCamera("Camera", 1, 0.8, 10, new BABYLON.Vector3(0, 0, 0), scene);
            scene.activeCamera.attachControl(canvas);

            var light = new BABYLON.PointLight("Omni", new BABYLON.Vector3(0, 100, 100), scene);

            var boxa = BABYLON.Mesh.CreateBox("BoxA", 1.0, scene);
            boxa.position = new BABYLON.Vector3(0,0.5,0);

            var boxb = BABYLON.Mesh.CreateBox("BoxB", 1.0, scene);
            boxb.position = new BABYLON.Vector3(3,0.5,0);

            var boxc = BABYLON.Mesh.CreateBox("BoxC", 1.0, scene);
            boxc.position = new BABYLON.Vector3(-3,0.5,0);

            var boxd = BABYLON.Mesh.CreateBox("BoxD", 1.0, scene);
            boxd.position = new BABYLON.Vector3(0,0.5,3);

            var boxe = BABYLON.Mesh.CreateBox("BoxE", 1.0, scene);
            boxe.position = new BABYLON.Vector3(0,0.5,-3);

            var ground = BABYLON.Mesh.CreateGround("ground1", 10, 6, 2, scene);
            ground.position = new BABYLON.Vector3(0,0,0);
            return scene;
         };
         var scene = createScene();
         engine.runRenderLoop(function() {
            scene.render();
         });
      </script>
   </body>
</html>
输出

演示
在上面的例子中,我们创建了 5 个大小为 1 的框,即框的边长为 1。我们创建了一个地面,并将地面放在中心。
第一个框,即 boxA,放置在地面上方的中心。我们可以使用 new BABYLON.Vector3(x, y, z) 或 shape.position.x , shape.position.y 或 shape.position.z 来定位形状。在上面的例子中,我们使用了 new BABYLON.Vector3(x, y, z)。
为了将 boxA 放置在地面的中心,我们使用了 x = 0、y = 盒子高度的一半,即 0.5 和 z = 0。
boxa.position = new BABYLON.Vector3(0,0.5,0);
下一个盒子 - boxb 朝向 x 轴放置;x 方向的值为 3。
boxb.position = new BABYLON.Vector3(3,0.5,0);
boxc 放置在与 x 方向相反的位置; x 被赋予 -3 值。
boxc.position = new BABYLON.Vector3(-3,0.5,0);
boxd 沿 z 轴放置,并被赋予值 3,当放置在 z 轴的反方向时则被赋予 -3。
boxd.position = new BABYLON.Vector3(0,0.5,3);
boxe.position = new BABYLON.Vector3(0,0.5,-3);
球体和地面演示
<!doctype html>
<html>
   <head>
      <meta charset = "utf-8">
      <title>BabylonJs - Ball/Ground Demo</title>
      <script src = "babylon.js"></script>
      <style>
         canvas {width: 100%; height: 100%;}
      </style>
   </head>
   <body>
      <canvas id = "renderCanvas"></canvas>
      <script type = "text/javascript">
         var canvas = document.getElementById("renderCanvas");
         var engine = new BABYLON.Engine(canvas, true);
         var createScene  = function() {
            var scene = new BABYLON.Scene(engine);
            scene.clearColor = new BABYLON.Color3( .5, .5, .5);

            var camera = new BABYLON.ArcRotateCamera("camera1",  0, 0, 0, new BABYLON.Vector3(0, 0, 0), scene);
            camera.setPosition(new BABYLON.Vector3(-100, 0, -100));
            camera.attachControl(canvas, true);

            var light = new BABYLON.HemisphericLight("light1", new BABYLON.Vector3(1, 0.5, 0), scene);

            var pl = new BABYLON.PointLight("pl", new BABYLON.Vector3(0, 0, 0), scene);

            var gmat = new BABYLON.StandardMaterial("mat1", scene);
            gmat.alpha = 1.0;
            var texture = new BABYLON.Texture("images/mat.jpg", scene);
            gmat.diffuseTexture = texture;

            var ground = BABYLON.MeshBuilder.CreateGround("ground", {width: 150, height:15}, scene);
            ground.material = gmat;

            var mat = new BABYLON.StandardMaterial("mat1", scene);
            mat.alpha = 1.0;
            mat.diffuseColor = new BABYLON.Color3(1, 0, 0);
            var texture = new BABYLON.Texture("images/rugby.jpg", scene);
            mat.diffuseTexture = texture;

            var sphere = BABYLON.MeshBuilder.CreateSphere("sphere", {diameter: 5, diameterX:5}, scene);
            sphere.position= new BABYLON.Vector3(-75,2.5,0);
            sphere.material = mat;
            console.log(sphere.position.x);
            scene.registerBeforeRender(function () {
               if (sphere.position.x <=75) {
                  console.log(sphere.position.x);
                  if (sphere.position.x <= -75) sphere.position.x=75;
                  sphere.position.x -= 0.25;
               } else if (sphere.position.x <= -15) {
                  console.log('B');
                  sphere.position.x += 1;
               }
            });
            return scene;
         };
         var scene = createScene();
         engine.runRenderLoop(function() {
            scene.render();
         });
      </script>
   </body>
</html>
输出
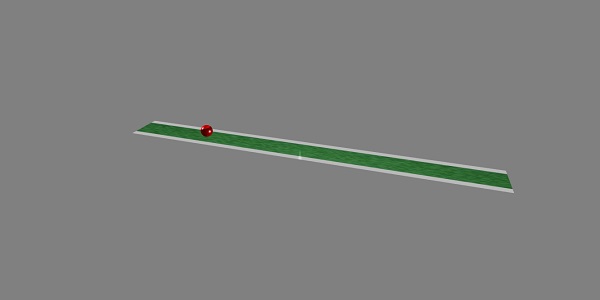
上述代码行将生成以下输出 −

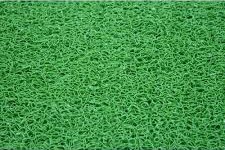
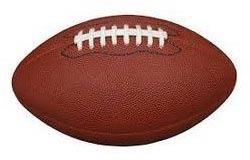
在此演示中,我们使用了两张图片 - mat.jpg 和 rugby.jpg。图片存储在本地 images/ 文件夹中,也粘贴在下面以供参考。您可以下载您选择的任何图片并在演示链接中使用。
用于地面的纹理 − images/mat.jpg

用于球体的纹理 − images/rugby.jpg

 babylonjs_basic_elements.html

