Yii - 依赖注入
DI(依赖注入)容器是一个知道如何实例化和配置对象的对象。Yii 通过 yii\di\Container 类 提供 DI 容器。
它支持以下类型的 DI −
- Setter 和属性注入
- PHP 可调用注入
- 构造函数注入
- 控制器动作注入
DI 容器借助类型提示支持构造函数注入 −
class Object1 {
    public function __construct(Object2 $object2) {

    }
}
$object1 = $container->get('Object1');
// 相当于以下内容:
$object2 = new Object2;
$object1 = new Object1($object2);
通过配置支持属性和 setter 注入 −
<?php
   use yii\base\Object;
   class MyObject extends Object {
      public $var1;
      private $_var2;
      public function getVar2() {
         return $this->_var2;
      }
      public function setVar2(MyObject2 $var2) {
         $this->_var2 = $var2;
      }
   }
   $container->get('MyObject', [], [
      'var1' => $container->get('MyOtherObject'),
      'var2' => $container->get('MyObject2'),
   ]);
?>
在 PHP 可调用注入的情况下,容器将使用已注册的 PHP 回调来构建类的新实例 −
$container->set('Object1', function () {
    $object1 = new Object1(new Object2);
    return $object1;
});
$object1 = $container->get('Object1');
控制器操作注入是一种 DI,其中依赖项使用类型提示声明。它对于保持 MVC 控制器的轻量级和精简非常有用 −
public function actionSendToAdmin(EmailValidator $validator, $email) {
   if ($validator->validate($email)) {
      // sending email
   }
}
You can use the yii\db\Container::set() method to register dependencies −
<?php
    $container = new \yii\di\Container;
    // 按原样注册一个类名。这可以跳过。
    $container->set('yii\db\Connection');
    // 注册一个别名。您可以使用 $container->get('MyObject')
    // 创建 Connection 的实例
    $container->set('MyObject', 'yii\db\Connection');
    // 注册一个接口
    // 当类依赖于接口时,相应的类
    // 将被实例化为依赖对象
    $container->set('yii\mail\MailInterface', 'yii\swiftmailer\Mailer');
    // 使用类配置注册一个别名
    // 在这种情况下,需要一个"class"元素来指定类
    $container->set('db', [
    'class' => 'yii\db\Connection',
    'dsn' => 'mysql:host=127.0.0.1;dbname = helloworld',
    'username' => 'vladimir',
    'password' => '12345',
    'charset' => 'utf8',
    ]);
    // 使用配置注册一个类。该配置
    // 将在通过 get() 实例化类时应用
    $container->set('yii\db\Connection', [
    'dsn' => 'mysql:host=127.0.0.1;dbname = helloworld',
    'username' => 'vladimir',
    'password' => '12345',
    'charset' => 'utf8',
    ]);
    // 注册一个 PHP 可调用函数
    // 每次调用 $container->get('db') 时,都会执行该可调用函数
    $container->set('db', function ($container, $params, $config) {
    return new \yii\db\Connection($config);
    });
    // 注册一个组件实例
    // $container->get('pageCache') 每次被调用时都会返回相同的实例
    //被调用
    $container->set('pageCache', new FileCache);
?>
使用 DI
步骤 1 − 在 components 文件夹中创建一个名为 MyInterface.php 的文件,并写入以下代码。
<?php
   namespace app\components;
   interface MyInterface {
      public function test();
   }
?>
步骤 2 − 在 components 文件夹中,创建两个文件。
First.php −
<?php
   namespace app\components;
   use app\components\MyInterface;
   class First implements MyInterface {
      public function test() {
         echo "First class <br>";
      }
   }
?>
Second.php −
<?php
   app\components;
   use app\components\MyInterface;
      class Second implements MyInterface {
      public function test() {
         echo "Second class <br>";
      }
   }
?>
步骤 3 −现在,向 SiteController 添加一个 actionTestInterface。
public function actionTestInterface() {
   $container = new \yii\di\Container();
   $container->set
      ("\app\components\MyInterface","\app\components\First");
   $obj = $container->get("\app\components\MyInterface");
   $obj->test(); // print "First class"
   $container->set
      ("\app\components\MyInterface","\app\components\Second");
   $obj = $container->get("\app\components\MyInterface");
   $obj->test(); // print "Second class"
}
步骤 4 − 转到 http://localhost:8080/index.php?r=site/test-interface 您应该会看到以下内容。
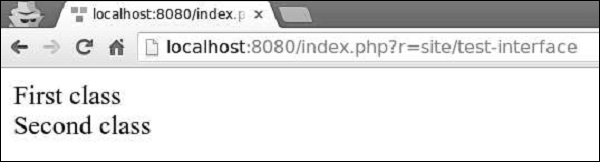
这种方法很方便,因为我们可以在一个地方设置类,其他代码将自动使用新类。


