ASP.NET MVC - Scaffolding 框架
ASP.NET Scaffolding 是 ASP.NET Web 应用程序的代码生成框架。 Visual Studio 2013 包含用于 MVC 和 Web API 项目的预安装代码生成器。 当您想要快速添加与数据模型交互的代码时,可以向项目添加 Scaffolding。 使用 Scaffolding 可以减少在项目中开发标准数据操作的时间。
正如您所看到的,我们已经创建了索引、创建、编辑操作的视图,并且还需要更新操作方法。 但是 ASP.Net MVC 提供了一种更简单的方法来使用 Scaffolding 创建所有这些视图和操作方法。
让我们看一个简单的例子。 我们将创建包含模型类 Employee 的相同示例,但这次我们将使用 Scaffolding。
步骤 1 − 打开 Visual Studio 并单击 File → New → Project 菜单选项。
打开一个新的项目对话框。
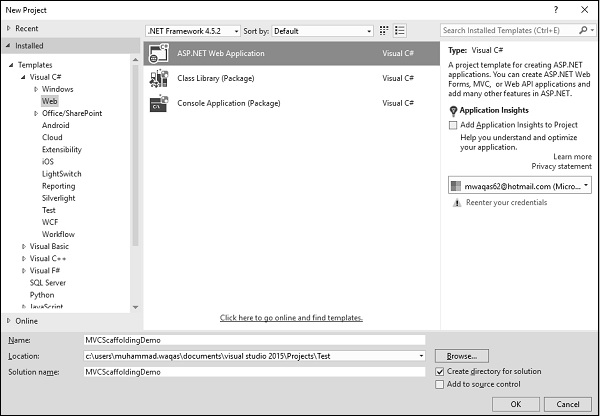
步骤 2 − 从左侧窗格中选择 Templates → Visual C# → Web。
步骤 3 − 在中间窗格中,选择 ASP.NET Web 应用程序。
步骤 4 − 在"名称"字段中输入项目名称"MVC Scaffolding Demo",然后单击"确定"继续。 您将看到以下对话框,要求您设置 ASP.NET 项目的初始内容。

步骤 5 − 为了简单起见,选择"空"选项并选中"添加文件夹和核心引用"部分中的 MVC 复选框,然后单击"确定"。
它将创建一个具有最少预定义内容的基本 MVC 项目。
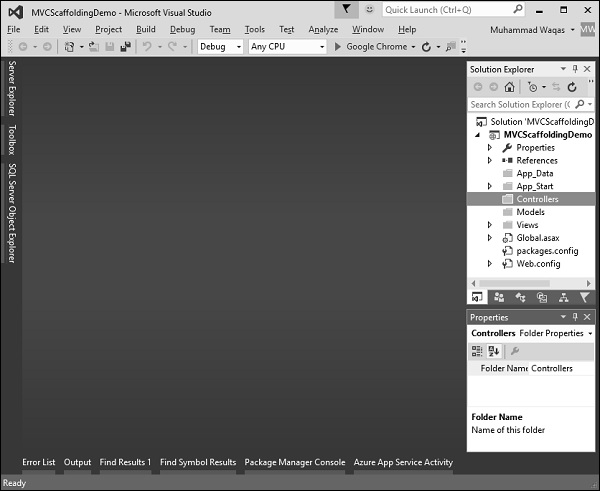
Visual Studio 创建项目后,您将看到解决方案资源管理器窗口中显示许多文件和文件夹。
添加实体框架支持
第一步是安装实体框架。 右键单击该项目并选择 NuGet 包管理器 → 管理解决方案的 NuGet 包...
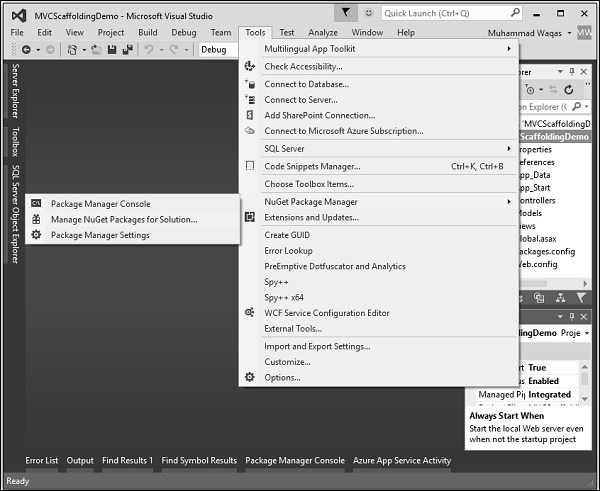
它将打开"NuGet 包管理器"。 在搜索框中搜索实体框架。
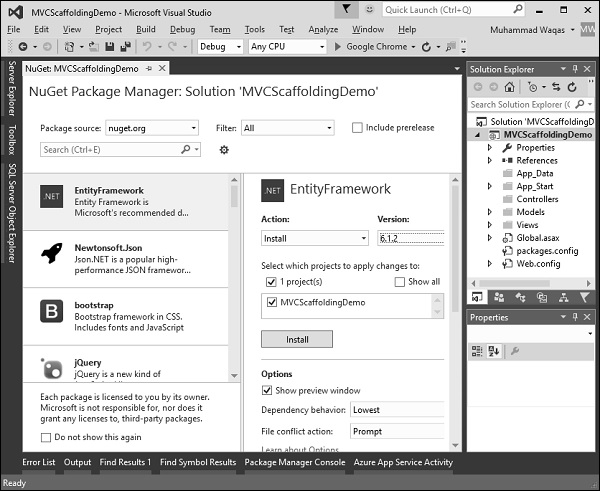
选择实体框架并单击"安装"按钮。 它将打开预览对话框。
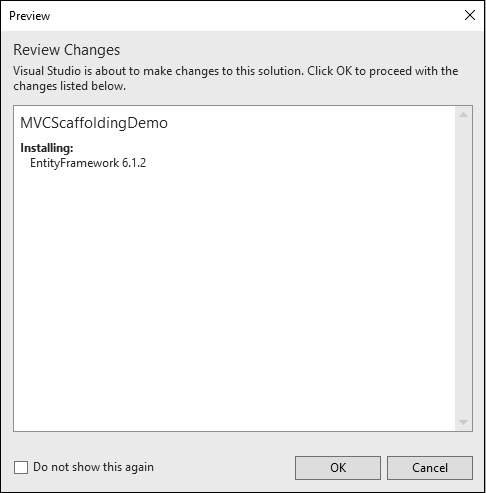
单击"确定"继续。
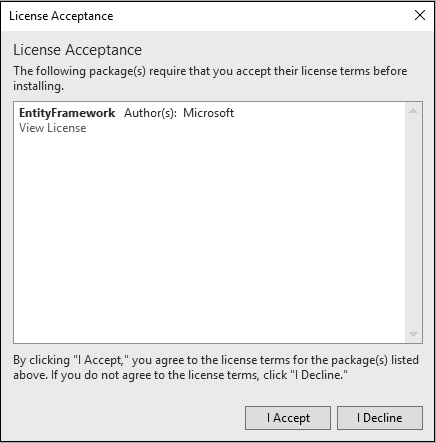
单击"我接受"按钮开始安装。
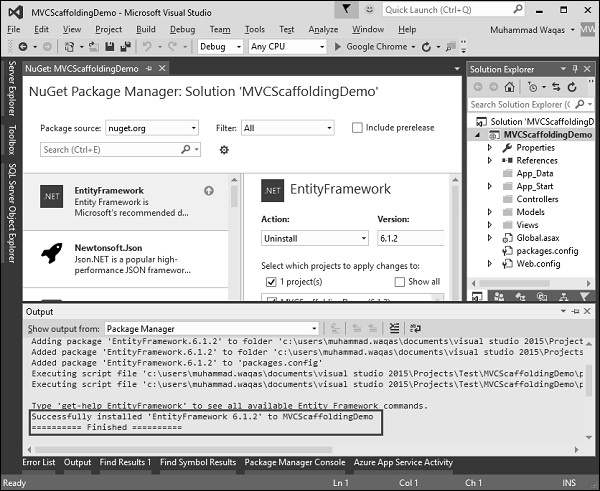
安装实体框架后,您将在窗口中看到消息,如上面的屏幕截图所示。
添加模型
要添加模型,请右键单击解决方案资源管理器中的"模型"文件夹,然后选择 Add → Class。 您将看到"添加新项目"对话框。
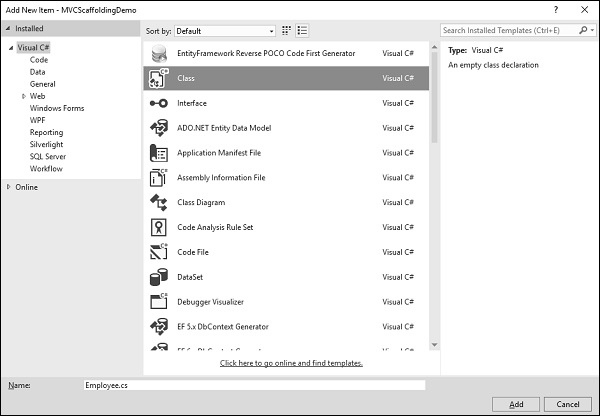
在中间窗格中选择 Class,然后在名称字段中输入 Employee.cs。
使用以下代码向 Employee 类添加一些属性。
using System;

namespace MVC Scaffolding Demo.Models {
   public class Employee{
      public int ID { get; set; }
      public string Name { get; set; }
      public DateTime JoiningDate { get; set; }
      public int Age { get; set; }
   }
}
添加 DBContext
我们有一个员工模型,现在我们需要添加另一个类,它将与实体框架通信以检索和保存数据。 以下是 Employee.cs 文件中的完整代码。
using System;
using System.Data.Entity;

namespace MVC Scaffolding Demo.Models{
   public class Employee{
      public int ID { get; set; }
      public string Name { get; set; }
      public DateTime JoiningDate { get; set; }
      public int Age { get; set; }
   }

   public class EmpDBContext : DbContext{
      public DbSet<Employee> Employees { get; set; }
   }
}
如您所见,"EmpDBContext"派生自名为"DbContext"的 EF 类。 在此类中,我们有一个名为 DbSet 的属性,它基本上代表您要查询和保存的实体。
现在让我们构建一个解决方案,当项目成功构建时您将看到消息。

添加Scaffolded项目
要添加支架,请右键单击解决方案资源管理器中的 Controllers 文件夹,然后选择 Add → New Scaffolded 项。
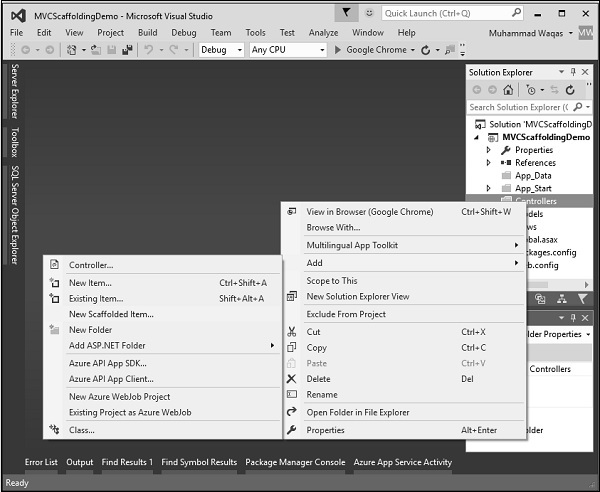
它将显示“添加控制器”对话框。
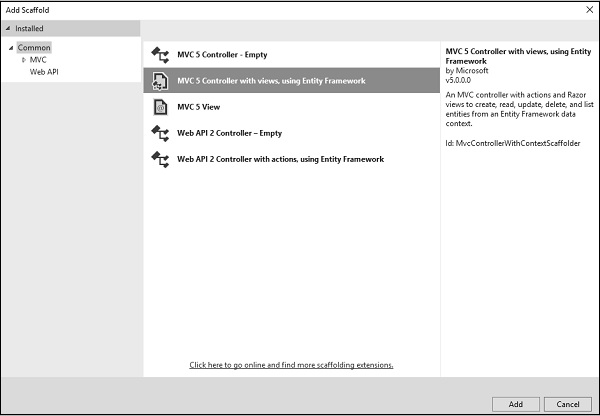
选择带有视图的 MVC 5 控制器,使用中间窗格中的实体框架,然后单击"添加"按钮,这将显示"添加控制器"对话框。
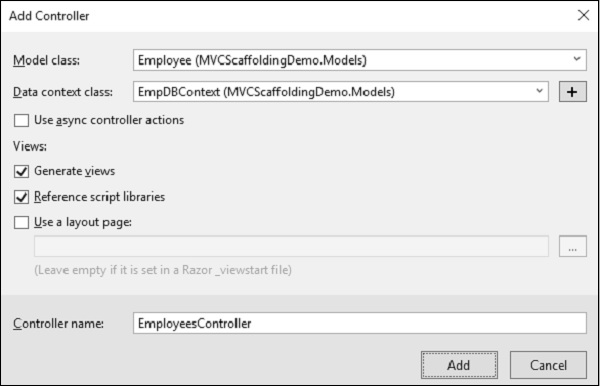
从模型类下拉列表中选择 Employee,从数据上下文类下拉列表中选择 EmpDBContext。 您还将看到默认选择控制器名称。
单击"添加"按钮继续,您将在员工控制器中看到以下代码,该代码是由 Visual Studio 使用Scaffolded创建的。
using System.Data.Entity;
using System.Linq;
using System.Net;
using System.Web.Mvc;
using MVC Scaffolding Demo.Models;

namespace MVC Scaffolding Demo.Controllers {
   public class EmployeesController : Controller{
      private EmpDBContext db = new EmpDBContext();

      // GET: Employees
      public ActionResult Index(){
         return View(db.Employees.ToList());
      }

      // GET: Employees/Details/5
      public ActionResult Details(int? id){
         if (id == null){
            return new HttpStatusCodeResult(HttpStatusCode.BadRequest);
         }

         Employee employee = db.Employees.Find(id);

         if (employee == null){
            return HttpNotFound();
         }
         return View(employee);
      }

      // GET: Employees/Create
      public ActionResult Create(){
         return View();
      }

      // POST: Employees/Create
      // To protect from overposting attacks, please enable the specific
      properties you want to bind to, for
      // more details see http://go.microsoft.com/fwlink/?LinkId=317598.
      [HttpPost]
      [ValidateAntiForgeryToken]

      public ActionResult Create([Bind(Include = "ID,Name,JoiningDate,Age")]
      Employee employee){
         if (ModelState.IsValid){
            db.Employees.Add(employee);
            db.SaveChanges();
            return RedirectToAction("Index");
         }
         return View(employee);
      }

      // GET: Employees/Edit/5
      public ActionResult Edit(int? id){
         if (id == null){
            return new HttpStatusCodeResult(HttpStatusCode.BadRequest);
         }

         Employee employee = db.Employees.Find(id);

         if (employee == null){
            return HttpNotFound();
         }
         return View(employee);
      }

      // POST: Employees/Edit/5
      // To protect from overposting attacks, please enable the specific
      properties you want to bind to, for
      // more details see http://go.microsoft.com/fwlink/?LinkId=317598.
      [HttpPost]
      [ValidateAntiForgeryToken]
      public ActionResult Edit([Bind(Include = "ID,Name,JoiningDate,Age")]Employee employee){
         if (ModelState.IsValid){
            db.Entry(employee).State = EntityState.Modified;
            db.SaveChanges();
            return RedirectToAction("Index");
         }
         return View(employee);
      }

      // GET: Employees/Delete/5
      public ActionResult Delete(int? id){
         if (id == null){
            return new HttpStatusCodeResult(HttpStatusCode.BadRequest);
         }

         Employee employee = db.Employees.Find(id);

         if (employee == null){
            return HttpNotFound();
         }
         return View(employee);
      }

      // POST: Employees/Delete/5
      [HttpPost, ActionName("Delete")]
      [ValidateAntiForgeryToken]

      public ActionResult DeleteConfirmed(int id){
         Employee employee = db.Employees.Find(id);
         db.Employees.Remove(employee);
         db.SaveChanges();
         return RedirectToAction("Index");
      }

      protected override void Dispose(bool disposing){
         if (disposing){
            db.Dispose();
         }

         base.Dispose(disposing);
      }
   }
}
运行您的应用程序并指定以下 URL http://localhost:59359/employees。 您将看到以下输出。
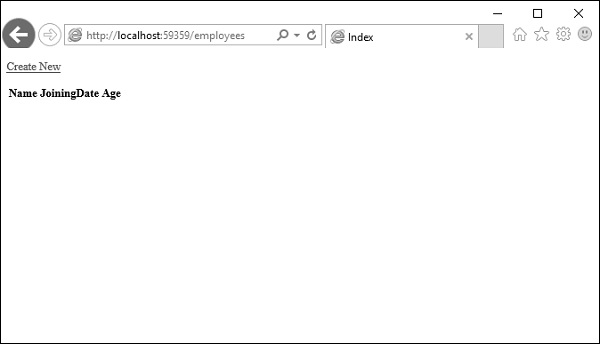
您可以看到视图中没有数据,因为我们还没有向由 Visual Studio 创建的数据库添加任何记录。
让我们通过单击"新建"链接从浏览器添加一条记录,它将显示"创建"视图。
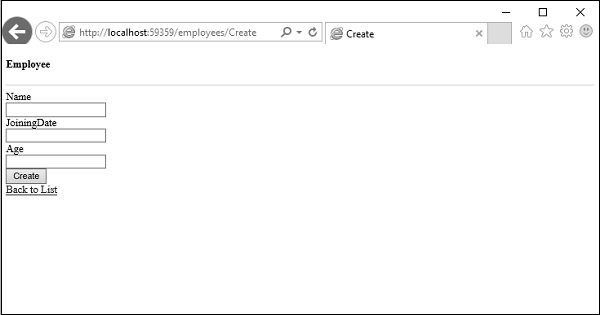
让我们在以下字段中添加一些数据。
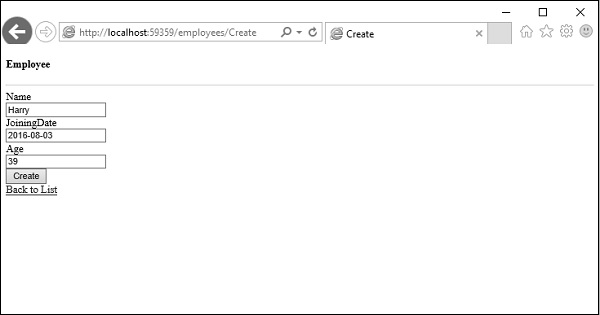
单击"创建"按钮,它将更新索引视图。
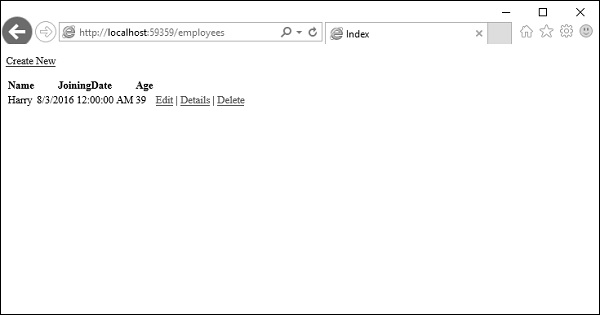
您可以看到新记录也已添加到数据库中。

正如您所看到的,我们使用Scaffolded实现了相同的示例,这是从模型类创建视图和操作方法的更简单的方法。


