GWT - 调试应用程序
GWT 提供了出色的客户端和服务器端代码调试功能。
在开发模式下,GWT 应用程序基于 Java 代码,不会转换为 JavaScript。
当应用程序在开发模式下运行时,Java 虚拟机 (JVM) 实际上是将应用程序代码作为已编译的 Java 字节码执行,并使用 GWT 功能连接到浏览器窗口。
GWT 使用基于浏览器的插件连接到 JVM。
因此,开发人员可以自由使用任何基于 Java 的 IDE 来调试客户端 GWT 代码以及服务器端代码。
在本文中,我们将演示使用 Eclipse 调试 GWT 客户端代码的用法。我们将执行以下任务 −
- 在代码中设置断点并在 BreakPoint Explorer 中查看它们。
- 在调试期间逐行执行代码。
- 查看变量的值。
- 检查所有变量的值。
- 检查表达式的值。
- 显示挂起线程的堆栈框架。
调试示例
此示例将带您完成简单的步骤来演示如何调试 GWT 应用程序。按照以下步骤更新我们在 GWT - 创建应用程序 一章中创建的 GWT 应用程序 −
| 步骤 | 描述 |
|---|---|
| 1 | 在 com.tutorialspoint 包下创建一个名为 HelloWorld 的项目,如 GWT - 创建应用程序 一章中所述。 |
| 2 | 修改 HelloWorld.gwt.xml、HelloWorld.css、HelloWorld.html 和 HelloWorld.java,如下所述。其余文件保持不变。 |
| 3 | 编译并运行应用程序以验证实现逻辑的结果。 |
以下是修改后的模块描述符src/com.tutorialspoint/HelloWorld.gwt.xml的内容。
<?xml version = "1.0" encoding = "UTF-8"?>
<module rename-to = 'helloworld'>
   <!-- Inherit the core Web Toolkit stuff.                        -->
   <inherits name = 'com.google.gwt.user.User'/>

   <!-- Inherit the default GWT style sheet.                       -->
   <inherits name = 'com.google.gwt.user.theme.clean.Clean'/>

   <!-- Specify the app entry point class.                         -->
   <entry-point class = 'com.tutorialspoint.client.HelloWorld'/>

   <!-- Specify the paths for translatable code                    -->
   <source path = 'client'/>
   <source path = 'shared'/>

</module>
以下是修改后的样式表文件war/HelloWorld.css的内容。
body {
   text-align: center;
   font-family: verdana, sans-serif;
}

h1 {
   font-size: 2em;
   font-weight: bold;
   color: #777777;
   margin: 40px 0px 70px;
   text-align: center;
}

.gwt-Label{
   font-size: 150%;
   font-weight: bold;
   color:red;
   padding:5px;
   margin:5px;
}
以下是修改后的 HTML 主机文件 war/HelloWorld.html 的内容,用于容纳两个按钮。
<html>
   <head>
      <title>Hello World</title>
      <link rel = "stylesheet" href = "HelloWorld.css"/>
      <script language = "javascript" src = "helloworld/helloworld.nocache.js">
      </script>
   </head>

   <body>
      <h1>Debugging Application Demonstration</h1>
      <div id = "gwtContainer"></div>
   </body>
</html>
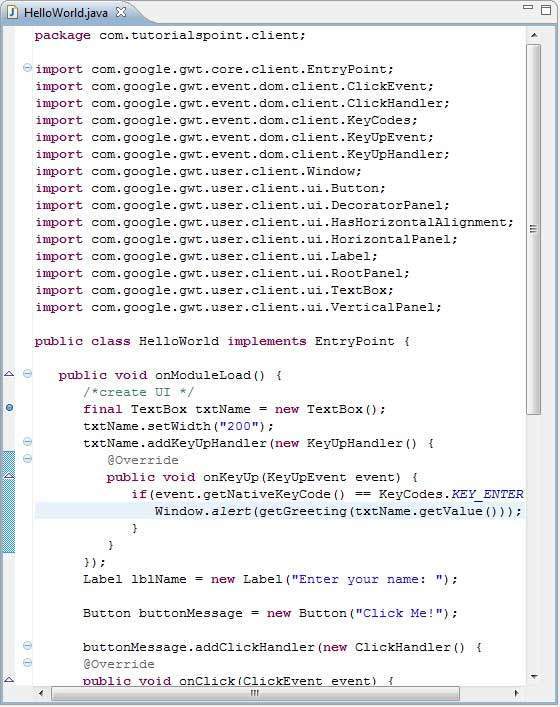
让我们获得 Java 文件 src/com.tutorialspoint/HelloWorld.java 的以下内容,我们将使用它来演示 GWT 代码的调试功能。
package com.tutorialspoint.client;

import com.google.gwt.core.client.EntryPoint;
import com.google.gwt.event.dom.client.ClickEvent;
import com.google.gwt.event.dom.client.ClickHandler;
import com.google.gwt.event.dom.client.KeyCodes;
import com.google.gwt.event.dom.client.KeyUpEvent;
import com.google.gwt.event.dom.client.KeyUpHandler;
import com.google.gwt.user.client.Window;
import com.google.gwt.user.client.ui.Button;
import com.google.gwt.user.client.ui.DecoratorPanel;
import com.google.gwt.user.client.ui.HasHorizontalAlignment;
import com.google.gwt.user.client.ui.HorizontalPanel;
import com.google.gwt.user.client.ui.Label;
import com.google.gwt.user.client.ui.RootPanel;
import com.google.gwt.user.client.ui.TextBox;
import com.google.gwt.user.client.ui.VerticalPanel;

public class HelloWorld implements EntryPoint {

   public void onModuleLoad() {
      /*create UI */
      final TextBox txtName = new TextBox();
      txtName.setWidth("200");
      txtName.addKeyUpHandler(new KeyUpHandler() {
         @Override
         public void onKeyUp(KeyUpEvent event) {
            if(event.getNativeKeyCode() == KeyCodes.KEY_ENTER){
               Window.alert(getGreeting(txtName.getValue()));
            }
         }
      });
      Label lblName = new Label("Enter your name: ");

      Button buttonMessage = new Button("Click Me!");

      buttonMessage.addClickHandler(new ClickHandler() {
      @Override
      public void onClick(ClickEvent event) {
         Window.alert(getGreeting(txtName.getValue()));
      }});

      HorizontalPanel hPanel = new HorizontalPanel();
      hPanel.add(lblName);
      hPanel.add(txtName);
      hPanel.setCellWidth(lblName, "130");

      VerticalPanel vPanel = new VerticalPanel();
      vPanel.setSpacing(10);
      vPanel.add(hPanel);
      vPanel.add(buttonMessage);
      vPanel.setCellHorizontalAlignment(buttonMessage,
      HasHorizontalAlignment.ALIGN_RIGHT);

      DecoratorPanel panel = new DecoratorPanel();
      panel.add(vPanel);

      // 将小部件添加到根面板。
      RootPanel.get("gwtContainer").add(panel);
   }

   public String getGreeting(String name){
      return "Hello "+name+"!";
   }
}
步骤 1 - 放置断点
在 HelloWorld.java 的 onModuleLoad() 的第一行放置一个断点
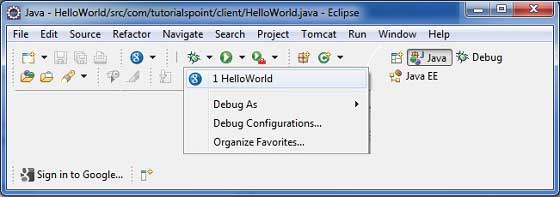
步骤 2 - 调试应用程序
现在单击 ![]() 调试应用程序菜单并选择 HelloWorld 应用程序来调试应用程序。
调试应用程序菜单并选择 HelloWorld 应用程序来调试应用程序。
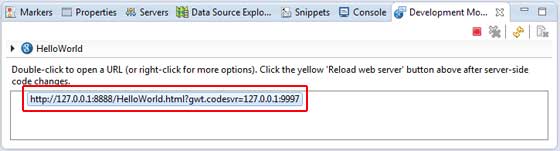
如果一切正常,您一定会看到 Eclipse 中激活了 GWT 开发模式,其中包含如下所示的 URL。双击 URL 以打开 GWT 应用程序。
应用程序启动后,您将看到焦点位于 Eclipse 断点上,因为我们已将断点放在入口点方法的第一行。
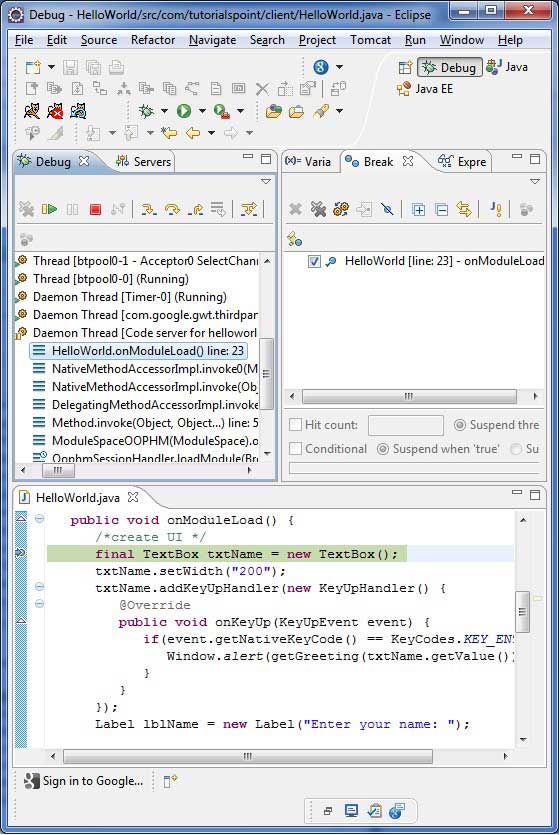
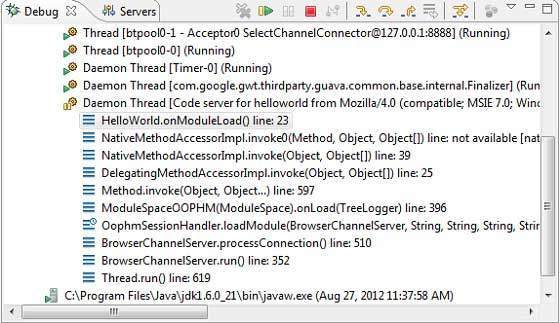
您可以查看挂起线程的堆栈跟踪。
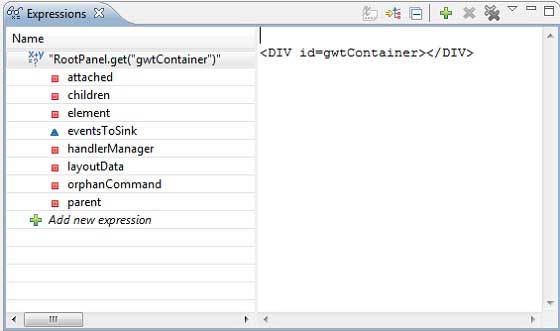
您可以查看表达式的值。
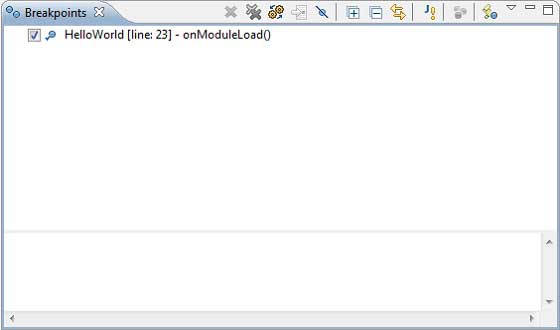
您可以查看所放置断点的列表。
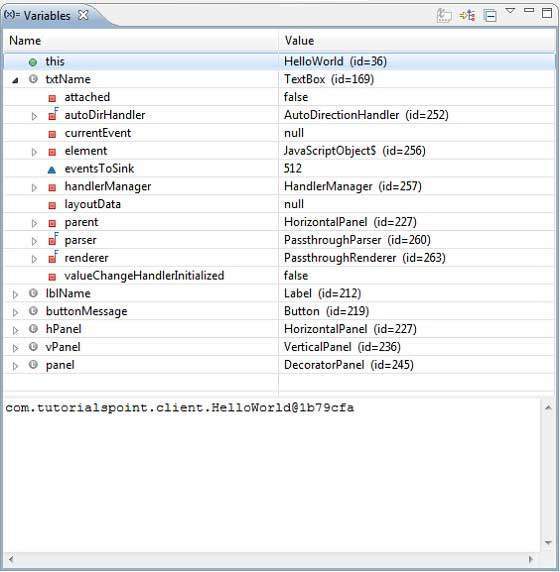
现在继续按 F6,直到到达 onModuleLoad() 方法的最后一行。作为功能键的参考,F6 逐行检查代码,F5 进一步进入内部,F8 将恢复应用程序。现在您可以看到 onModuleLoad() 方法的所有变量的值列表。
可以像调试 Java 应用程序一样调试 GWT 客户端代码。将断点放置在任何行并使用 GWT 的调试功能。


