Spring MVC - 内部资源视图解析器示例
InternalResourceViewResolver 用于将提供的 URI 解析为实际的 URI。 以下示例显示了如何使用 Spring Web MVC 框架使用 InternalResourceViewResolver。 InternalResourceViewResolver 允许使用请求映射网页。
实例
package com.tutorialspoint;

import org.springframework.stereotype.Controller;
import org.springframework.web.bind.annotation.RequestMapping;
import org.springframework.web.bind.annotation.RequestMethod;
import org.springframework.ui.ModelMap;

@Controller
@RequestMapping("/hello")
public class HelloController{

   @RequestMapping(method = RequestMethod.GET)
   public String printHello(ModelMap model) {
      model.addAttribute("message", "Hello Spring MVC Framework!");

      return "hello";
   }
}
实例
<bean class = "org.springframework.web.servlet.view.InternalResourceViewResolver">
   <property name = "prefix" value = "/WEB-INF/jsp/"/>
   <property name = "suffix" value = ".jsp"/>
</bean>
例如,使用上面的配置,如果是URI
/hello 被请求,DispatcherServlet 会将请求转发到前缀 + 视图名 + 后缀 = /WEB-INF/jsp/hello.jsp。
首先,让我们有一个工作的 Eclipse IDE,然后考虑以下步骤来使用 Spring Web 框架开发基于动态表单的 Web 应用程序。
| 步骤 | 说明 |
|---|---|
| 1 | 在包 com.tutorialspoint 下创建一个名称为 TestWeb 的项目,如 Spring MVC - Hello World Example 一章中所述。 |
| 2 | 在 com.tutorialspoint 包下创建一个 Java 类 HelloController。 |
| 3 | 在 jsp 子文件夹下创建一个视图文件 hello.jsp。 |
| 4 | 最后一步是创建源文件和配置文件的内容并导出应用程序,如下所述。 |
HelloController.java
实例
package com.tutorialspoint;

import org.springframework.stereotype.Controller;
import org.springframework.web.bind.annotation.RequestMapping;
import org.springframework.web.bind.annotation.RequestMethod;
import org.springframework.ui.ModelMap;

@Controller
@RequestMapping("/hello")
public class HelloController{

   @RequestMapping(method = RequestMethod.GET)
   public String printHello(ModelMap model) {
      model.addAttribute("message", "Hello Spring MVC Framework!");

      return "hello";
   }

}
TestWeb-servlet.xml
实例
<beans xmlns = "http://www.springframework.org/schema/beans"
   xmlns:context = "http://www.springframework.org/schema/context"
   xmlns:xsi = "http://www.w3.org/2001/XMLSchema-instance"
   xsi:schemaLocation = "
   http://www.springframework.org/schema/beans
   http://www.springframework.org/schema/beans/spring-beans-3.0.xsd
   http://www.springframework.org/schema/context
   http://www.springframework.org/schema/context/spring-context-3.0.xsd">

   <context:component-scan base-package = "com.tutorialspoint" />

   <bean class = "org.springframework.web.servlet.view.InternalResourceViewResolver">
      <property name = "prefix" value = "/WEB-INF/jsp/" />
      <property name = "suffix" value = ".jsp" />
   </bean>

</beans>
hello.jsp
实例
<%@ page contentType = "text/html; charset = UTF-8" %>
<html>
   <head>
      <title>Hello World</title>
   </head>
   <body>
      <h2>${message}</h2>
   </body>
</html>
完成创建源文件和配置文件后,导出您的应用程序。 右键单击您的应用程序,使用 Export → WAR File 选项并将 TestWeb.war 文件保存在 Tomcat 的 webapps 文件夹中。
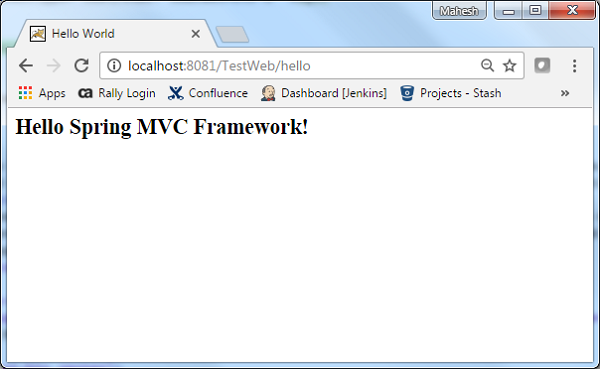
现在,启动您的 Tomcat 服务器并确保您能够使用标准浏览器从 webapps 文件夹访问其他网页。 尝试访问 URL - http://localhost:8080/TestWeb/hello 如果 Spring Web 应用程序一切正常,我们将看到以下屏幕。


