如何在 OpenCV Python 中计算图像的 Hu 矩?
opencvpythonserver side programmingprogramming
可以使用 cv2.HuMoments() 函数找到 Hu 矩。它返回对平移、旋转和缩放不变的七个矩。第七个矩是倾斜不变的。
要计算 Hu 矩,我们首先需要找到图像。使用对象的轮廓计算对象的图像矩。因此,首先,我们检测对象的轮廓,然后应用 cv2.moments() 函数来计算矩。
语法
此函数使用以下语法 −
M = cv2.moments(cnt)
cv2.HuMoments(M)
这里,
cnt − 它是图像中对象轮廓点的 numpy 数组。
M − 上面计算的图像矩。
步骤
您可以使用以下步骤计算 Hu-Moments图像 −
导入所需的库。在以下所有 Python 示例中,所需的 Python 库都是 OpenCV。确保您已经安装了它。
import cv2
使用 cv2.imread() 读取输入图像并将其转换为灰度。
img = cv2.imread('shape.png')
gray = cv2.cvtColor(img, cv2.COLOR_BGR2GRAY)
对灰度图像应用阈值以创建二值图像。
ret,thresh = cv2.threshold(gray,150,255,0)
使用 cv2.findContours() 函数查找图像中的轮廓。
contours, _ = cv2.findContours(thresh, cv2.RETR_TREE,cv2.CHAIN_APPROX_SIMPLE)
使用 cv2.moments(cnt) 函数查找轮廓的矩。
cnt = contours[0]
M = cv2.moments(cnt)
使用 cv2.HuMoments(M) 函数查找特定轮廓的 Hu-Moments。
Hm = cv2.HuMoments(M)
在输入图像上绘制轮廓。
cv2.drawContours(img, [cnt], -1, (0,255,255), 3)
打印 Hu-Moments 并显示带有绘制轮廓的图像。
print("第一个轮廓的 Hu-Moments:\n", Hm)
cv2.imshow(Hu-Moments", img)
cv2.waitKey(0)
cv2.destroyAllWindows()
让我们看一些例子以便更好地理解。
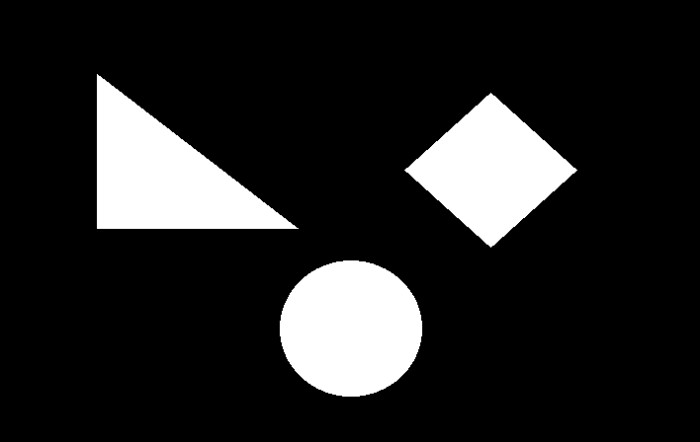
我们将在下面的例子中使用以下图像作为输入文件。
示例 1
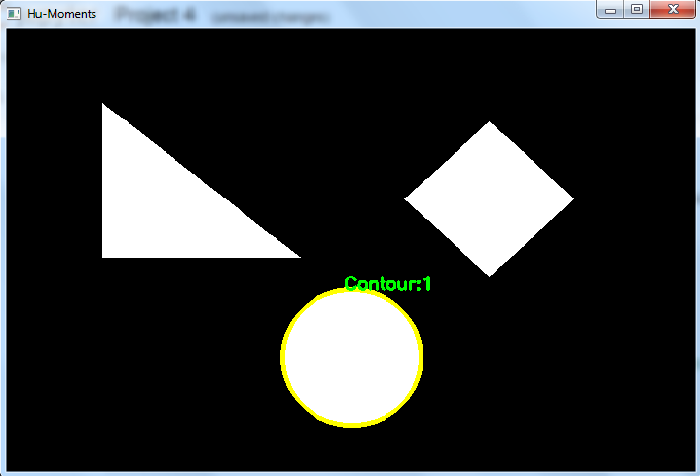
在下面的 Python 程序中,我们检测图像中的轮廓并找到第一个轮廓的 Hu-Moments轮廓。我们还在图像上绘制了第一个轮廓。
# import the required libraries
import cv2

# Read the input image
img = cv2.imread('shape.png')

# Convert the input image to grayscale
gray = cv2.cvtColor(img, cv2.COLOR_BGR2GRAY)

# apply thresholding on gray image
ret,thresh = cv2.threshold(gray,150,255,0)

# Find the contours in the image
contours,hierarchy = cv2.findContours(thresh, cv2.RETR_TREE,cv2.CHAIN_APPROX_SIMPLE)
print("Number of Contours detected:",len(contours))

# Find the moments of first contour
cnt = contours[0]
M = cv2.moments(cnt)
Hm = cv2.HuMoments(M)

# Draw the contour
cv2.drawContours(img, [cnt], -1, (0,255,255), 3)
x1, y1 = cnt[0,0]
cv2.putText(img, 'Contour:1', (x1, y1), cv2.FONT_HERSHEY_SIMPLEX, 0.6, (0, 255, 0), 2)

# print the moments of the first contour
print("Hu-Moments of first contour:\n", Hm)
cv2.imshow("Hu-Moments", img)
cv2.waitKey(0)
cv2.destroyAllWindows()
输出
当您执行上述代码时,它将产生以下输出 -
Number of Contours detected: 3
Hu-Moments of first contour:
   [[ 1.59307685e-01]
   [ 4.69721864e-05]
   [ 1.89651880e-10]
   [ 8.95011994e-14]
   [ 2.03401550e-25]
   [ 4.24017740e-16]
   [-3.07567885e-25]]
我们得到以下输出窗口,显示图像中检测到的第一个轮廓 -
示例 2
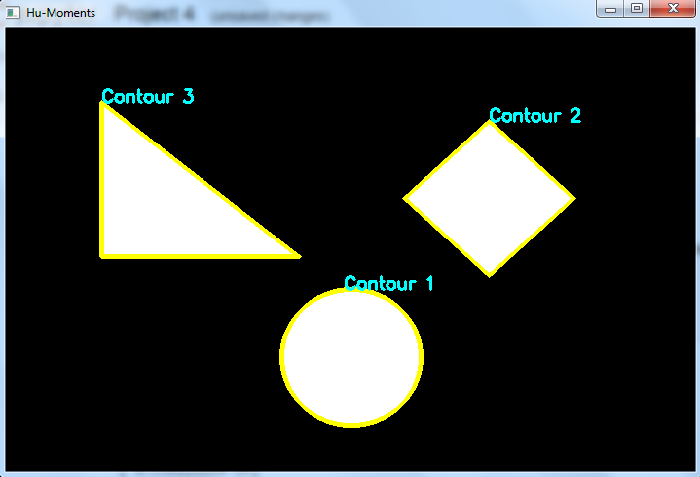
在下面的 Python 程序中,我们检测图像中的轮廓并找到所有轮廓的 Hu-Moments。我们还在图像上绘制了所有轮廓。
import cv2
import numpy as np

img = cv2.imread('shape.png')
gray = cv2.cvtColor(img, cv2.COLOR_BGR2GRAY)
ret,thresh = cv2.threshold(gray,170,255,0)
contours,hierarchy = cv2.findContours(thresh, cv2.RETR_TREE,cv2.CHAIN_APPROX_SIMPLE)
print("Number of contours detected:",len(contours))

# compute HuMoments for all the contours detected in the image
for i, cnt in enumerate(contours):
   x,y = cnt[0,0]
   moments = cv2.moments(cnt)
   hm = cv2.HuMoments(moments)
   cv2.drawContours(img, [cnt], -1, (0,255,255), 3)
   cv2.putText(img, f'Contour {i+1}', (x, y), cv2.FONT_HERSHEY_SIMPLEX, 0.6, (255, 255, 0), 2)
   print(f"\nHuMoments for Contour {i+1}:\n", hm)

cv2.imshow("Hu-Moments", img)
cv2.waitKey(0)
cv2.destroyAllWindows()
输出
执行上述代码时,将产生以下输出 −
Number of contours detected: 3
HuMoments for Contour 1:
   [[ 1.59307685e-01]
   [ 4.69721864e-05]
   [ 1.89651880e-10]
   [ 8.95011994e-14]
   [ 2.03401550e-25]
   [ 4.24017740e-16]
   [-3.07567885e-25]]
HuMoments for Contour 2:
   [[ 1.67576439e-01]
   [ 3.03541843e-04]
   [ 2.96933966e-10]
   [ 8.49276231e-12]
   [-3.47095391e-22]
   [ 2.67821989e-14]
   [ 2.47818355e-22]]
HuMoments for Contour 3:
   [[2.29748674e-01]
   [1.57527336e-02]
   [5.92081089e-03]
   [4.77994195e-04]
   [4.24175667e-07]
   [1.65030169e-05]
   [6.83150707e-07]]
我们得到以下输出窗口,显示图像中检测到的轮廓 -