如何使用 OpenCV Python 计算图像中物体的范围?
opencvpythonserver side programmingprogramming
物体的范围计算为轮廓面积与其边界矩形面积之比。因此,要计算范围,我们首先必须找到轮廓面积和边界矩形面积。可以使用 cv2.contourArea() 函数找到对象的轮廓区域。
语法
范围可以按如下方式计算 -
area = cv2.contourArea(cnt)
x,y,w,h = cv2.boundingRect(cnt)
rect_area = w*h
extent = float(area)/rect_area
此处,"cnt"是图像中对象轮廓点的 numpy 数组。
步骤
您可以使用以下步骤计算图像中对象的范围 -
导入所需的库。在以下所有 Python 示例中,所需的 Python 库均为 OpenCV。确保您已经安装了它。
import cv2
使用 cv2.imread() 读取输入图像并将其转换为灰度图像。
img = cv2.imread('star1.png')
gray = cv2.cvtColor(img, cv2.COLOR_BGR2GRAY)
对灰度图像应用阈值处理以创建二值图像。调整第二个参数以更好地检测轮廓。
ret,thresh = cv2.threshold(gray,150,255,0)
使用 cv2.findContours() 函数查找图像中的轮廓。
contours, _ = cv2.findContours(thresh, cv2.RETR_TREE, cv2.CHAIN_APPROX_SIMPLE)
选择轮廓"cnt"或循环遍历所有轮廓。计算轮廓面积与边界矩形面积之比的范围。
cnt = contours[0]
area = cv2.contourArea(cnt)
x,y,w,h = cv2.boundingRect(cnt)
rect_area = w*h
extent = float(area)/rect_area
您也可以选择在输入图像上绘制轮廓和边界矩形。还将范围作为文本放在图像上
cv2.drawContours(img, [cnt], -1, (0,255,255), 3)
cv2.rectangle(img,(x,y),(x+w,y+h),(255,0,0),2)
打印计算出的范围并显示带有绘制轮廓和边界矩形的图像。
print("对象的范围:", ext)
cv2.imshow("范围", img)
cv2.waitKey(0)
cv2.destroyAllWindows()
让我们看一些例子以便更好地理解。
示例 1
在此 Python 程序中,我们计算对象的范围图像。我们在图像上绘制对象的轮廓和边界矩形。我们还将范围值作为对象的文本。
# import required libraries
import cv2

# load the input image
img = cv2.imread('star1.png')

# convert the image to grayscale
gray = cv2.cvtColor(img, cv2.COLOR_BGR2GRAY)

# apply thresholding to convert grayscale to binary image
ret,thresh = cv2.threshold(gray,150,255,0)

# find the contours
contours,hierarchy = cv2.findContours(thresh, cv2.RETR_TREE,cv2.CHAIN_APPROX_SIMPLE)
print("Number of objects detected:", len(contours))

# define function to compute the extent
def extent(cnt):
   area = cv2.contourArea(cnt)
   x,y,w,h = cv2.boundingRect(cnt)
   rect_area = w*h
   extent = float(area)/rect_area
   return extent

# select first contour
cnt = contours[0]

# find the extent
ext = extent(cnt)

# round it to three decimal points
ext = round(ext, 3)

# draw contours
cv2.drawContours(img,[cnt],0,(0,255,0),2)

# draw bounding rectangle
x,y,w,h = cv2.boundingRect(cnt)
cv2.rectangle(img,(x,y),(x+w,y+h),(255,0,0),2)

# put text on the image
cv2.putText(img, f'Extent={ext}', (x, y), cv2.FONT_HERSHEY_SIMPLEX, 0.6, (0, 0, 255), 2)
print("Extent of the object:", ext)
cv2.imshow("Extent", img)
cv2.waitKey(0)
cv2.destroyAllWindows()
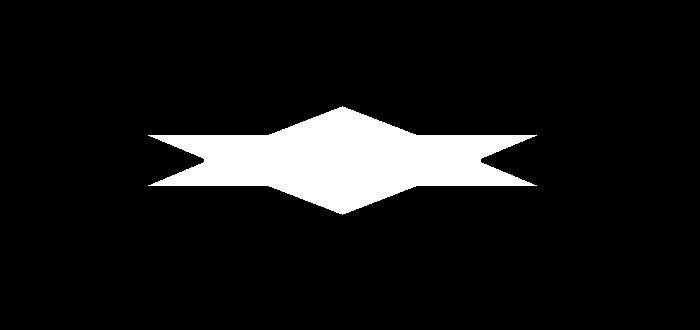
我们将使用以下图像作为此程序中的输入文件 -
输出
当我们执行上述代码时,它将产生以下输出 -
Number of objects detected: 1
Extent of the object:0.487
我们得到以下输出 窗口 -
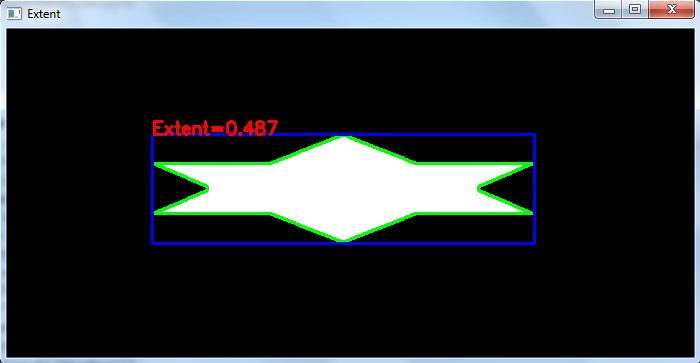
轮廓用绿色绘制,边界矩形用蓝色绘制颜色。检测到的物体的范围用红色表示。
示例 2
在此 Python 程序中,我们计算图像中多个物体的范围。我们在图像上绘制轮廓和边界矩形。我们还将所有物体的范围作为文本。
# import required libraries
import cv2

# load the input image
img = cv2.imread('shapes2.png')

# convert the image to grayscale
gray = cv2.cvtColor(img, cv2.COLOR_BGR2GRAY)

# apply thresholding to convert grayscale to binary image
ret,thresh = cv2.threshold(gray,40,255,0)

# find the contours
contours,hierarchy = cv2.findContours(thresh, cv2.RETR_TREE,cv2.CHAIN_APPROX_SIMPLE)
print("Number of objects detected:", len(contours))

# define function to compute the extent
def extent(cnt):
   area = cv2.contourArea(cnt)
   x,y,w,h = cv2.boundingRect(cnt)
   rect_area = w*h
   extent = float(area)/rect_area
   return extent

# loop over all the contours
for i, cnt in enumerate(contours):
   ext = extent(cnt)
   ext = round(ext, 2)
   x,y,w,h = cv2.boundingRect(cnt)
   img = cv2.drawContours(img,[cnt],0,(0,255,0),2)
   img = cv2.rectangle(img,(x,y),(x+w,y+h),(0,255,255),2)
   cv2.putText(img, f'Extent={ext}', (x, y), cv2.FONT_HERSHEY_SIMPLEX, 0.6, (0, 0, 255), 2)
   print(f"Extent of object {i+1}:", ext)

cv2.imshow("Extents", img)
cv2.waitKey(0)
cv2.destroyAllWindows()
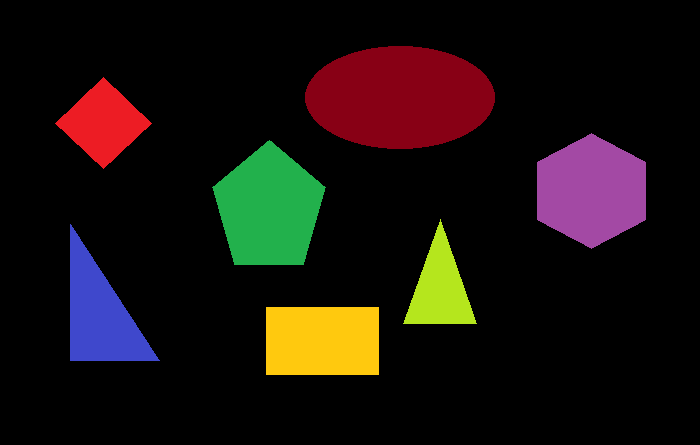
我们将使用以下图像作为此程序中的 输入文件 −
输出
当我们执行上述代码时,它将产生以下输出 −
Number of objects detected: 7
Extent of object 1: 0.98
Extent of object 2: 0.49
Extent of object 3: 0.48
Extent of object 4: 0.67
Extent of object 5: 0.73
Extent of object 6: 0.49
Extent of object 7: 0.77
我们得到以下输出 window −
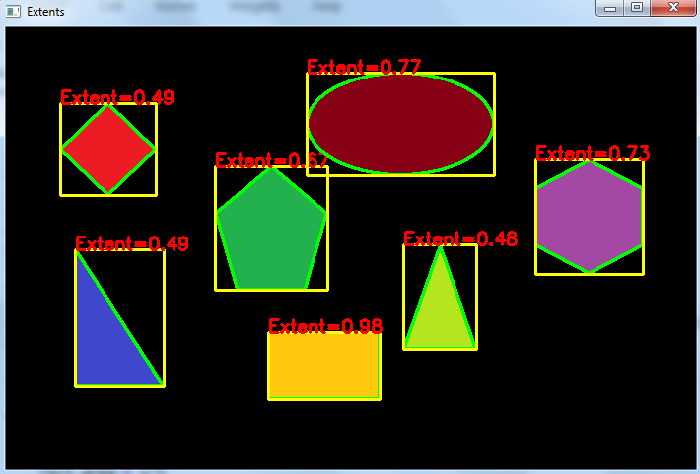
轮廓用绿色绘制,边界矩形用黄色绘制。检测到的物体的范围用红色表示。


