Zend Framework - 表单和验证
Zend Framework 提供了一个单独的组件 zend-form,以加速表单创建和验证过程。它连接模型和视图层。它提供了一组表单元素,用于从预定义模型创建完整的 html 表单,一个 InputFilter 类,用于根据表单验证模型,以及将表单中的数据绑定到模型和反之亦然的选项。
安装表单组件
可以使用 Composer 命令安装 Zend 表单组件,如下所示 −
composer require zendframework/zend-form
Zend 表单框架有三个子组件来管理表单。它们如下详细解释 −
元素 − 用于定义映射到模型中属性的单个 html 输入控件。
字段集 − 用于以嵌套方式对元素和其他 字段集 进行分组。
表单 − 用于创建 html 表单,由元素和字段集组成。
Zend 表单通常在 module//src/Form 目录下创建。
示例
现在让我们创建一个简单的表单,将 book 添加到数据库中。为此,我们应遵循以下步骤 −
步骤 1:创建 BookForm
在 *myapp/module/Tutorial/src/Form" 目录下创建"BookForm.php"。在文件中添加以下更改 −
<?php
namespace Tutorial\Form;
use Zend\Form\Form;

class BookForm extends Form {

   public function __construct($name = null) {
      parent::__construct('book');
      $this->add(array(
         'name' => 'id',
         'type' => 'Hidden',
      ));
      $this->add(array(
         'name' => 'author',
         'type' => 'Text',
         'options' => array(
            'label' => 'Author',
         ),
      ));
      $this->add(array(
         'name' => 'title',
         'type' => 'Text',
         'options' => array(
            'label' => 'Title',
         ),
      ));
      $this->add(array(
         'name' => 'submit',
         'type' => 'Submit',
         'attributes' => array(
            'value' => 'Go',
            'id' => 'submitbutton',
         ),
      ));
   }
}
Form 类提供 add 方法 来映射模型及其相应的表单详细信息。我们通过扩展 Form 类创建了 BookForm,并为 Book 模型添加了表单详细信息。
步骤 2:更新书籍模型 Book.php
使用下面指定的过滤器和验证更新模型 'Book' −
<?php
namespace Tutorial\Model;
use Zend\InputFilter\InputFilterInterface;
use Zend\InputFilter\InputFilterAwareInterface;
use Zend\InputFilter\InputFilter;

class Book implements InputFilterAwareInterface {
   public $id;
   public $author;
   public $title;
   protected $inputFilter;
   public function setInputFilter(InputFilterInterface $inputFilter) {
      throw new \Exception("Not used");
   }
   public function getInputFilter() {
      if (!$this->inputFilter) {
         $inputFilter = new InputFilter();
         $inputFilter->add(array(
            'name' => 'id',
            'required' => true,
            'filters' => array(
               array('name' => 'Int'),
            ),
         ));
         $inputFilter->add(array(
            'name' => 'author',
            'required' => true,
            'filters' => array(
               array('name' => 'StripTags'),
               array('name' => 'StringTrim'),
            ),
            'validators' => array(
               array(
                  'name' => 'StringLength',
                  'options' => array(
                     'encoding' => 'UTF-8',
                     'min' => 1,
                     'max' => 100,
                  ),
               ),
            ),
         ));
         $inputFilter->add(array(
            'name' => 'title',
            'required' => true,
            'filters' => array(
               array('name' => 'StripTags'),
               array('name' => 'StringTrim'),
            ),
            'validators' => array(
               array(
                  'name' => 'StringLength',
                  'options' => array(
                     'encoding' => 'UTF-8',
                     'min' => 1,
                     'max' => 100,
                  ),
               ),
            ),
         ));
         $this->inputFilter = $inputFilter;
      }
      return $this->inputFilter;
   }
   public function exchangeArray($data) {
      $this->id = (!empty($data['id'])) ? $data['id'] : null;
      $this->author = (!empty($data['author'])) ? $data['author'] : null;
      $this->title = (!empty($data['title'])) ? $data['title'] : null;
   }
}
每个模型都应该实现InputFilterAwareInterface。InputFilterAwareInterface 提供了两个方法,setInputFilter() 和 getInputFilter()。
getInputFilter 用于获取模型的验证详细信息。Zend 框架提供了一组丰富的过滤器和验证器来验证表单。书籍模型中使用的一些过滤器和验证器如下 −
StripTags − 删除不需要的 HTML。
StringTrim − 删除不必要的空格。
StringLength 验证器 −确保用户输入的字符数不超过指定限制。
步骤 3:更新 BookTable 类
包含 saveBook 方法以将书籍添加到数据库。
BookTable.php
<?php
namespace Tutorial\Model;
use Zend\Db\TableGateway\TableGatewayInterface;

class BookTable {
   protected $tableGateway;
   public function __construct(TableGatewayInterface $tableGateway) {
      $this->tableGateway = $tableGateway;
   }
   public function fetchAll() {
      $resultSet = $this->tableGateway->select();
      return $resultSet;
   }
   public function getBook($id) {
      $id  = (int) $id;
      $rowset = $this->tableGateway->select(array('id' => $id));
      $row = $rowset->current();
      if (!$row) {
         throw new \Exception("Could not find row $id");
      }
      return $row;
   }
   public function saveBook(Book $book) {
      $data = array (
         'author' => $book->author,
         'title'  => $book->title,
      );
      $id = (int) $book->id;
      if ($id == 0) {
         $this->tableGateway->insert($data);
      } else {
         if ($this->getBook($id)) {
            $this->tableGateway->update($data, array('id' => $id));
         } else {
            throw new \Exception('Book id does not exist');
         }
      }
   }
}
步骤 4:更新 TutorialController 类
在教程控制器中添加新操作 addAction – myapp/module/Tutorial/src/Controller/TutorialController.php。
public function addAction() {
   $form = new BookForm();
   $form->get('submit')->setValue('Add');
   $request = $this->getRequest();
   if ($request->isPost()) {
      $book = new Book();
      $form->setInputFilter($book->getInputFilter());
      $form->setData($request->getPost());
      if ($form->isValid()) {
         $book->exchangeArray($form->getData());
         $this->bookTable->saveBook($book);

         // 重定向至教程列表
         return $this->redirect()->toRoute('tutorial');
      }
   }
   return array('form' => $form);
}
addAction 方法执行以下过程 −
获取请求对象。
检查请求的 http 方法是否为 post 方法。
如果请求的 http 方法不是 post,则仅呈现模板 add.phtml
如果请求的 http 方法不是 post,则设置 inputfilter,获取请求数据并将其设置到输入文件中。
使用 Form 类的 isValid() 方法检查表单是否有效。
如果表单无效,则再次呈现模板, add.phtml
如果表单有效,它会将书籍保存到数据库并重定向到主页。
步骤 5:添加 add.phtml 模板
在 myapp/module/Tutorial/view/tutorial/tutorial/add.phtml 下创建一个模板 – add.phtml
Add.phtml
<?php
$title = 'Add new Book';
$this->headTitle($title);
?>
<h1><?php echo $this->escapeHtml($title); ?></h1>
<?php
if(!empty($form)) {
   $form->setAttribute('action', $this->url('tutorial', array('action' => 'add')));
   $form->prepare();
   echo $this->form()->openTag($form);
   echo $this->formHidden($form->get('id'));
   echo $this->formRow($form->get('author'))."<br>";
   echo $this->formRow($form->get('title'))."<br>";
   echo $this->formSubmit($form->get('submit'));
   echo $this->form()->closeTag();
}
在这里,我们使用 Form 实例 $form 呈现书籍表单。
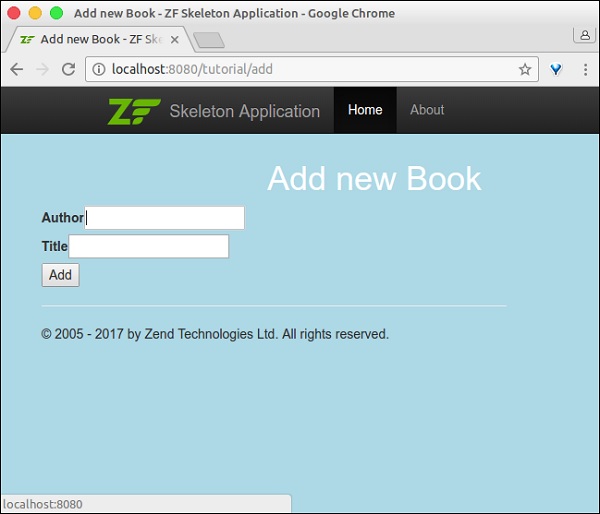
步骤 6:运行应用程序
现在,我们可以运行应用程序 - http://localhost:8080/tutorial/add。
表单页面
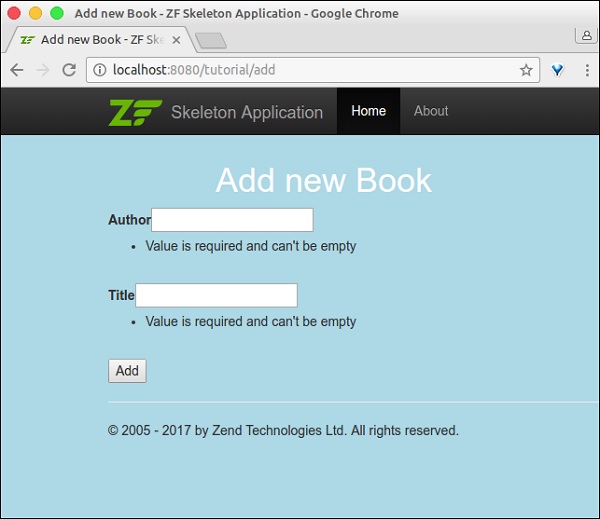
验证错误页面