Turbogears - 快速指南
TurboGears - 概述
什么是 Web 框架?
Web 应用程序框架或简称 Web 框架代表库和模块的集合,它使 Web 应用程序开发人员能够编写应用程序,而不必担心协议、线程管理等低级细节。
什么是 TurboGears?
TurboGears 是一个用 Python 编写的 Web 应用程序框架。 TurboGears 最初由 Kevin Dangoor 于 2005 年创建,其最新版本 TurboGears(版本 2.3.7)由 Mark Ramm 和 Florent Aide 领导的一组开发人员管理。
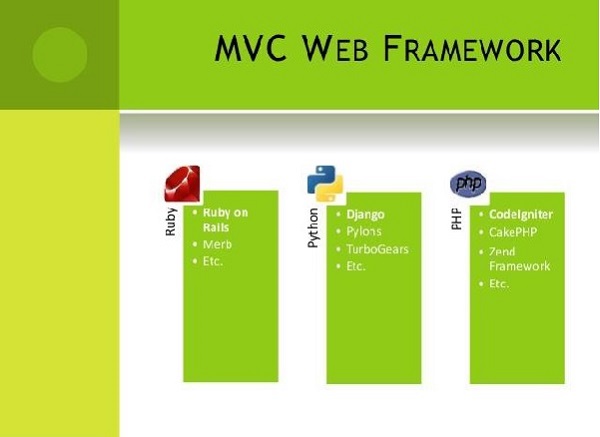
TurboGears 遵循模型-视图-控制器范式,大多数现代 Web 框架(如 Rails、Django、Struts 等)也是如此。
模型视图控制器
MVC 是一种用于开发 Web 应用程序的软件设计模式。模型视图控制器模式由三部分组成 −
模型 − 模式的最低级别负责维护数据。
视图 − 这负责向用户显示全部或部分数据。
控制器 −控制模型和视图之间交互的软件代码。
MVC 很受欢迎,因为它将应用程序逻辑与用户界面层隔离开来,并支持关注点分离。在这里,控制器接收应用程序的所有请求,然后与模型一起准备视图所需的任何数据。然后,视图使用控制器准备的数据生成最终可呈现的响应。MVC 抽象可以用图形表示如下 −

模型
模型负责管理应用程序的数据。它响应来自视图的请求,也响应来自控制器的指令来更新自身。
视图
以特定格式呈现数据,由控制器决定呈现数据而触发。它们是基于脚本的模板系统,非常容易与 AJAX 技术集成。
控制器
控制器负责响应用户输入并对数据模型对象执行交互。控制器接收输入,验证输入,然后执行修改数据模型状态的业务操作。
TurboGears 建立在许多库和工具之上。这些工具在 TurboGears 的不同版本之间有所变化。当前版本(版本 2.3.7)的组件如下所列。
SQLAlchemy
它是一个开源 SQL 工具包,为 Python 代码提供对象关系映射 (ORM)。
Genshi
此模板引擎用于构建 TG 应用程序的前端。Web 模板系统将模板与特定数据源相结合以呈现动态网页。
ToscaWidgets
它是一个小部件库,用于生成带有服务器端控件的 HTML 表单。Tosca 还充当与 JavaScript 小部件和工具包连接的中间件。
Gearbox
它提供了一组命令来管理项目和服务器 TurboGears 应用程序。 TurboGears 应用程序可以部署在任何符合 WSGI 标准的 Web 服务器上。
Web 服务器网关接口 (WSGI) 已被采纳为 Python Web 应用程序开发的标准。WSGI 是 Web 服务器和 Web 应用程序之间通用接口的规范。wsgiref 包是 WSGI 的参考实现。它用于向 Web TurboGears Web 框架添加 WSGI 支持。此包中的 simple_server 模块实现了一个简单的 HTTP 服务器,为 WSGI 应用程序提供服务。我们将使用它来测试在本教程中开发的应用程序。
TurboGears - 环境
先决条件
Python 2.6 或更高版本。TurboGears 的早期版本与 Python 3.X 不兼容。最新版本声称可以在 Python 3.X 上运行良好。但是,TurboGears 的官方文档仍然基于 Python 2.7 环境。
以下命令安装 virtualenv −
pip install virtualenv
此命令需要管理员权限。在 Linux/Mac OS 上,请在 pip 前添加 sudo。如果您使用的是 Windows,请以管理员身份登录。在 Ubuntu 上,可以使用其包管理器安装 virtualenv。
Sudo apt-get install virtualenv
安装后,新的虚拟环境将在一个文件夹中创建。
mkdir newproj
cd newproj
virtualenv venv
要在 Linux/OS X 上激活相应的环境,请执行以下操作:
venv/bin/activate
在 Windows 上
venv\scripts\activate
现在我们准备在此环境中 安装 TurboGears。通过以下命令完成 TurboGears 的最小安装 −
pip install TurboGears2
上述命令无需虚拟环境即可直接运行,用于全系统安装。
要安装 TurboGears 以及开发工具,请使用以下命令 −
pip install tg.devtools
TurboGears - 第一个程序
TurboGears 具有最小模式,可以快速创建单文件应用程序。可以使用最少的依赖项快速构建简单的示例和服务。
TG 应用程序中的应用程序类继承自 TGController 类。此类中的方法可供 tg 模块中的 @expose 装饰器访问。在我们的第一个应用程序中,index() 方法被映射为我们应用程序的根。TGController 类也需要从 tg 模块导入。
from tg import expose, TGController
class MyController(TGController):
   @expose()
   def index(self):
      return 'Hello World turbogears'
接下来,设置应用程序的配置并声明应用程序对象。此处的 AppConfig 类构造函数采用两个参数 - 设置为 true 的 minimal 属性和控制器类。
config = AppConfig(minimal = True, root_controller = RootController())
application = config.make_wsgi_app()
此处的 make_wsgi_app() 函数构造应用程序对象。
为了服务此应用程序,我们现在需要启动 HTTP 服务器。如前所述,我们将使用 wsgiref 包中的 simple_server 模块来设置和启动它。此模块具有 make_server() 方法,该方法需要端口号和应用程序对象作为参数。
from wsgiref.simple_server import make_server
server = make_server('', 8080, application)
server.serve_forever()
这意味着我们的应用程序将在 localhost 的端口号 8080 上提供服务。
以下是我们的第一个 TurboGears 应用程序的完整代码 −
app.py
from wsgiref.simple_server import make_server
from tg import expose, TGController, AppConfig

class MyController(TGController):

   @expose()
   def index(self):
      return 'Hello World TurboGears'

config = AppConfig(minimal = True, root_controller = MyController())
application = config.make_wsgi_app()

print "Serving on port 8080..."
server = make_server('', 8080, application)
server.serve_forever()
从 Python shell 运行上述脚本。
Python app.py
在浏览器地址栏中输入 http://localhost:8080 即可查看"Hello World TurboGears"消息。
TurboGears 的 tg.devtools 包含 Gearbox。它是一组命令,可用于管理更复杂的 TG 项目。可以通过以下 Gearbox 命令快速创建全栈项目 −
gearbox quickstart HelloWorld
这将创建一个名为 HelloWorld 的项目。
TurboGears - 依赖项
TurboGears 项目包含以下目录 −
Config − 项目设置和配置所依赖的位置
Controllers − 所有项目控制器,Web 应用程序的逻辑
i018n − 所支持语言的翻译文件
Lib − 实用程序 Python 函数和类
Model − 数据库模型
公共静态文件 − CSS、JavaScript 和图像
模板 −我们的控制器公开的模板。
测试 − 已完成的测试集。
Websetup − 在应用程序设置时执行的函数。
如何安装项目
现在需要安装此项目。项目的基本目录中已提供 setup.py。执行此脚本时,将安装项目依赖项。
Python setup.py evolve
默认情况下,在设置项目时会安装以下依赖项 −
- Beaker
- Genshi
- zope.sqlalchemy
- sqlalchemy
- alembic
- repoze.who
- tw2.forms
- tgext.admin ≥ 0.6.1
- WebHelpers2
- babel
安装后,通过在 shell − 中发出以下命令开始在开发服务器上为项目提供服务
Gearbox serve –reload –debug
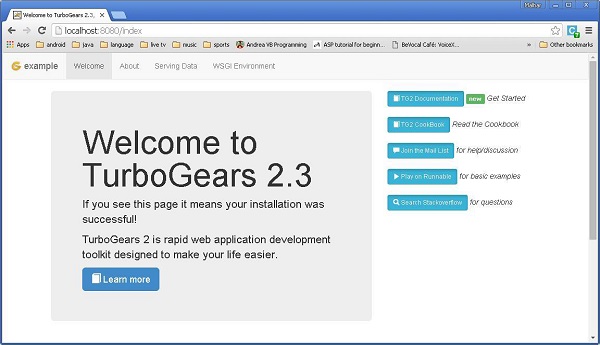
按照上述命令为预构建的示例项目提供服务。在浏览器中打开 http://localhost:8080。这个现成的示例应用程序简要介绍了 TurboGears 框架本身。
在此 Hello 项目中,默认控制器在 controllers 目录中创建为 Hello/hello/controllers.root.py。让我们用以下代码修改 root.py −
from hello.lib.base import BaseController
from tg import expose, flash

class RootController(BaseController):
   movie = MovieController()
   @expose()
   def index(self):
      return "<h1>Hello World</h1>"

   @expose()
   def _default(self, *args, **kw):
      return "This page is not ready"
一旦基本工作应用程序准备就绪,就可以在控制器类中添加更多视图。在上面的 Mycontroller 类中,添加了一个新方法 sayHello()。@expose() 装饰器将 /sayHello URL 附加到它。此函数旨在接受来自 URL 的名称作为参数。
通过"gearbox serve"命令启动服务器后,http://localhost:8080。即使输入以下 URL −,浏览器中也会显示 Hello World 消息
http://localhost:8080/
http://localhost:8080/index
所有这些 URL 都映射到 RootController.index() 方法。此类还具有 _default() 方法,当 URL 未映射到任何特定函数时,该方法将被调用。对 URL 的响应由 @expose() 装饰器映射到函数。
可以从 URL 向公开函数发送参数。以下函数从 URL 读取名称参数。
@expose()
def sayHello(self, name):
    return '<h3>Hello %s</h3>' %name
浏览器中将显示以下输出作为对 URL 的响应 − http://localhost:8080/?name=MVL
Hello MVL
TurboGears 自动将 URL 参数映射到函数参数。我们的 RootController 类继承自 BaseController。它被定义为应用程序lib文件夹中的base.py。
其代码如下 −
from tg import TGController, tmpl_context
from tg import request

__all__ = ['BaseController']

def __call__(self, environ, context):
   tmpl_context.identity = request.identity
   return TGController.__call__(self, environ, context)
TGController.__call__ 将请求分派到路由到的 Controller 方法。
TurboGears - 提供模板
虽然 HTML 内容可以返回到浏览器,但对于更高级的输出,始终首选使用模板引擎。在 gearbox 的"快速启动"的全栈项目中,Genshi 被启用为默认模板渲染器。然而,在最小应用程序中,需要安装和启用 Genshi(或任何其他模板引擎,如 jinja)。Genshi 模板引擎允许以纯 xhtml 编写模板并验证它们以在编译时检测问题并防止提供损坏的页面。
使用点符号引用模板。在我们的 Hello 项目中,提供了一个模板目录来存储模板网页。因此,sample.html 将被称为 hello.templates.sample(未提及扩展名)。 TurboGears 通过公开装饰器呈现此模板,并通过 tg.render_template() 函数将控制器方法链接到该模板。
公开的控制器函数返回一个 Python 字典对象。此字典对象又传递给链接的模板。模板中的占位符填充了字典值。
首先,让我们显示一个带有纯 html 脚本的网页。公开的控制器返回一个 空字典对象,因为我们不打算发送任何要在 HTML 脚本内解析的数据。
如何创建示例 HTML
我们的 sample.html 如下所示。确保它存储在项目的模板目录中。
<html>
<head>
<title>TurboGears Templating Example</title>
</head>
<body>
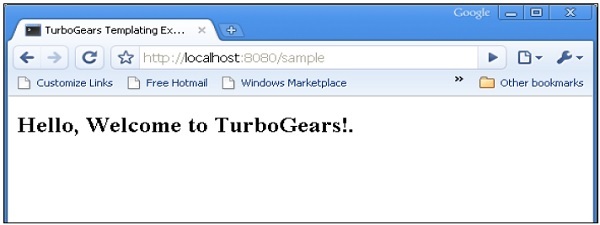
<h2>Hello, Welcome to TurboGears!.</h2>
</body>
</html>
在 root.py 中添加 sample() 函数并通过它公开 sample.html。
@expose("hello.templates.sample")
    def sample(self):
        return {}
启动 Web 服务器后,输入 URL http://localhost:8080/sample 时,浏览器中将显示以下结果。
如上所述,字典对象作为参数集合发送到 Genshi 模板。此模板包含"占位符",这些占位符会动态填充从控制器接收的参数。
让我们更改 sample() 函数以将字典对象发送到示例模板。
@expose("hello.templates.sample")
   def sample(self,name):
      mydata = {'person':name}
      return mydata
在模板文件夹 (templates\sample.html) 中创建 sample.html
<html>
<head>
<title>TurboGears Templating Example</title>
</head>
<body>
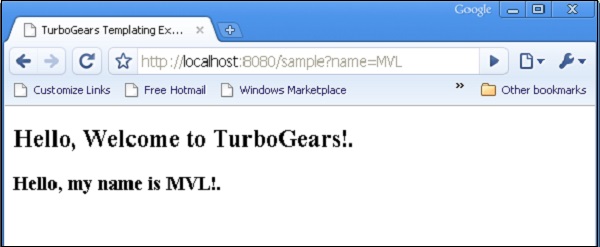
<h2>Hello, my name is ${person}!.</h2>
</body>
</html>
在上述 HTML 代码中,${person} 是占位符。在浏览器中输入 http://localhost:8080/sample?name=MVL 作为 URL。此 URL 映射到根控制器中的 sample() 方法。它返回一个字典对象。此对象由模板目录中的链接模板页面 sample.html 选取。然后,网页中的 ${person} 被 MVL 替换。
也可以在控制器函数中访问 HTML 表单数据。HTML 表单用于发送表单数据。
TurboGears - HTTP 方法
Http 协议是万维网上数据通信的基础。此协议定义了从指定 URL 检索数据的不同方法。下表总结了不同的 http 方法 −
| Sr.No. | HTTP 方法和说明 |
|---|---|
| 1 | GET 以未加密形式将数据发送到服务器。最常用的方法。 |
| 2 | HEAD 与 GET 相同,但没有响应主体 |
| 3 | POST 用于将 HTML 表单数据发送到服务器。 POST 方法接收的数据不会被服务器缓存。 |
| 4 | PUT 用上传的内容替换目标资源的所有当前表示。 |
| 5 | DELETE 删除 URL 给出的目标资源的所有当前表示 |
创建 HTML 表单
让我们创建一个 HTML 表单并将表单数据发送到 URL。将以下脚本保存为 login.html
<html>
   <body>
      <form action = "http://localhost:8080/login" method = "get">
         <p>Enter Name:</p>
         <p><input type = "text" name = "nm" /></p>
         <p><input type = "submit" value = "submit" /></p>
      </form>
   </body>
</html>
此表单中输入的数据将提交至 '/login' URL。现在创建一个控制器函数 loginpage() 并向其公开上述 html 页面。
@expose("hello.templates.login")
   def loginpage(self):
      return {}
为了接收表单数据,提供一个 login() 控制器,该控制器具有表单属性作为其参数。此处 'nm' 是登录表单中文本输入字段的名称,它用作 login() 函数的参数。
@expose("hello.templates.sample")
   def login(self, nm):
      name = nm
      return {'person':name}
如您所见,从登录表单收到的数据被发送到 sample.html 模板(之前使用过)。它由 Genshi 模板引擎 解析以生成以下输出 −

POST 方法
当 HTML 表单使用 POST 方法将数据发送到 action 属性中的 URL 时,表单数据不会在 URL 中公开。控制器函数在 dict 参数中接收编码数据。下面的 **kw 参数是保存数据的字典对象。
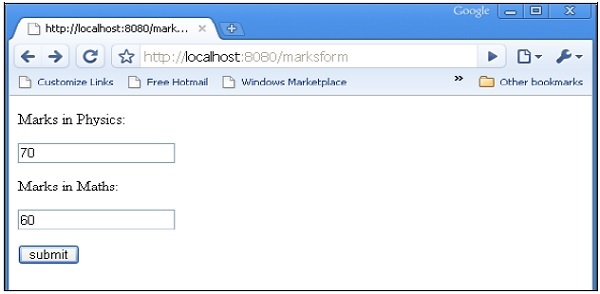
HTML 表单包含两个输入文本字段。
<html>
   <body>

      <form action = "http://localhost:8080/marks" method = "post">
         <p>Marks in Physics:</p>
         <p><input type = "text" name = "phy" /></p>
         <p>Marks in Maths:</p>
         <p><input type = "text" name = "maths" /></p>
         <p><input type = "submit" value = "submit" /></p>
      </form>

   </body>
</html>
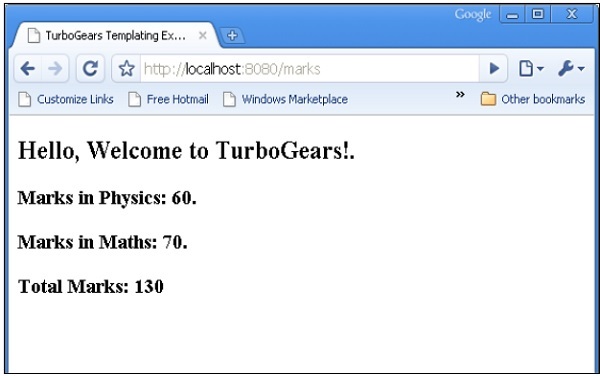
marks() 控制器接收表单数据并将其发送到 sample.html 模板。root.py 的代码如下 −
from hello.lib.base import BaseController
from tg import expose, request

class RootController(BaseController):
   @expose("hello.templates.marks")
   def marksform(self):
      return {}

   @expose("hello.templates.sample")
   def marks(self, **kw):
      phy = kw['phy']
      maths = kw['maths']
      ttl = int(phy)+int(maths)
      mydata = {'phy':phy, 'maths':maths, 'total':ttl}
      return mydata
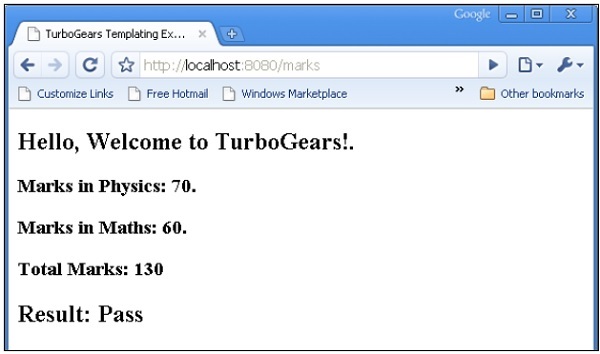
最后sample.html模板如下 −
<html>
   <head>
      <title>TurboGears Templating Example</title>
   </head>

   <body>
      <h2>Hello, Welcome to TurboGears!.</h2>
      <h3>Marks in Physics: ${phy}.</h3>
      <h3>Marks in Maths: ${maths}.</h3>
      <h3>Total Marks: ${total}</h3>
   </body>

</html>
启动服务器(如果尚未运行)
Gearbox 服务器 –reload –debug
在浏览器中输入 http://localhost::8080/marksform
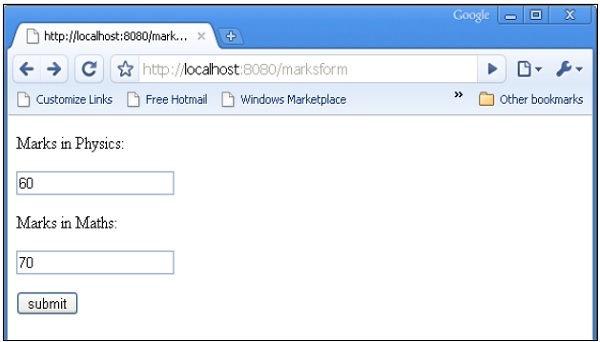
sample.html 将呈现以下输出 −
TurboGears - Genshi 模板语言
Genshi 是一种基于 XML 的模板语言。它类似于 Kid,后者曾是 TurboGears 早期版本的模板引擎。Genshi 和 Kid 都受到其他知名模板语言(如 HSLT、TAL 和 PHP)的启发。
Genshi 模板由处理指令组成。这些指令是模板中的元素和属性。Genshi 指令在命名空间 http://genshi.edgewall.org/ 中定义。因此,需要在模板的根元素中声明此命名空间。
<html xmlns = "http://www.w3.org/1999/xhtml"
   xmlns:py = "http://genshi.edgewall.org/"
   lang = "en">
...
</html>
上述声明意味着默认命名空间设置为 XHTML,并且 Genshi 指令具有"py"前缀。
Genshi 指令
Genshi 中定义了许多指令。以下列表列举了 Genshi 指令 −
- py:if
- py:choose
- py:for
- py:def
- py:match
- py:with
- py:replace
- py:content
- py:attrs
- py:strip
条件部分
Genshi 提供了两个用于条件呈现内容的指令− py:if 和 py:choose。
py:if
仅当 if 子句 中的表达式求值为 true 时,才会呈现此指令元素的内容。假设模板上下文中的数据为 {'foo':True, 'bar':'Hello'>,则以下指令 −
<div>
   <b py:if = "foo">${bar}</b>
</div>
将导致
Hello
但是,如果 'foo' 设置为 False,则不会呈现此输出。
此指令也可用作元素。在这种情况下,<py:if> 必须由相应的 </py:if> 关闭>
<div>
   <py:if test = "foo">
      <b>${bar}</b>
   </py:if>
</div>
py:choose
使用 py:choose 结合 py:when 和 py:otherwise 指令可以实现高级条件处理。此功能类似于 C/C++ 中的 switch – case 构造。
使用 py:when 替代方案标识的不同值检查 py:choose 指令中的表达式,并将呈现相应的内容。可以以 py:otherwise 指令的形式提供默认替代方案。
<div py:choose = "foo">
   <span py:when = "0">0</span>
   <span py:when = "1">1</span>
   <span py:otherwise = "">2</span>
</div>
以下示例说明了 py:choose 和 py:when 指令的使用。HTML 表单将数据发布到 /marks URL。marks() 函数将分数和结果以字典对象的形式重定向到 total.html 模板。result Pass/Fail 的条件显示是通过使用 py:choose 和 py:when 指令实现的。
输入分数 (marks.html) 的 HTML 脚本如下 −
<html>
   <body>
      <form action = "http://localhost:8080/marks" method = "post">
         <p>Marks in Physics:</p>
         <p><input type = "text" name = "phy" /></p>
         <p>Marks in Maths:</p>
         <p><input type = "text" name = "maths" /></p>
         <p><input type = "submit" value = "submit" /></p>
      </form>
   </body>
</html>
root.py 的完整代码如下。marks() 控制器将标记和结果发送到 total.html 模板 −
from hello.lib.base import BaseController
from tg import expose, request

class RootController(BaseController):
   @expose("hello.templates.marks")
      def marksform(self):
      return {}

   @expose("hello.templates.total")
      def marks(self, **kw):
      phy = kw['phy']
      maths = kw['maths']
      ttl = int(phy)+int(maths)
      avg = ttl/2

      if avg ≥ 50:
         mydata = {'phy':phy, 'maths':maths, 'total':ttl, 'result':2}
      else:
         mydata = {'phy':phy, 'maths':maths, 'total':ttl,'result':1}

      return mydata
templates 文件夹中的 total.html 接收字典数据,并有条件地在 html 输出中解析它,如下所示 −
<html xmlns = "http://www.w3.org/1999/xhtml"
   xmlns:py = "http://genshi.edgewall.org/"
   lang = "en">

   <head>
      <title>TurboGears Templating Example</title>
   </head>

   <body>
      <h2>Hello, Welcome to TurboGears!.</h2>
      <h3>Marks in Physics: ${phy}.</h3>
      <h3>Marks in Maths: ${maths}.</h3>
      <h3>Total Marks: ${total}</h3>

      <div py:choose = "result">
         <span py:when = "1"><h2>Result: Fail</h2></span>
         <span py:when = "2"><h2>Result: Pass</h2></span>
      </div>

   </body>
</html>
启动服务器(如果尚未运行)
Gearbox 服务器 –reload –debug
在浏览器中输入 http://localhost::8080/marksform −
total.html 将呈现以下输出 −
py:for
py:for 指令中的元素针对可迭代对象(通常是 Python List 对象)中的每个项目重复。如果模板上下文中存在 items = [1,2,3],则可以通过以下 py:for 指令 − 对其进行迭代
<ul>
<li py:for = "item in items">${item}</li>
</ul>
将呈现以下输出 −
1
2
3
以下示例显示了使用 py:for 指令在 total.html 模板中呈现的 HTML 表单数据,也可以按如下方式使用 −
<py:for each = "item in items">
<li>${item}</li>
</py:for>
HTML 表单脚本
<html>
   <body>

      <form action = "http://localhost:8080/loop" method="post">
         <p>Marks in Physics:</p>
         <p><input type = "text" name = "phy" /></p>
         <p>Marks in Chemistry:</p>
         <p><input type = "text" name = "che" /></p>
         <p>Marks in Maths:</p>
         <p><input type = "text" name = "maths" /></p>
         <p><input type = "submit" value = "submit" /></p>
      </form>

   </body>
</html>
loop() 控制器读取表单数据并以列表对象的形式将其发送到 total.template。
from hello.lib.base import BaseController
from tg import expose, request

class RootController(BaseController):
   @expose("hello.templates.marks")
   def marksform(self):
   return {}

   @expose("hello.templates.temp")
   def loop(self, **kw):
      phy = kw['phy']
      maths = kw['maths']
      che = kw['che']
      l1 = []
      l1.append(phy)
      l1.append(che)
      l1.append(maths)

   return ({'subjects':['physics', 'Chemistry', 'Mathematics'], 'marks':l1})
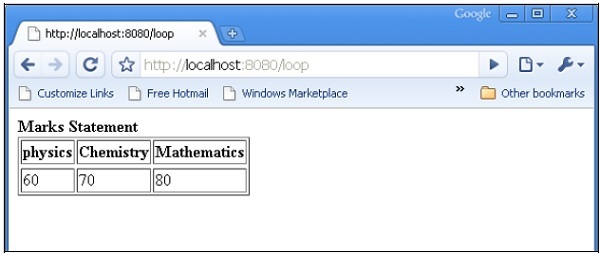
temp.html 模板使用 py:for 循环以表格形式呈现 dict 对象的内容。
<html xmlns = "http://www.w3.org/1999/xhtml"
   xmlns:py = "http://genshi.edgewall.org/" lang = "en">

   <body>
      <b>Marks Statement</b>
      <table border = '1'>
         <thead>
            <py:for each = "key in subjects"><th>${key}</th></py:for>
         </thead>
         <tr>
            <py:for each = "key in marks"><td>${key}</td></py:for>
         </tr>
      </table>
   </body>
</html>
启动服务器(如果尚未运行)
gearbox server –reload –debug
在浏览器中输入 http://localhost::8080/marksform。

提交上述表单后,浏览器中将显示以下输出。
py:def
此指令用于创建宏。宏是可重复使用的模板代码片段。与 Python 函数非常相似,它有一个名称,并且可以选择包含参数。此宏的输出可以插入到模板中的任何位置。
py:def 指令遵循以下语法 −
<p py:def = "greeting(name)">
   Hello, ${name}!
</p>
此宏可以使用变量值呈现为"name"参数。
${greeting('world')}
${greeting('everybody)}
此指令还可以与另一个版本的语法一起使用,如下所示 −
<py:def function = "greeting(name)">
<p>Hello, ${name}! </p>
</py:def>
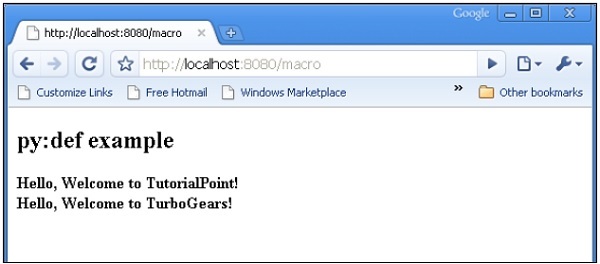
在以下示例中,root.py 中的 macro() 控制器将一个带有两个键 name1 和 name2 的 dict 对象发送到 macro.html 模板。
from hello.lib.base import BaseController
from tg import expose, request

class RootController(BaseController):
   @expose('hello.templates.macro')
   def macro(self):
      return {'name1':'TutorialPoint', 'name2':'TurboGears'}
此 macro.html 模板包含名为 Greeting 的宏的定义。它用于为从控制器接收的数据生成问候消息。
<html xmlns = "http://www.w3.org/1999/xhtml"
   xmlns:py = "http://genshi.edgewall.org/"
   lang = "en">

   <body>
      <h2>py:def example</h2>

      <div>
         <div py:def = "greeting(name)">
            Hello, Welcome to ${name}!
         </div>

         <b>
            ${greeting(name1)}
            ${greeting(name2)}
         </b>

      </div>
   </body>
</html>
使用 gearbox 启动服务器
gearbox serve –reload –debug
通过在浏览器中输入以下 URL 来调用 macro() 控制器 −
http://localhost:8080/macro
以下输出将在浏览器中呈现 −
py:with
此指令允许您将表达式分配给局部变量。这些局部变量使表达式内部更简洁、更高效。
假设在模板的上下文数据中给出了 x = 50,以下将是 py:with 指令 −
<div>
   <span py:with = "y = 50; z = x+y">$x $y $z</span>
</div>
它将产生以下输出 −
50 50 100
py:with 指令的替代版本也可用 −
<div>
<py:with = "y = 50; z = x+y">$x $y $z</py:with>
</div>
在下面的例子中,macro() 控制器返回一个带有 name、phy 和 maths 的 dict 对象 keys.
from hello.lib.base import BaseController
from tg import expose, request

class RootController(BaseController):
   @expose('hello.templates.macro')
   def macro(self):
      return {'name':'XYZ', 'phy':60, 'maths':70}
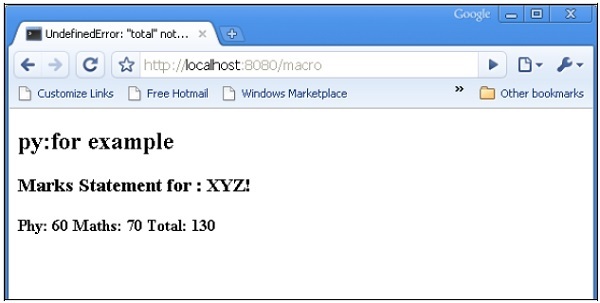
模板 macro.html 使用 py:with 指令添加物理和数学键的值。
<html xmlns = "http://www.w3.org/1999/xhtml"
   xmlns:py = "http://genshi.edgewall.org/"
   lang = "en">

   <body>
      <h2>py:with example</h2>
      <h3>Marks Statement for : ${name}!</h3>

      <b>Phy: $phy Maths: $maths
         <span py:with = "ttl = phy+maths">Total: $ttl</span>
      </b>

   </body>

</html>
浏览器将响应 URL http://localhost:8080/macro 呈现以下输出
结构操作指令
py:attrs 指令可添加、修改或删除元素中的属性。
<ul>
<li py:attrs = "foo">Bar</li>
</ul>
如果 foo = {'class':'collapse'> 存在于模板上下文中,则上述代码片段将呈现。
<ul>
<li class = "collapse">Bar</li>
</ul>
py:content 指令将任何嵌套内容替换为对表达式求值的结果 −
<ul>
   <li py:content = "bar">Hello</li>
</ul>
假设上下文数据中的 bar = 'Bye',则会产生
<ul>
<li>Bye</li>
</ul>
py:replace 指令将元素本身替换为表达式的求值结果 −
<div>
<span py:replace = "bar">Hello</span>
</div>
假设上下文数据中的 bar = 'Bye',则会产生
<div>
Bye
</div>
TurboGears - 包含
可以使用包含标签将另一个 XML 文档(尤其是 HTML 文档)的内容包含在当前文档中。为了实现这种包含,必须在 HTML 文档的根元素中声明 XInclude 命名空间。
<html xmlns = "http://www.w3.org/1999/xhtml" xmlns:xi = "http://www.w3.org/2001/XInclude >
上述声明指定 include 指令包含 'xi' 前缀。要在当前文档中添加另一个 html 页面的内容,请使用 xi:include 指令,如下所示 −
<xi:include href = "somepage.html" />
在下面的示例中,root.py 包含 include() 控制器,该控制器公开 include.html。
from hello.lib.base import BaseController
from tg import expose, request

class RootController(BaseController):
   @expose('hello.templates.include')
   def include(self):
      return {}
标题和页脚 HTML
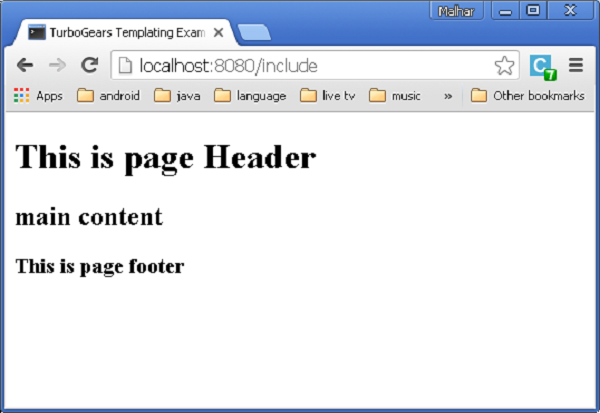
在 include.html 中,声明了包含命名空间,并添加了 header.html 和 footer.html 的内容。以下是 templates\include.html 的 HTML 脚本 −
<html xmlns = "http://www.w3.org/1999/xhtml"
   xmlns:xi = "http://www.w3.org/2001/XInclude">

   <head>
      <title>TurboGears Templating Example</title>
   </head>

   <body>
      <xi:include href = "heading.html" />
      <h2>main content </h2>
      <xi:include href = "footer.html" />
   </body>

</html>
这是 templates\heading.html 代码 −
<html>
   <head>
      <title>TurboGears Templating Example</title>
   </head>

   <body>
      <h1>This is page Header</h1>
   </body>
</html>
以下是templates\footer.html
<html>
   <head>
      <title>TurboGears Templating Example</title>
   </head>

   <body>
      <h3>This is page footer</h3>
   </body>
</html>
使用 gearbox 开始开发,并在浏览器中输入 http://localhost:8080/include。渲染的输出将如下所示 −
这样就可以实现视图的模块化构建。如果 xi:include 指令中提到的资源不可用,则会引发错误。在这种情况下,可以使用 xi:fallback 加载替代资源。
<xi:include href = "main.html">
<xi:fallback href = "default.html"/>
</xi.include>
可以将内容包含动态化为可以包含表达式的 href 属性。
在 root.py 中添加以下控制器。
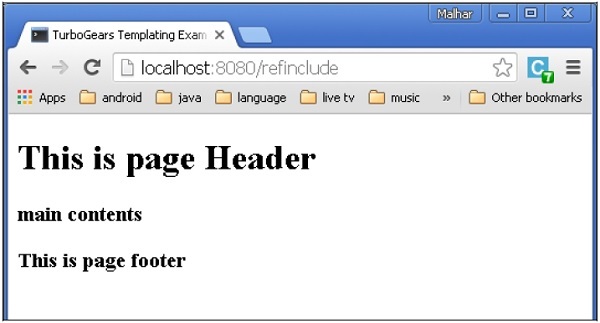
@expose('hello.templates.ref-include')
   def refinclude(self):
      return {'pages':['heading','main','footer']}
将以下代码保存为模板文件夹中的 ref-include.html。
<html xmlns = "http://www.w3.org/1999/xhtml"
   xmlns:py = "http://genshi.edgewall.org/"
   xmlns:xi = "http://www.w3.org/2001/XInclude">

   <head>
      <title>TurboGears Templating Example</title>
   </head>

   <body>
      <xi:include href = "${name}.html" py:for = "name in pages" />
   </body>

</html>
在启动服务器之前,请确保模板文件夹包含heading.html、main.html和footer.html。在浏览器中输入http://localhost:8082/refinclude可获得以下输出
TurboGears - JSON 渲染
@expose() 装饰器默认渲染 html 内容。但是,可以将其设置为 json 内容类型。TurboGears 通过 tg.jsonify.JSONEncoder (**kwargs) 类支持 json 渲染。要呈现 json 数据,只需将 json 作为内容类型传递给暴露装饰器即可。
@expose('json')
def jsondata(self, **kwargs):
    return dict(hello = 'World')
如果在浏览器中输入 '/jsondata' URL,它将通过显示 − 进行响应
{"hello": "World"}
jsonp 渲染
jsonp 代表带填充的 json。它的工作方式类似于 json 输出,不同之处在于它通过调用 javascript 函数提供应用程序/javascript 响应,该函数提供控制器返回的所有值作为函数参数。
要启用 jsonp 渲染,您必须首先将其附加到应用程序内所需引擎的列表中 - config/app_cfg.py −
base_config.renderers.append('jsonp')
按如下方式编写您的暴露装饰器 −
@expose('json')
@expose('jsonp')
def jsonpdata (self, **kwargs):
    return dict(hello = 'World')
访问 /jsonpdata?callback = callme 时,您应该看到 −
callme({"hello": "World"});
TurboGears - URL 层次结构
有时,Web 应用程序可能需要具有多个级别的 URL 结构。TurboGears 可以遍历对象层次结构以找到可以处理您的请求的适当方法。
使用 gearbox"快速启动"的项目在项目的 lib 文件夹中有一个 BaseController 类。它以"Hello/hello/lib/base.py"的形式提供。它作为所有子控制器的基类。为了在应用程序中添加 URL 的子级别,请设计一个从 BaseController 派生的名为 BlogController 的子类。
此 BlogController 有两个控制器函数,index() 和 post()。两者都旨在公开一个模板,blog.html 和 post.html。
注意 − 这些模板放在子文件夹 − templates/blog 中
class BlogController(BaseController):

   @expose('hello.templates.blog.blog')
   def index(self):
      return {}

   @expose('hello.templates.blog.post')
   def post(self):
      from datetime import date
      now = date.today().strftime("%d-%m-%y")
      return {'date':now}
现在在 RootController 类(在 root.py 中)中声明此类的对象,如下所示 −
class RootController(BaseController):
    blog = BlogController()
顶级 URL 的其他控制器函数将与之前一样存在于此类中。
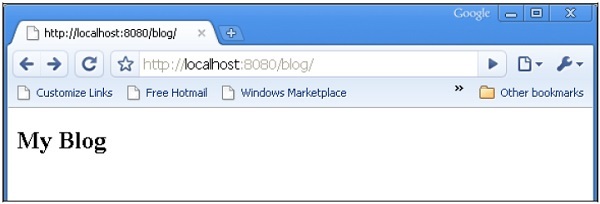
当输入 URL http://localhost:8080/blog/ 时,它将映射到 BlogController 类内的 index() 控制器函数。同样,http://localhost:8080/blog/post 将调用 post() 函数。
blog.html 和 post.html 的代码如下 −
Blog.html
<html>
<body>
<h2>My Blog</h2>
</body>
</html>
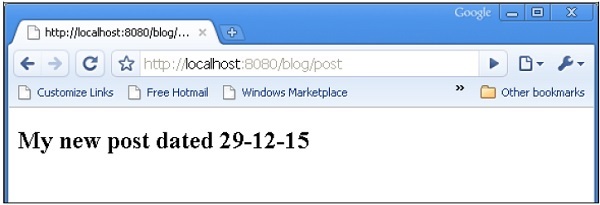
post.html
<html>
<body>
<h2>My new post dated $date</h2>
</body>
</html>
当输入 URL http://localhost:8080/blog/ 时,将产生以下输出 −
当输入 URL http://localhost:8080/blog/post 时,将产生以下输出 −
TurboGears – ToscaWidgets 表单
任何 Web 应用程序最重要的方面之一就是为用户呈现用户界面。HTML 提供了一个用于设计界面的 <form> 标签。可以适当使用表单的元素,例如文本输入、单选按钮、选择等。用户输入的数据以 Http 请求消息的形式通过 GET 或 POST 方法提交给服务器端脚本。
服务器端脚本必须根据 http 请求数据重新创建表单元素。因此,表单元素必须定义两次 - 一次在 HTML 中,另一次在服务器端脚本中。
使用 HTML 表单的另一个缺点是很难(如果不是不可能的话)动态呈现表单元素。 HTML 本身无法验证用户的输入。
ToscaWidgets2
TurboGears 依赖于 ToscaWidgets2,这是一个灵活的表单渲染和验证库。使用 ToscaWidgets,我们可以在 Python 脚本中定义表单字段,并使用 HTML 模板渲染它们。也可以将验证应用于 tw2 字段。
ToscaWidgets 库是许多模块的集合。一些重要的模块列在下面 −
tw2.core − 它提供核心功能。此模块中的小部件不适用于最终用户。
tw2.forms − 这是一个基本的表单库。它包含字段、字段集和表单的小部件。
tw2.dynforms − 它包含动态表单功能。
tw2.sqla − 这是 SQLAlchemy 数据库的接口。
tw2.forms
它包含一个 Form 类,该类充当自定义表单的基础。有一个 TableForm 类可用于在两列表中呈现字段。 ListForm 以无序列表的形式显示其字段。
| Sr.No. | 字段 &描述 |
|---|---|
| 1 | TextField 单行文本输入字段 |
| 2 | TextArea 多行文本输入字段 |
| 3 | CheckBox 显示一个带标签的可勾选矩形框 |
| 4 | CheckBoxList 可多选复选框组 |
| 5 | RadioButton 用于选择/取消选择的切换按钮 |
| 6 | RadioButtonList 一组互斥的单选按钮 |
| 7 | PasswordField 与 Textfield 类似,但不显示输入键 |
| 8 | CalendarDatePicker 让用户选择日期 |
| 9 | SubmitButton 提交表单的按钮 |
| 10 | ImageButton 可点击按钮,顶部带有图像 |
| 11 | SingleSelectField 允许从列表中选择单个项目 |
| 12 | MultipleSelectField 允许从列表中选择多个项目列表 |
| 13 | FileField 用于上传文件的字段 |
| 14 | EmailField 电子邮件输入字段 |
| 15 | URLField 用于输入 URL 的输入字段 |
| 16 | NumberField 数字旋转框 |
| 17 | RangeField 数字滑块 |
在下面的示例中,构建了一个使用其中一些小部件的表单。虽然大多数小部件都是在 tw2.forms 中定义的,但 CalendarDateField 是在 tw2.Dynforms 模块中定义的。因此,这两个模块以及 tw2.core 都是在开始时导入的 −
import tw2.core as twc
import tw2.forms as twf
import tw2.dynforms as twd
ToscaWidgets 表单是从 tw2.forms.form 基类派生的类。所需的小部件放置在 Layout 对象内。在此示例中,使用了 TableLayout。小部件呈现在两列的表中。第一列显示标题,第二列显示输入或选择字段。
使用以下构造函数 − 创建 TextField 对象
twf.TextField(size, value = None)
如果没有提及,TextField 对象采用默认大小并且最初为空白。在声明 TextArea 对象时,可以提及行数和列数。
twf.TextArea("",rows = 5, cols = 30)
NumberField 对象是只能接受数字的 TextField。右边框上生成了向上和向下箭头,用于增加或减少其中的数字。初始值也可以在构造函数中作为参数指定。
twf.NumberField(value)
在 CalendarDatePicker 框的右侧,显示一个日历按钮。按下时会弹出一个日期选择器。用户可以在框中手动输入日期,也可以从日期选择器中选择。
twd.CalendarDatePicker()
EmailField 对象显示一个 TextField,但其中的文本必须为电子邮件格式。
EmailID = twf.EmailField()
以下表单也有一个 RadioButtonList。此类的构造函数包含一个 List 对象作为 options 参数的值。将呈现每个选项的单选按钮。默认选择通过值参数指定。
twf.RadioButtonList(options = ["option1","option2"],value = option1)
CheckBoxList 为列表中的每个选项呈现复选框。
twf.CheckBoxList(options = [option1, option2, option3])
在此 ToscaWidgets 库中,下拉列表被称为 SingleSelectfield。与选项参数对应的 List 对象中的项目构成下拉列表。可见标题设置为 prompt_text 参数的值。
twf.SingleSelectField(prompt_text = 'text', options=['item1', 'item2', 'item3'])
默认情况下,表单显示一个提交按钮,其标题为"保存"。为了显示另一个标题,请创建一个 SubmitButton 对象并将其指定为值参数。
twf.SubmitButton(value = 'Submit')
表单提交到 URL,该 URL 被指定为表单的操作参数的值。默认情况下,表单数据通过 http POST 方法提交。
action = 'URL'
在下面的代码中,使用上面解释的小部件设计了一个名为 AdmissionForm 的表单。在 root.py 中的 RootController 类之前添加此代码。
class AdmissionForm(twf.Form):
   class child(twf.TableLayout):
      NameOfStudent = twf.TextField(size = 20)
      AddressForCorrespondance = twf.TextArea("", rows = 5, cols = 30)
      PINCODE = twf.NumberField(value = 431602)
      DateOfBirth = twd.CalendarDatePicker()
      EmailID = twf.EmailField()
      Gender = twf.RadioButtonList(options = ["Male","Female"],value = 'Male')
      Subjects = twf.CheckBoxList(options = ['TurboGears', 'Flask', 'Django', 'Pyramid'])

      MediumOfInstruction = twf.SingleSelectField(prompt_text = 'choose',
         options = ['English', 'Hindi', 'Marathi', 'Telugu'])

      action = '/save_form'
      submit = twf.SubmitButton(value ='Submit')
现在将下面的代码保存为模板目录中的twform.html −
<!DOCTYPE html>
<html xmlns = "http://www.w3.org/1999/xhtml"
   xmlns:py = "http://genshi.edgewall.org/"
   lang = "en">

   <head>
      <title>TurboGears Form Example</title>
   </head>

   <body>
      <div id = "tw form">
         ${form.display(value = dict(title = 'default title'))}
      </div>
   </body>

</html>
在 RootController 类(在 root.py 中)中,添加以下控制器函数 −
@expose('hello.templates.twform')
def twform(self, *args, **kw):
    return dict(page = 'twform', form = MovieForm)
在 AdmissionForm 类中,我们将 stipulated/save_form 作为操作 URL。因此,在 RootController 中添加 save_form() 函数。
@expose()
def save_movie(self, **kw):
    return str(kw)
确保服务器正在运行(使用 gearbox serve)。在浏览器中输入http://localhost:8080/twform。
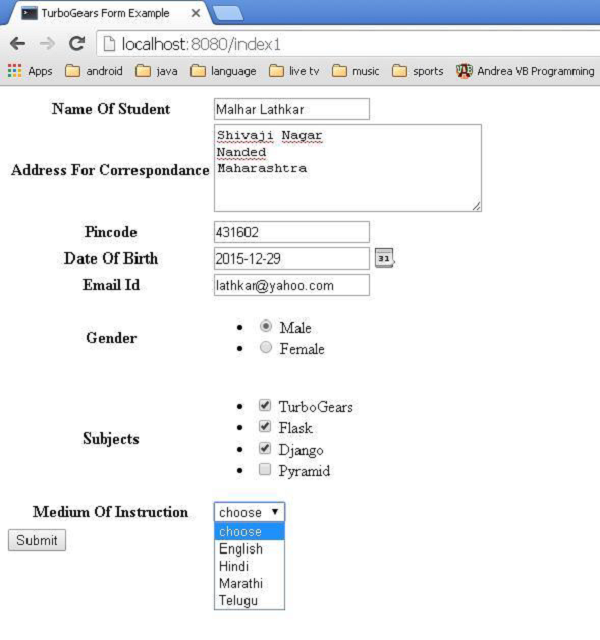
按下提交按钮会将此数据发布到 save_form() URL,该 URL 将以字典对象的形式显示表单数据。
{
   'EmailID': u'lathkar@yahoo.com',
   'NameOfStudent': u'Malhar Lathkar',
   'Gender': u'Male',
   'PINCODE': u'431602',
   'DateOfBirth': u'2015-12-29',
   'Subjects': [u'TurboGears', u'Flask', u'Django'],
   'MediumOfInstruction': u'',
   'AddressForCorrespondance': u'Shivaji Nagar
Nanded
Maharashtra'
}
TurboGears – 验证
一个好的 Forms 小部件库应该具有输入验证功能。例如,应该强制用户在必填字段中输入数据,或者验证电子邮件字段是否包含有效的电子邮件,而无需诉诸任何其他编程方式(如 JavaScript 函数)进行验证。
ToscaWidgets Forms 库的早期版本曾经依赖 FormEncode 模块来提供验证支持。ToscaWidgets2 现在在 tw2.core 模块中提供内置验证支持。但是,仍然可以使用 FormEncode 验证技术。
为了对 ToscaWidgets 表单进行验证,使用 @validate 装饰器。
@validate(form, error_handler, validators)
'form' 是需要验证的 ToscaWidgets 表单对象。
'error-handler' 是用于处理表单错误的控制器方法。
'validators' 是一个包含 FormEncode 验证器的字典对象。
验证器的类型
tw2.core 模块包含一个验证器类,其他验证器从该类继承而来。也可以基于此设计自定义验证器。下面描述了一些重要的验证器 −
LengthValidator − 检查值是否具有规定的长度。最小和最大限制使用 min 和 max 参数定义。长度低于和高于 min 和 max 的自定义消息可以指定为 tooshort 和 toolong 参数。
tw2.core.LengthValidator(min = minval, max = maxval,
    msgs = { 'tooshort': ('message for short length'),
    'toolong': ('message for long length)})
RangeValidator − 通常与 RangeField 一起使用。它有助于验证数字字段的值在最小和最大限制内。tooshort 和 toolong 参数的消息可以自定义。
tw2.core.RangeValidator(min = minval, max = maxval,
   msgs = { 'tooshort': ('message for short length'),
   'toolong': ('message for long length)})
IntValidator − 此类派生自 RangeValidator。这通常用于验证普通文本字段中的输入是否包含整数数据。可以设置最小和最大限制以及错误消息。此外,非整数输入的错误消息可以指定为"notint"参数。
tw2.core.IntValidator(msgs = {'notint':'Must be Integer'})
OneOfValidator −此验证器强制用户仅从列表中的可用选项中选择一个值。
tw2.core.OneOfValidator(values = [option1, option2,..],
    msgs = {'notinlist':'Not in List'}}
DateValidator − 非常有用,可确保用户输入的是有效日期。日期格式(默认为 Y-M-D)和错误消息可自定义。还可以指定最小和最大日期限制。DateTimeValidator 也可用于验证 DateTime 类的对象。
tw2.core.DateValidator(msgs = {format = '%Y-%m-%d',
   'baddatetime': ('baddate', ('Must follow date format $format_str'))}
EmailValidator − 根据有效的电子邮件地址验证用户输入。此类继承自更通用的 RegexValidator。
tw2.core.EmailValidator(msgs = {'badregex': ('bademail',
   ('Must be a valid email address')) }
UrlValidator − 此类也继承自 RegexValidator。它验证用户输入的 URL 是否有效。
tw2.core.UrlValidator(msgs = {'badregex': ('badurl', ('Must be a valid URL')) }
MatchValidator − 确认一个字段的值是否与另一个字段匹配。当用户需要选择并确认密码字段时,此功能特别有用。MatchValidator 的典型用法如下所示 −
import tw2.core as twc
import tw2.forms as twf

  class AdmissionForm(twf.Form):
      class child(twf.TableLayout):
         validator = twc.MatchValidator('pw', 'pwconfirm')
         pw = twf.PasswordField()
         pwconfirm = twf.PasswordField()
还可以构建复合验证器,其中只要任何一项检查通过,验证就成功。在其他情况下,您可能希望只有输入通过所有检查,验证才会成功。为此,tw2.core 提供了 Any 和 All 验证器,它们是可扩展 CompoundValidator 的子类。
TurboGears – Flash 消息
TurboGears 提供了一种非常方便的消息系统,可以以非侵入方式向用户通知信息。tg 模块中的 TGFlash 类支持存储在普通 cookie 中的 Flash 消息。此类支持通过 JavaScript 在服务器端和客户端获取 Flash 消息。
TGFlash 类的 render() 方法在 Python 本身中使用时,可以从模板调用以呈现 Flash 消息。如果在 JavaScript 上使用,它会提供一个 WebFlash 对象。它公开 payload() 和 render() 方法来获取当前 Flash 消息并从 JavaScript 呈现它。
使用"quickstart"创建 TurboGears 项目时,它有一个 Master.html 模板。它包含该 Flash 对象变量的定义。从控制器收到的此 Flash 消息的内容将替换此模板中标记的占位符。
<py:with vars = "flash = tg.flash_obj.render('flash', use_js = False)">
    <div py:if = "flash" py:replace = "Markup(flash)" />
</py:with>
tg.flash_obj 是 WebFlash 对象,可通过包含 master.html 模板在任何呈现的模板中使用。此对象允许检索当前的 Flash 消息并显示它。
使用 tg.flash() 方法将 Flash 消息存储在 cookie(其默认名称为 webflash)中。然后将消息和状态参数传递给它。
tg.flash('Message', 'status')
如果调用 flash 的方法执行重定向,则 flash 将在重定向页面内可见。如果该方法直接公开模板,则 flash 将在模板本身内可见。
可以通过将 CSS 样式应用于状态代码来定制 flash 消息的外观。"快速启动"项目包含由样式表 public/css/style.css 定制的错误、警告、信息和 ok 状态代码。还可以添加更多带有样式的状态代码。
#flash > .warning {
   color: #c09853;
   background-color: #fcf8e3;
   border-color: #fbeed5;
}

#flash > .ok {
   color: #468847;
   background-color: #dff0d8;
   border-color: #d6e9c6;
}

#flash > .error {
   color: #b94a48;
   background-color: #f2dede;
   border-color: #eed3d7;
}

#flash > .info {
   color: #3a87ad;
   background-color: #d9edf7;
   border-color: #bce8f1;
}
此外部样式表需要包含在模板中 −
<link rel = "stylesheet" type = "text/css" media = "screen"
    href = "${tg.url('/css/style.css')}" />
任何 Flash 消息支持的配置都可以通过设置 TGFlash 对象的 configure() 方法或在 app_cfg.py(在 config 文件夹中)中的参数来实现。可配置的参数是 −
| Sr.No. | 参数和说明 |
|---|---|
| 1 | flash.cookie_name 用于存储 Flash 消息的 cookie 的名称。默认为 webflash。 |
| 2 | flash.default_status 如果未指定,则为默认消息状态(默认为 ok) |
| 3 | flash.template 渲染时用作 flash 模板。 |
| 4 | flash.allow_html 打开/关闭 Flash 消息中的转义,默认情况下不允许使用 HTML。 |
| 5 | flash.js_call 从 JavaScript 显示 Flash 时将运行的 JavaScript 代码。默认为 webflash.render() |
| 6 | flash.js_template string.Template 实例用于替换 Flash 消息的完整 JavaScript 支持。 |
pop_payload() − 函数获取当前 Flash 消息、状态和相关信息。获取 Flash 消息将删除 cookie。
render(container_id, use_js=True) −在模板内呈现 flash 消息或为其提供 Javascript 支持。
container_id 是显示消息的 DIV,而 use_js 则在将 flash 呈现为 HTML 或 JavaScript 使用之间切换。
status − 仅获取当前 flash 状态,获取 flash 状态将删除 cookie。
message − 仅获取当前 flash 消息,获取 flash 消息将删除 cookie。
如何制作简单的 Flash 消息?
在下面的示例中,根控制器类中提供了一个 flash() 方法。它调用一个 flash() 消息,该消息被呈现到公开的模板 flash.html
from hello.lib.base import BaseController
from tg import expose, flash, redirect, request
class RootController(BaseController):
@expose('hello.templates.flash')
def flash(self, user = None):
if user:
flash(message = "Welcome "+user,status = "ok")
else:
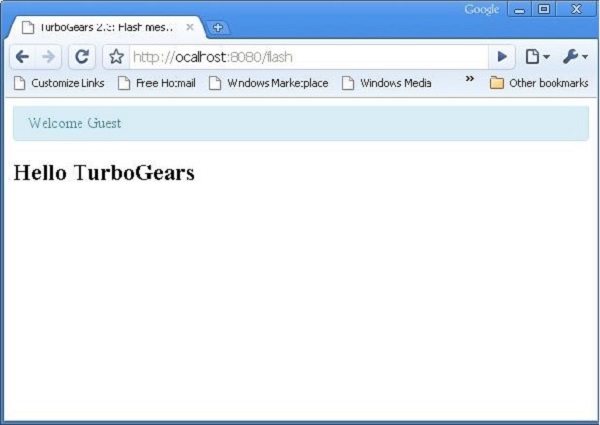
flash(message = "Welcome Guest",status = "info")
return {}
templates文件夹下制作flash.html的代码如下
<html xmlns = "http://www.w3.org/1999/xhtml"
   xmlns:py = "http://genshi.edgewall.org/"
   xmlns:xi = "http://www.w3.org/2001/XInclude">

   <head>
      <title>TurboGears 2.3: Flash messages>/title>
      <link rel = "stylesheet" type = "text/css" media = "screen"
         href = "${tg.url('/css/style.css')}" />

      <py:with vars = "flash = tg.flash_obj.render('flash', use_js = False)">
         <div py:if = "flash" py:replace = "Markup(flash)" />
      </py:with>

   </head>

   <body>
      <h2>Hello TurboGears</h2>
   </body>

</html>
启动服务器并在浏览器中输入 http://localhost:8080/flash?user=MVL

将 URL 更改为 http://localhost:8080/flash 并查看根据 style.css 中的定义以不同格式显示的 Flash 消息
TurboGears – Cookies 和 Sessions
通常需要将简单的浏览数据保存到用户的浏览器中。Sessions 是最常用的技术。Session 表示不需要以更持久的形式(如磁盘文件或数据库)存储的数据。
但是,TurboGears 中的 sessiondata 可以由文件系统、数据库或散列 cookie 值支持。少量的 session 数据通常保存在 cookie 中,但对于大量的 session 数据,则使用 MemCache。
MemCache 是系统级守护进程。它提供对缓存数据的快速访问,并且具有极高的可扩展性。但是,它仅供在安全服务器上使用,因此必须由系统管理员维护和保护。
会话管理中的 Beaker
TurboGears 使用 Beaker 进行会话管理。 gearbox 快速启动的项目默认配置为使用哈希 cookie 来存储会话数据。
每次客户端连接时,会话中间件 (Beaker) 将使用配置文件中定义的 cookie 名称检查 cookie。如果未找到 cookie,则会在浏览器中设置它。在所有后续访问中,中间件将找到 cookie 并使用它。
为了启用会话管理,应通过以下导入语句将会话类合并到项目中 −
from tg import session
要将数据保存在会话变量中 −
session['key'] = value
session.save()
要检索会话变量 −
return session['key']
请注意,您需要明确保存会话,以便将密钥存储在该会话中。
会话对象的 delete() 方法将删除所有用户会话 −
session.delete()
尽管通常不会删除任何给定生产环境中的所有用户会话,但您通常会在可用性或功能测试完成后进行清理。
下面给出了一个演示会话的简单示例。RootController 类有一个 setsession() 方法,用于设置会话变量。
from hello.lib.base import BaseController
from tg import expose, session
class RootController(BaseController):
@expose()
def setsession(self):
session['user'] = 'MVL'
session.save()
str = "<b>sessionVariable set to "+session['user']
str = str+"<br><a href = '/getsession'>click here to retrieve</a></b>"
return str
@expose()
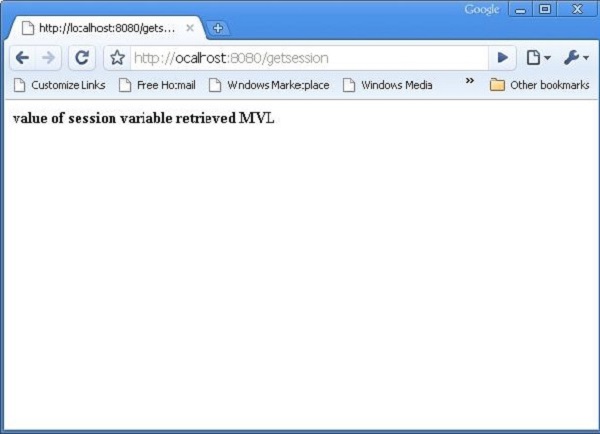
def getsession(self):
return "<b>value of session variable retrieved " +session['user'] +"</b>"
输入 http://localhost:8080/setsession
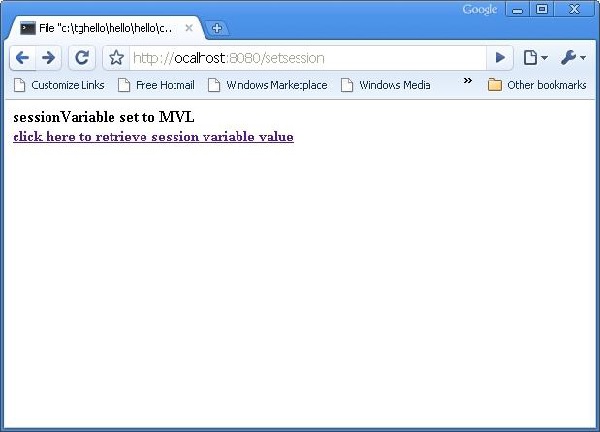
浏览器中的链接指向 http://localhost:8080/getsession,该链接检索并显示会话变量 −
 <
<TurboGears – 缓存
为了提高 Web 应用程序的性能,尤其是当它涉及长时间操作时,可以使用缓存技术。TurboGears 提供两种类型的缓存技术 −
整页缓存
它在 HTTP 协议级别工作,通过让用户的浏览器或中间代理服务器(如 Squid)拦截请求并返回文件的缓存副本,避免向服务器发送整个请求。
应用程序级缓存
这在应用程序服务器内工作,以缓存计算值,通常是复杂数据库查询的结果,以便将来的请求可以避免需要重新计算这些值。对于 Web 应用程序,应用程序级缓存提供了一种灵活的方式来缓存复杂查询的结果,这样可以将给定控制器方法的总负载减少到几个特定于用户或特定于案例的查询和模板的渲染开销。
应用程序级缓存
如前所述,"快速启动"TurboGears 项目配置为启用 Beaker 包以支持缓存。Beaker 支持以下用于缓存存储的后端 −
内存 − 用于每个进程的存储。它非常快。
文件系统 − 每个进程存储以及多进程。
DBM 数据库 −每个进程,多进程,相当快。
SQLAlchemy 数据库 − 每个数据库服务器存储。与上面给出的选项相比速度较慢。
Memcached − 基于多服务器内存的缓存。
控制器缓存
对于快速控制器缓存,可以使用 cached() 装饰器。整个控制器主体根据请求的各种参数进行缓存。tg.decorators.cached() 装饰器的定义如下
tg.decorators.cached(key, expire, type,
   query-args, cache_headers, invalidate_on_startup, cache_response)
参数说明如下 −
| Sr.No. | 参数 &描述 |
|---|---|
| 1 | key 指定用于生成缓存键的控制器参数。 |
| 2 | expire 缓存过期前的时间(以秒为单位),默认为"永不"。 |
| 3 | Type dbm、memory、file、memcached 或 None。 |
| 4 | cache_headers 表示响应的标头名称元组标头。 |
| 5 | invalidate_on_startup 如果为 True,则每次应用程序启动或重新启动时,缓存都会失效。 |
| 6 | cache_response 响应是否应缓存,默认为 True。 |
以下是控制器缓存的示例 −
@cached(expire = 100, type = 'memory')
@expose()
def simple(self):
return "This is a cached controller!"
模板级缓存
如果模板内容没有改变,Genshi 模板引擎会从缓存中检索模板。此缓存的默认大小为 25。默认情况下,模板的自动重新加载为 true。为了提高性能,可以在 app_cfg.py 中进行以下设置 −
[app:main]
genshi.max_cache_size = 100
auto_reload_templates = false
要缓存模板,您只需从呈现缓存模板的控制器返回 tg_cache 选项。
tg_cache 是一个接受以下键的字典 −
key − 缓存键。 默认: 无。
expire − 缓存必须保持活动的时间。默认: 永不过期
type − 内存、dbm、memcached。默认: dbm。
以下示例说明了模板缓存 −
@expose(hello.templates.user')
def user(self, username):
   return dict(user = username, tg_cache = dict(key = user, expire = 900))
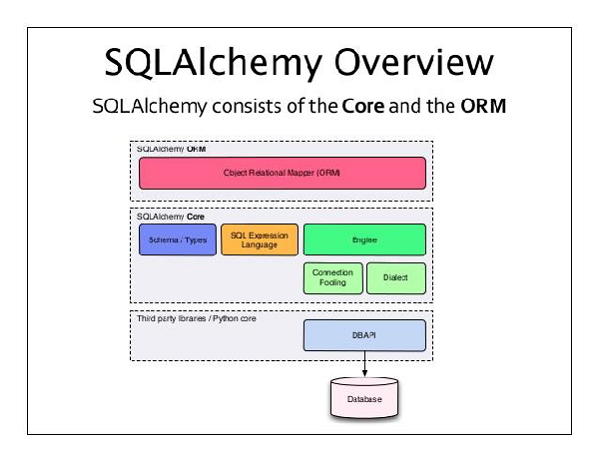
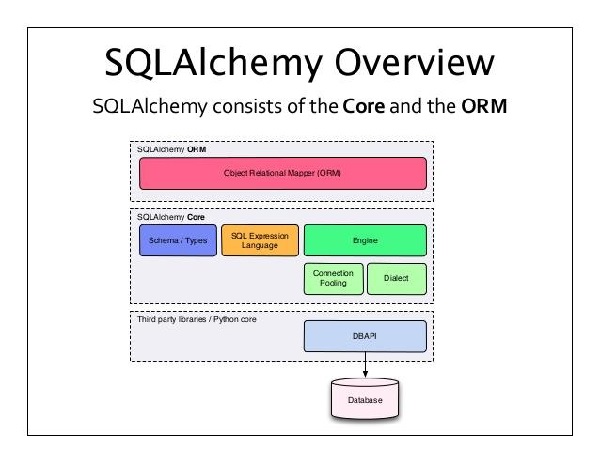
TurboGears – SQLAlchemy
虽然可以在 TurboGears 应用程序中使用 SQL 对任何关系数据库执行 CRUD 操作,但建议使用 SQLAlchemy,这是一个 Python 工具包,是一个功能强大的对象关系映射器,可为应用程序开发人员提供 SQL 的全部功能和灵活性。除了通过 SQLAlchemy 支持基于 SQL 的数据库外,TurboGears 还通过 Ming 支持 MongoDB 数据库。本节将讨论 SQLAlchemy 的功能。
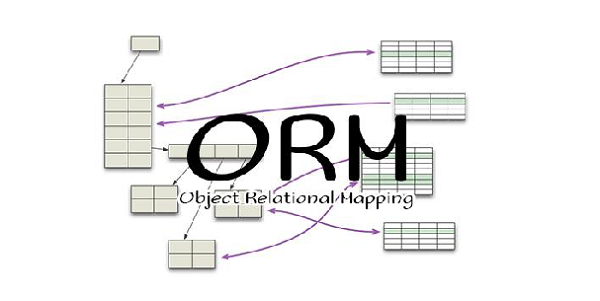
什么是 ORM(对象关系映射)?
大多数编程语言平台都是面向对象的。另一方面,RDBMS 服务器中的数据存储为表。对象关系映射是一种将对象参数映射到底层 RDBMS 表结构的技术。 ORM API 提供了执行 CRUD 操作的方法,而无需编写原始 SQL 语句。
使用 gearbox 工具包中的"quickstart"命令创建 TurboGears 项目时,默认情况下会通过以下配置设置启用 SQLAlchemy 支持 −
config['use_sqlalchemy'] = True
config['sqlalchemy.url'] = 'sqlite:///devdata.db'
"quickstarted"项目还在其中创建了一个模型包。例如,"Hello"项目将具有 Hello\hello\model。此包中创建了以下文件 −
__init__.py −这是设置数据库访问的地方。应用程序的模型对象导入到此模块中。它还有一个 DBSession - 一个全局会话管理器和一个 DeclarativeBase,它是所有模型类的基类。
auth.py − 这是定义身份验证堆栈使用的模型的地方。其他数据库模型作为单独的模块存储在此包中,并添加到 __init__.py 中。
TurboGears – 创建模型
让我们添加一个学生模型,它将在我们的 sqlite 数据库中设置一个学生表。
Hello\hello\model\student.py
from sqlalchemy import *
from sqlalchemy.orm import mapper, relation, relation, backref
from sqlalchemy import Table, ForeignKey, Column
from sqlalchemy.types import Integer, Unicode, DateTime

from hello.model import DeclarativeBase, metadata, DBSession
from datetime import datetime

class student(DeclarativeBase):
    __tablename__ = 'student'

    uid = Column(Integer, primary_key = True)
    name = Column(Unicode(20), nullable = False, default = '')
    city = Column(Unicode(20), nullable = False, default = '')
    address = Column(Unicode(100), nullable = False, default = '')
    pincode = Column(Unicode(10), nullable = False, default = '')
现在在 __init__.py 中的 init_model() 函数中添加此模型。此函数已包含 auth 模型。在其下方添加我们的学生模型。
# 在此处导入您的模型模块。
from hello.model.auth import User, Group, Permission
from hello.model.student import student
如果您希望在设置模型时使用一些数据初始化表,请在 websetup 包中的 bootstrap.py 中添加它。在bootstrap()函数中添加如下语句。
s1 = model.student()
s1.name = 'M.V.Lathkar'
s1.city = 'Nanded'
s1.address = 'Shivaji Nagar'
s1.pincode = '431602'

model.DBSession.add(s1)
model.DBSession.flush()
transaction.commit()
通过运行 gearbox 的 setup-app 命令初始化模型 −
gearbox setup-app
SQLAlchemy 的 Session 对象管理 ORM 对象的所有持久化操作。
TurboGears – CRUD 操作
以下会话方法执行 CRUD 操作 −
DBSession.add(model object) − 将记录插入映射表。
DBSession.delete(model object) − 从表中删除记录。
DBSession.query(model).all() − 从表检索所有记录(对应于 SELECT 查询)。
您可以使用过滤器属性将过滤器应用于检索到的记录集。例如,为了检索 students 表中 city = 'Hyderabad' 的记录,请使用以下语句 −
DBSession.query(model.student).filter_by(city = 'Hyderabad').all()
现在我们将了解如何通过控制器 URL 与模型进行交互。
首先让我们设计一个 ToscaWidgets 表单来输入学生的数据
Hello\hello\controllers.studentform.py
import tw2.core as twc
import tw2.forms as twf

class StudentForm(twf.Form):
   class child(twf.TableLayout):
      name = twf.TextField(size = 20)
      city = twf.TextField()
      address = twf.TextArea("",rows = 5, cols = 30)
      pincode = twf.NumberField()

   action = '/save_record'
   submit = twf.SubmitButton(value = 'Submit')
在 RootController(Hello 应用程序的 root.py)中,添加以下函数映射'/add' URL −
from hello.controllers.studentform import StudentForm

class RootController(BaseController):
    @expose('hello.templates.studentform')
    def add(self, *args, **kw):
        return dict(page='studentform', form = StudentForm)
将以下 HTML 代码保存为 templates 文件夹中的 studentform.html −
<!DOCTYPE html>
<html xmlns = "http://www.w3.org/1999/xhtml"
   xmlns:py = "http://genshi.edgewall.org/"
   lang = "en">

   <head>
      <title>Student Registration Form</title>
   </head>

   <body>
      <div id = "getting_started">
         ${form.display(value = dict(title = 'Enter data'))}
      </div>
   </body>

</html>
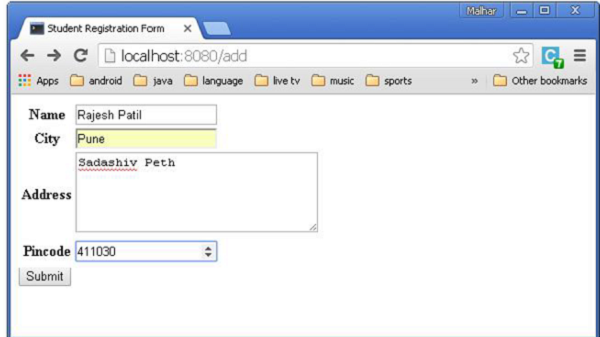
启动服务器后,在浏览器中输入 http://localhost:8080/add。以下学生信息表单将在浏览器中打开 −
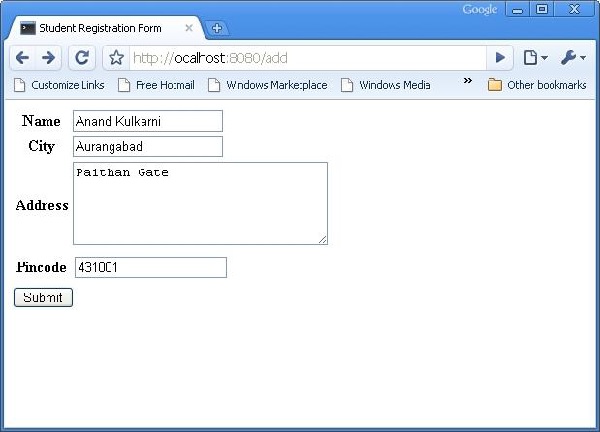
上述表单旨在提交到 '/save_record' URL。因此,需要在 root.py 中添加 save_record() 函数来公开它。此函数将 studentform 中的数据作为 dict() 对象接收。它用于在学生模型底层的学生表中添加新记录。
@expose()
#@validate(form = AdmissionForm, error_handler = index1)
def save_record(self, **kw):
newstudent = student(name = kw['name'],city = kw['city'],
address = kw['address'], pincode = kw['pincode'])
DBSession.add(newstudent)
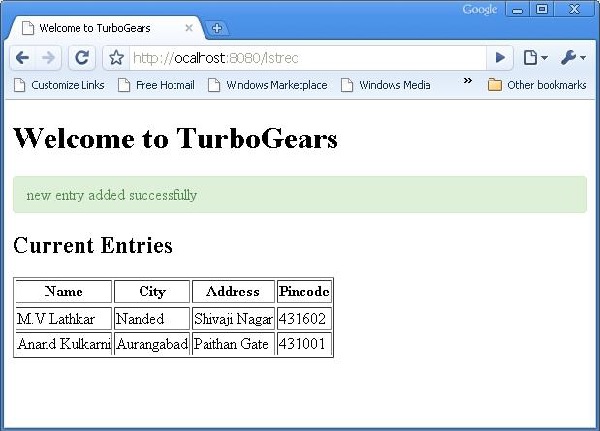
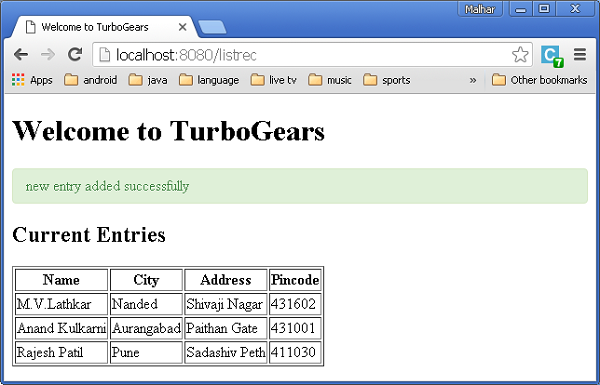
flash(message = "new entry added successfully")
redirect("/listrec")
请注意,添加成功后,浏览器将重定向到'/listrec' URL。此URL由listrec()函数公开。此函数选择student表中的所有记录,并以dict对象的形式将它们发送到studentlist.html模板。此listrec()函数如下 −
@expose ("hello.templates.studentlist")
def listrec(self):
    entries = DBSession.query(student).all()
    return dict(entries = entrys)
studentlist.html模板使用py:for指令遍历entries字典对象。studentlist.html模板如下 −
<html xmlns = "http://www.w3.org/1999/xhtml"
   xmlns:py = "http://genshi.edgewall.org/">

   <head>
      <link rel = "stylesheet" type = "text/css" media = "screen"
         href = "${tg.url('/css/style.css')}" />
      <title>Welcome to TurboGears</title>
   </head>

   <body>
      <h1>Welcome to TurboGears</h1>

      <py:with vars = "flash = tg.flash_obj.render('flash', use_js = False)">
         <div py:if = "flash" py:replace = "Markup(flash)" />
      </py:with>

      <h2>Current Entries</h2>

      <table border = '1'>
         <thead>
            <tr>
               <th>Name</th>
               <th>City</th>
               <th>Address</th>
               <th>Pincode</th>
            </tr>
         </thead>

         <tbody>
            <py:for each = "entry in entries">
               <tr>
                  <td>${entry.name}</td>
                  <td>${entry.city}</td>
                  <td>${entry.address}</td>
                  <td>${entry.pincode}</td>
               </tr>
            </py:for>
         </tbody>

      </table>

   </body>
</html>
现在重新访问 http://localhost:8080/add 并在表单中输入数据。单击提交按钮,浏览器将转到 studentlist.html。它还将闪烁"新记录添加成功"消息。
TurboGears – DataGrid
ToscaWidgets 包含一个 DataGrid 控件,它提供了一种以表格形式呈现数据的快速方法。DataGrid 对象的声明如下 −
from tw2.forms import DataGrid
student_grid = DataGrid(fields = [('Name', 'name'),('City', 'city'),
    ('Address','address'), ('PINCODE', 'pincode')])
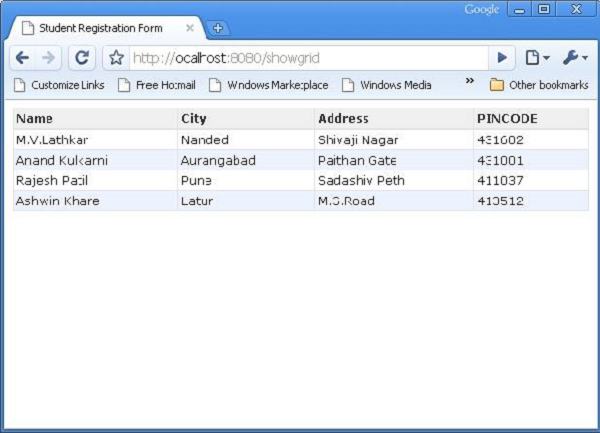
现在,showgrid() 函数检索学生表中的所有记录并将数据公开给 grid.html 模板。首先给出 showgrid() 函数的代码,然后给出 grid.html 代码 −
showgrid()
@expose('hello.templates.grid')
def showgrid(self):
   data = DBSession.query(student).all()
   return dict(page = 'grid', grid = student_grid, data = data)
grid.html
<!DOCTYPE html>
<html xmlns = "http://www.w3.org/1999/xhtml"
   xmlns:py = "http://genshi.edgewall.org/"
   lang = "en">

   <head>
      <title>Student Registration Form</title>
   </head>

   <body>
      <div id = "getting_started">
         <div>${grid.display(value = data)}</div>
      </div>
   </body>

</html>
在浏览器中输入 http://localhost:8080/showlist URL 时将显示以下表格数据 −
TurboGears – 分页
TurboGears 提供了一个方便的装饰器 paginate() 来划分页面中的输出。此装饰器与 reveal() 装饰器结合使用。@Paginate() 装饰器将查询结果的字典对象作为参数。此外,每页的记录数由 items_per_page 属性的值决定。确保将 tg.decorators 中的 paginate 函数导入到代码中。
在 root.py 中重写 listrec() 函数,如下所示 −
from tg.decorators import paginate
class RootController(BaseController):
@expose ("hello.templates.studentlist")
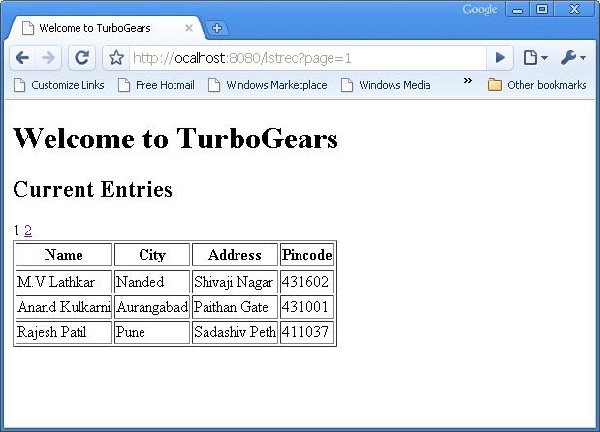
@paginate("entries", items_per_page = 3)
def listrec(self):
entries = DBSession.query(student).all()
return dict(entries = entries)
每页的项目数设置为 3。
在 studentlist.html 模板中,通过在 py:for 指令下添加 tmpl_context.paginators.entries.pager() 来启用页面导航。此模板的代码应如下所示 −
<html xmlns = "http://www.w3.org/1999/xhtml"
   xmlns:py = "http://genshi.edgewall.org/">

   <head>
      <link rel = "stylesheet" type = "text/css" media = "screen"
         href = "${tg.url('/css/style.css')}" />
      <title>Welcome to TurboGears</title>
   </head>

   <body>

      <h1>Welcome to TurboGears</h1>

      <py:with vars = "flash = tg.flash_obj.render('flash', use_js = False)">
         <div py:if = "flash" py:replace = "Markup(flash)" />
      </py:with>

      <h2>Current Entries</h2>

      <table border = '1'>
         <thead>
            <tr>
               <th>Name</th>
               <th>City</th>
               <th>Address</th>
               <th>Pincode</th>
            </tr>
         </thead>

         <tbody>
            <py:for each = "entry in entries">
               <tr>
                  <td>${entry.name}</td>
                  <td>${entry.city}</td>
                  <td>${entry.address}</td>
                  <td>${entry.pincode}</td>
               </tr>
            </py:for>

            <div>${tmpl_context.paginators.entries.pager()}</div>
         </tbody>

      </table>

   </body>

</html>
在浏览器中输入 http://localhost:8080/listrec。将显示表中的第一页记录。在此表的顶部,还可以看到页码的链接。
如何向数据网格添加分页支持
也可以向数据网格添加分页支持。在下面的示例中,分页数据网格旨在显示操作按钮。为了激活操作按钮,使用以下代码构造数据网格对象 −
student_grid = DataGrid(fields = [('Name', 'name'),('City', 'city'),
   ('Address','address'), ('PINCODE', 'pincode'),
   ('Action', lambda obj:genshi.Markup('<a
      href = "%s">Edit</a>' % url('/edit',
      params = dict(name = obj.name)))) ])
此处的操作按钮与数据网格中每行的名称参数相关联。
重写 showgrid() 函数,如下所示 −
@expose('hello.templates.grid')
@paginate("data", items_per_page = 3)

def showgrid(self):
   data = DBSession.query(student).all()
   return dict(page = 'grid', grid = student_grid, data = data)
浏览器显示分页数据网格如下 −
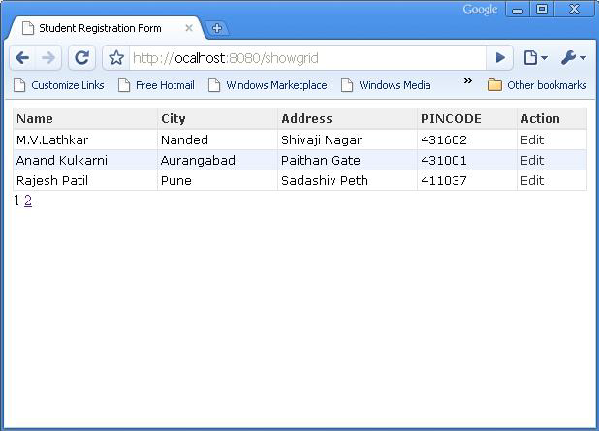
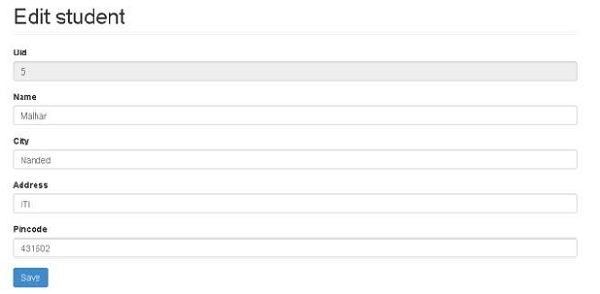
单击第三行的"编辑"按钮,它将重定向到以下 URL http://localhost:8080/edit?name=Rajesh+Patil
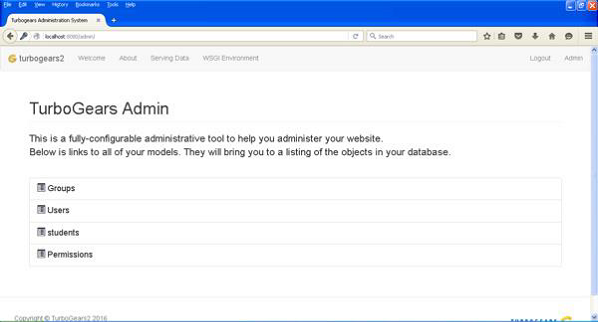
TurboGears – 管理员访问
TurboGears 提供 tgext.admin 扩展,由 tgext.crud 和 sprox 提供支持。此 Sprox 是一个用于直接从数据库模式创建 Web 小部件的包。这可用于自动创建简单的管理页面,并且是支持新快速启动应用程序中的 /admin 页面的工具包。
默认情况下,管理员将自动生成对项目 models/__init__.py 中导入的所有模型的访问权限。
如何创建 TurboGears 管理员
默认的 TurboGears 管理员是作为 AdminController 类的对象创建的 −
from tgext.admin.controller import AdminController

class RootController(BaseController):
   admin = AdminController(model, DBSession, config_type = TGAdminConfig)
这将为所有具有默认 TurboGears 管理配置的模型创建一个管理员。
通过管理器,在设置阶段创建了一个用户。现在,可以通过 http://localhost:8080/admin 访问 TurboGears 管理员。首次访问此页面时,它将要求进行身份验证。您只需提供 setup-app 命令为我们创建的用户名和密码即可 −
Username: manager
Password: managepass
为了登录快速启动项目,请将以下函数添加到 RootController 类 (controllers/root.py)。
from hello.lib.base import BaseController
from tg import expose, flash, redirect, request,url, lurl
from tg import redirect, validate
from hello import model
from hello.model import DBSession
from tgext.admin.tgadminconfig import BootstrapTGAdminConfig as TGAdminConfig
from tgext.admin.controller import AdminController
from tg.exceptions import HTTPFound

class RootController(BaseController):
   admin = AdminController(model, DBSession, config_type =  TGAdminConfig)

   @expose('hello.templates.index')
   def index(self):
      return dict(page = 'index')

   @expose('hello.templates.login')
   def login(self, came_from = lurl('/'), failure = None,    login = ''):

      if failure is not None:
         if failure == 'user-not-found':
            flash(_('User not found'), 'error')
         elif failure == 'invalid-password':
            flash(_('Invalid Password'), 'error')

      login_counter = request.environ.get('repoze.who.logins', 0)

      if failure is None and login_counter > 0:
         flash(_('Wrong credentials'), 'warning')

      return dict(page = 'login', login_counter = str(login_counter),
         came_from = came_from, login = login)
   @expose()

   def post_login(self, came_from = lurl('/')):
      if not request.identity:

         login_counter = request.environ.get('repoze.who.logins', 0) + 1
            redirect('/login', params = dict(came_from = came_from,
            __logins = login_counter))

         userid = request.identity['repoze.who.userid']
         flash(('Welcome back, %s!') % userid)

         return HTTPFound(location = came_from)
启动服务器后,通过访问 http://localhost:8080/login 登录"quickstarted"应用程序,然后输入如上所示的管理员凭据。浏览器将显示如下所示的管理页面 −
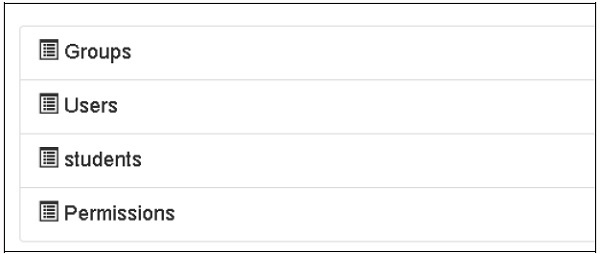
该页面显示此应用程序中创建的所有模型。您可以单击任何模型以查看其中的条目列表 −

此数据网格顶部的"新建"按钮允许添加记录。同样,此数据网格的操作列中还提供了用于编辑和删除记录的操作按钮。还显示一个搜索框,用于有条件地选择记录。
TurboGears – 授权和身份验证
TurboGears 应用程序由 gearbox 工具包的 quickstart 和 setup-app 选项创建,默认情况下启用授权和身份验证支持。auth.py 中声明的模型根据 bootstrap.py 中指定的值进行设置和初始化。
auth.py − 中声明了以下模型
用户模型
用户模型包含 tg_user 表的设计。此表由 repose.who 包使用。此 repose.who 包是 WSGI 应用程序的强大且可扩展的身份验证库。用户模型的结构如下 −
class User(DeclarativeBase):

"""
   __tablename__ = 'tg_user'

   user_id = Column(Integer, autoincrement = True, primary_key=True)
   user_name = Column(Unicode(16), unique = True, nullable = False)
   email_address = Column(Unicode(255), unique = True,nullable=False)

   display_name = Column(Unicode(255))
   _password = Column('password', Unicode(128))
   created = Column(DateTime, default = datetime.now)
此群组模型包含定义 tg_group 表。其定义在 auth.py 中给出如下 −
class Group(DeclarativeBase):
   __tablename__ = 'tg_group'

   group_id = Column(Integer, autoincrement = True,primary_key = True)
   group_name = Column(Unicode(16),unique = True,nullable = False)
   display_name = Column(Unicode(255))
   created = Column(DateTime, default = datetime.now)
还设置了另一个模型权限,其中包含权限定义。
class Permission(DeclarativeBase):
   __tablename__ = 'tg_permission'

   permission_id = Column(Integer,autoincrement = True,primary_key = True)
   permission_name = Column(Unicode(63), unique = True, nullable = False)
   description = Column(Unicode(255))
在建立模型时,这些表中添加了以下数据 −
u = model.User()
u.user_name = 'manager'
u.display_name = 'Example manager'
u.email_address = 'manager@somedomain.com'
u.password = 'managepass'

model.DBSession.add(u)
g = model.Group()
g.group_name = 'managers'
g.display_name = 'Managers Group'
g.users.append(u)

model.DBSession.add(g)
p = model.Permission()
p.permission_name = 'manage'
p.description = 'This permission gives an administrative right'
p.groups.append(g)

model.DBSession.add(p)
u1 = model.User()
u1.user_name = 'editor'
u1.display_name = 'Example editor'
u1.email_address = 'editor@somedomain.com'
u1.password = 'editpass'

model.DBSession.add(u1)
谓词模型
tg 包中的谓词模块包含谓词检查器的定义。谓词是用户必须满足才能访问请求源的条件。这样的谓词或条件可能由更多谓词组成 - 这些谓词称为复合谓词。动作控制器或控制器可能只有一个谓词,无论是单个谓词还是复合谓词。
如果用户未登录或没有适当的权限,此谓词检查器将抛出 401(HTTP 未授权),该错误会被 repoze.who 中间件捕获,以显示允许用户登录的登录页面,并在用户登录完成后将用户重定向回正确的页面。
tg.predicates 模块中定义的不同条件或谓词是 −
| Sr.No. | tg.predicates 模块 &描述 |
|---|---|
| 1 | All 检查是否满足所有指定的谓词 |
| 2 | Any 检查是否至少满足一个指定的谓词 |
| 3 | is_user 检查经过身份验证的用户的用户名是否为指定的用户名 |
| 4 | in_group 检查用户是否属于特定的组。 |
| 5 | in_all_groups 检查用户是否属于所有指定的组。 |
| 6 | in_any_group 检查用户是否属于至少一个指定的组。 |
| 7 | is_anonymous 检查当前用户是否为匿名用户。 |
| 8 | has_permission 检查当前用户具有指定的权限。 |
| 9 | has_all_permissions 检查当前用户是否已被授予所有指定的权限。 |
| 10 | has_any_permission 检查用户是否至少具有指定的权限之一。 |
例如,如果您有一个谓词,即授予属于客户组的访问权限,那么您可以使用以下内置谓词检查器 −
from tg.predicates import in_group
p in_group('customers')
以下谓词检查器将授予"root"用户或任何具有"管理"权限的用户访问权限 −
from tg.predicates import Any, is_user, has_permission
p = Any(is_user('root'), has_permission('manage'),
   sg = 'Only administrators can remove blog posts')
TurboGears - 使用 MongoDB
TurboGears 还支持 MongoDB 文档数据库。它使用 Ming,一种对象文档映射器 API。Ming 的使用与 SQLAlchemy 非常相似。Ming 查询语言使基于 SQLAlchemy 的 TurboGears 项目移植到 Ming 成为可能。
什么是 PyMongo
PyMongo 是一个 Python 发行版,其中包含用于处理 MongoDB 的工具。 Ming 扩展了 PyMongo,提供 −
- 声明式模型
- 模式验证和转换
- 模式演进
- 纯内存 MongoDB 实现
- 工作单元
- 身份映射
- 一对多、多对一和多对多关系
首先,您需要下载并安装 MongoDB。 MongoDB 的最新发行版可从 https://www.mongodb.org/downloads 下载
在 Windows 上,通过提供 -dbpath 选项 − 启动 MongoDB 服务器
C:\mongodb\bin>Mongod --dbpath d:\mongo
D:\mongo 文件夹 指定用于存储 MongoDB 数据库。服务器开始监听 http://localhost:27017。 现在要启动 MongoDB shell,请使用以下命令 −
C:\mongodb\bin>Mongo
我们的 MongoDB 环境现已准备就绪。
现在使用 -ming 选项创建一个 TurboGears 项目 −
gearbox quickstart --ming Hello
此快速启动项目将提供身份验证和授权层,类似于为 SQLAlchemy 版本提供的层。此应用程序现在将尝试连接到本地计算机上端口 27017 上的服务器。项目文件夹中的 development.ini 文件包含以下设置 −
ming.url = mongodb://localhost:27017/
ming.db = hello
使用以下命令设置项目 −
Python setup.py develop
项目文件夹包含 models 子文件夹,其中包含以下文件 −
__init__.py − 这是设置数据库访问权限的地方。您的集合应导入到此模块。例如,我们将在此包中添加学生集合。
session.py − 此文件定义数据库连接的会话。每次您必须声明 MappedClass 以指定会话来执行查询时,都需要导入此文件。
auth.py − 如果您在快速入门中启用了身份验证和授权,则会创建此文件。它定义了三个集合 repoze.who,它们进一步依赖于:用户、组和权限。
定义您的集合
默认情况下,TurboGears 以声明模式配置 Ming。这类似于 SQLAlchemy 声明支持,需要每个模型从 MappedClass 类继承。
MappedClass 要求内部有一个 __mongometa__ 子类,它进一步提供有关存储文档的集合名称以及用于存储文档的会话的详细信息。
MappedClass 还包含文档中字段的定义。 Ming 的 odm 模块有不同类型的字段属性定义 −
- FieldProperty
- ForeignIdProperty
- RelationProperty
ming.schema 模块定义了以下数据类型 −
- ming.schema.Anything
- ming.schema.Array
- ming.schema.Binary
- ming.schema.Bool
- ming.schema.Float
- ming.schema.Int
- ming.schema.ObjectId
- ming.schema.Scalar
- ming.schema.String
要在此模型中添加学生集合,请将以下代码保存为 hello/models 文件夹中的 student.py。
Hello\models\student.py
from ming import schema
from ming.odm import MappedClass
from ming.odm import FieldProperty, ForeignIdProperty
from hello.model import DBSession

Class student(MappedClass):
   class __mongometa__:
      session = DBSession
      name = 'student'

   _id = FieldProperty(schema.ObjectId)
   name = FieldProperty(schema.String(required = True))
   city = FieldProperty(schema.String(if_missing = ''))
   address = FieldProperty(schema.String(if_missing = ''))
   pincode = FieldProperty(schema.String(if_missing = ''))
最后,将此模型包含在 hello\models\__init__.py 中
# 在此处导入您的模型模块。
from hello.model.auth import User, Group, Permission
from hello.model.student import student
要设置这些模型,请运行以下 gearbox 命令 −
Gearbox setup-app
使用以下 gearbox 命令启动服务器 −
Gearbox serve –reload –debug
打开此应用程序的主页 (http://localhost:8080/) 并使用管理员凭据登录。此应用程序的管理页面将显示已设置的模型列表。 (以管理员身份登录,密码为 managepass)
还可以在 MongoDB Web 界面以及 MongoDB shell 中验证集合的创建。
ODMSession 用于使用以下函数执行多个数据库操作 −
- model.query.find()
- model.query.find_and_modify()
- model.remove()
- model.update()
- model.flush()
设计 ToscoWidget 表单
我们现在将设计一个 ToscoWidget 表单来输入学生数据并将其添加到学生模型的底层表中。
以下是创建 studentform.py 的代码 −
Hello\controllers\studentform.py
import tw2.core as twc
import tw2.forms as twf

class StudentForm(twf.Form):

   class child(twf.TableLayout):
      name = twf.TextField(size = 20)
      city = twf.TextField()
      address = twf.TextArea("",rows = 5, cols = 30)
      pincode = twf.NumberField()

   action = '/save_record'
   submit = twf.SubmitButton(value = 'Submit')
在应用程序的 Rootcontroller '/add' URL 中调用 add() 函数,该函数将在浏览器中打开上面设计的表单。然后,其提交按钮调用 save_record() 函数。它检索表单数据并将其保存在学生表中,并将应用程序重定向到 '/listrec' URL,该 URL 公开学生列表模板。
此活动的 root.py 如下 −
Hello/controllers/root.py
from hello.lib.base import BaseController
from tg import expose, flash, redirect, request,url, lurl
from tg import redirect, validate
from hello import model
from hello.model import DBSession
from hello.model.student import student

from hello.controllers.studentform import StudentForm

class RootController(BaseController):
   @expose()
   def index(self):
      return "<h1>Hello World</h1>"

   @expose ("hello.templates.studentlist")
   def listrec(self):
      entries = student.query.find()
      return dict(entries = entries)

   @expose('hello.templates.studentform')
   def add(self, *args, **kw):
      return dict(page = 'studentform', form = StudentForm)

   @expose()
   def save_record(self, **kw):
      newstudent = student(name = kw['name'],city = kw['city'],
         address = kw['address'], pincode = kw['pincode'])
      DBSession.flush()
      flash(message = "new entry added successfully")
      redirect("/listrec")
在 templates 文件夹中创建以下模板 −
Hello emplates\studentform.html
<!DOCTYPE html>
<html xmlns = "http://www.w3.org/1999/xhtml"
   xmlns:py = "http://genshi.edgewall.org/" lang = "en">

   <head>
      <title>Student Registration Form</title>
   </head>


   <body>
      <div id = "getting_started">
         ${form.display(value = dict(title = 'Enter data'))}
      </div>
   </body>

</html>
Hello emplates\studentlist.html
<html xmlns = "http://www.w3.org/1999/xhtml"
   xmlns:py = "http://genshi.edgewall.org/">

   <head>
      <link rel = "stylesheet" type = "text/css" media = "screen"
         href = ${tg.url('/css/style.css')}" />
      <title>Welcome to TurboGears</title>
   </head>

   <body>
      <h1>Welcome to TurboGears</h1>

      <py:with vars = "flash = tg.flash_obj.render('flash', use_js = False)">
         <div py:if = "flash" py:replace = "Markup(flash)" />
      </py:with>

      <h2>Current Entries</h2>

      <table border = '1'>
         <thead>
            <tr>
               <th>Name</th>
               <th>City</th>
               <th>Address</th>
               <th>Pincode</th>
            </tr>
         </thead>

         <tbody>
            <py:for each = "entry in entries">
               <tr>
                  <td>${entry.name}</td>
                  <td>${entry.city}</td>
                  <td>${entry.address}</td>
                  <td>${entry.pincode}</td>
               </tr>
            </py:for>
         </tbody>
      </table>

   </body>

</html>
重启服务器,在浏览器中输入http://localhost:8080/add −
每次添加数据并按下提交按钮时,都会显示当前条目列表。
TurboGears – 脚手架
Gearbox 工具包包含 scaffold 命令,该命令对于快速创建 TurboGears 应用程序的新组件非常有用。由 gearbox 的 quickstart 命令生成的应用程序在模型文件夹 (model.py.template)、模板文件夹 (template.html.template) 和控制器文件夹 (controller.py.template) 中有一个骨架模板。这些".template"文件用作为应用程序创建新脚手架的基础
例如,为了创建一个名为 mymodel 的新模型,只需运行以下命令 −
gearbox scaffold model mymodel
此命令将生成 model/mymodel.py,其中定义了 newmodel 类。
# -*- coding: utf-8 -*-
"""Mymodel model module."""
from sqlalchemy import *
from sqlalchemy import Table, ForeignKey, Column
from sqlalchemy.types import Integer, Unicode, DateTime, LargeBinary
from sqlalchemy.orm import relationship, backref
from hello.model import DeclarativeBase, metadata, DBSession

class Mymodel(DeclarativeBase):
   __tablename__ = 'mymodels'

   uid = Column(Integer, primary_key = True)
   data = Column(Unicode(255), nullable = False)

   user_id = Column(Integer, ForeignKey('tg_user.user_id'), index = True)
   user = relationship('User', uselist = False,
      backref = backref('mymodels',cascade = 'all, delete-orphan'))
   __all__ = ['Mymodel']
用户现在可以根据需要修改表结构,然后将其导入 model/__init__.py 中,以使模型在应用程序中可用。
为了创建模型、处理它的控制器类和索引页,可以通过以下命令同时创建这三个组件。
gearbox scaffold model controller template mymodel
此命令将导致 controllers\mymodel.py,其中正确定义了 MymodelController 类。
# -*- coding: utf-8 -*-
"""Mymodel 控制器模块"""

来自 tg 导入 reveal、redirect、validate、flash、url
# 来自 tg.i18n 导入 ugettext as _
# 来自 tg 导入谓词

来自 hello.lib.base 导入 BaseController
# 来自hello.model import DBSession

class MymodelController(BaseController):
    # 如果您的控制器需要经过身份验证的用户,请取消注释此行
    # allow_only = predicates.not_anonymous()

    @expose('hello.templates.mymodel')
    def index(self, **kw):
      return dict(page = 'mymodel-index')
要开始使用此控制器,请将其安装在应用程序 RootController 中,以定义 MymodelController 的一个实例。在控制器 oot.py 中添加以下行 −
从 hello.controller.mymodel 导入 MymodelController

class RootController(BaseController): mymodel = MymodelController()
还将在 templates 文件夹中创建模板支架 templates\mymodel.html。它将充当"/mymodel"URL 的索引页。
templates 文件夹中生成的 mymodel.html 文件将如下所示 −
<html xmlns = "http://www.w3.org/1999/xhtml"
   xmlns:py = "http://genshi.edgewall.org/"
   xmlns:xi = "http://www.w3.org/2001/XInclude">

   <xi:include href = "master.html" />

   <head>
      <title>Mymodel</title>
   </head>

   <body>
      <div class = "row">
         <div class = "col-md-12">
            <h2>Mymodel</h2>
            <p>Template page for Mymodel</p>
         </div>
      </div>
   </body>

</html>
TurboGears – Hooks 钩子
TurboGears 中有三种方法可以将行为插入现有应用程序。
Hook − 这是一种可以定义事件并在事件发出时通知已注册侦听器的机制。
控制器包装器 − 它位于 TurboGears 和控制器之间,因此可以像装饰器一样扩展控制器。因此,它可以附加到任何第三方控制器应用程序。
应用程序包装器 −它类似于任何 WSGI 中间件,但仅在 TurboGears 上下文中工作。
在本章中,我们将讨论如何在现有应用程序内使用钩子。
钩子
钩子是在应用程序的配置文件 app_cfg.py 中注册的事件。然后,任何控制器都通过事件装饰器挂接到这些事件上。
以下钩子在 TurboGears 中定义 −
| Sr.No. | 钩子 &描述 |
|---|---|
| 1 | Startup() 仅限应用程序范围,在应用程序启动时调用。 |
| 2 | shutdown() 仅限应用程序范围,在应用程序退出时调用。 |
| 3 | configure_new_app 新应用程序由应用程序配置器创建。 |
| 4 | before_config(app) 仅限应用程序范围,在创建后立即调用应用程序,但在设置选项和中间件之前 |
| 5 | after_config(app) 仅限应用程序范围,在完成所有设置后调用。 |
| 6 | before_validate 在执行验证之前调用 |
| 7 | before_call 在验证之后调用,在调用实际控制器方法之前。 |
| 8 | before_render 在渲染控制器模板之前调用,输出为控制器返回值。 |
| 9 | after_render 在完成渲染控制器模板后调用。 |
注册一个钩子
为了注册一个钩子,请在app_cfg.py中创建函数,然后使用以下代码注册它们 −
tg.hooks.register(hookane, function, controller)
在下面的代码中,on_startup、on_shutdown 和 before_render 钩子是在 app_cfg.py 中注册。
def on_startup():
   print 'hello, startup world'

def on_shutdown():
   print 'hello, shutdown world'

def before_render(remainder, params, output):
   print 'system wide before render'

# ... (base_config init code)
tg.hooks.register('startup', on_startup)
tg.hooks.register('shutdown', on_shutdown)
tg.hooks.register('before_render', before_render)
before_render 钩子已在 Rootcontroller 中的控制器函数中注册。在 controllers oot.py 中添加以下代码。
from tg.decorators import before_render

class RootController(BaseController):
   @expose('hello.templates.index')
   @before_render(before_render_cb)

   def index(self, *args, **kw):
      return dict(page = 'index')
当应用程序启动时,控制台中会显示启动消息。
你好,启动世界
在 http://127.0.0.1:8080 上启动标准 HTTP 服务器
当在浏览器中输入"/"URL 时,控制台上会显示与 before_render 钩子相对应的消息。
system wide before render
Going to render {'page': 'index'}
TurboGears - 编写扩展
TurboGears 扩展由 tgext.* 包 标识。Gearbox 工具包提供 tgext 命令来创建示例扩展。例如 −
gearbox tgext -n myextension
此命令的其他可选参数是 −
--author − 包作者的姓名。
--email − 包作者的电子邮件。
--licence − 包使用的许可证。默认为 MIT。
--description −包的描述。
--keywords − 包关键字(默认:turbogears2.extension)。
这将创建一个 tgext.myextension 目录,其中包含一个简单的示例扩展。
在目录 − 内运行 setup.py
Python setup.py install
tgext/myextension 文件夹中的 _init_.py 文件包含 −
Plugme 函数 − 这是扩展的入口点。
SetupExtension 类 −扩展初始化在这里进行。
类内的 On_startup 函数 − 是在类内的 __call__ 函数上注册的钩子。
tgext\myextension\__init__.py 的简要版本。
from tg import config
from tg import hooks
from tg.configuration import milestones

import logging
log = logging.getLogger('tgext.myextension')

def plugme(configurator, options = None):
   if options is None:
      options = {}
   log.info('Setting up tgext.myextension extension...')
   milestones.config_ready.register(SetupExtension(configurator))

   return dict(appid='tgext.myextension')

class SetupExtension(object):
   def __init__(self, configurator):
      self.configurator = configurator

   def __call__(self):
      log.info('>>> Public files path is %s' % config['paths']['static_files'])
      hooks.register('startup', self.on_startup)

   def echo_wrapper_factory(handler, config):
      def echo_wrapper(controller, environ, context):
         log.info('Serving: %s' % context.request.path)
         return handler(controller, environ, context)
      return echo_wrapper

   self.configurator.register_wrapper(echo_wrapper_factory)

   def on_startup(self):
      log.info('+ Application Running!')
安装扩展后,通过在应用程序的 app_cfg.py 配置文件中进行以下添加来启用它。
from tgext.myextension import plugme

plugme(base_config)
如果我们使用 gearbox 服务器命令启动服务器,则可以通过以下命令在控制台上查看新注册扩展的通知 −
14:29:13,250 INFO [tgext.myextension] Setting up tgext.myextension extension...
14:29:13,453 INFO [tgext.myextension] >>> Public files path is c:	ghello\hello\hello\public
14:29:13,453 INFO [tgext.myextension] + Application Running!

Starting Standard HTTP server on http://127.0.0.1:8080
TurboGears - 可插拔应用程序
如果您的扩展需要公开模型和控制器,您可能需要查看可插拔应用程序,这些应用程序旨在创建可重复使用的 Turbogears 应用程序,这些应用程序可以插入其他应用程序以扩展其功能。
使用以下 gearbox 命令创建可插拔应用程序 −
gearbox quickstart-pluggable plugtest
这些可插拔应用程序可以定义自己的 −
Controllers − 当应用程序被清除时,它将自动安装。
Models −它将可以在插入的应用程序内部和外部使用。
Helpers − 它可以自动在应用程序模板中的"H"对象中公开。
Bootstrap − 它将会在调用 setup-app 时执行。
Statics − 它将在其自己的私有路径中可用。
安装此 plugtest 应用程序并通过在 app_cfg.py 中进行以下修改来挂载它。
from tgext.pluggable import plug
plug(base_config, plugtest)
TurboGears – RESTful 应用程序
REST 代表 REpresentational State Ttransfer。REST 是基于 Web 标准的架构,使用 HTTP 协议进行数据通信。它围绕资源展开,其中每个组件都是资源,并且资源通过通用接口使用 HTTP 标准方法进行访问。REST 最初由 Roy Fielding 于 2000 年提出。
什么是 RestController
TurboGears 中的 RestController 提供了一种访问请求方法(而不仅仅是 URL)的机制。标准 HTTP 措辞包括:GET、POST、PUT 和 DELETE。 RestController 支持这些,还添加了一些 URL 调度的快捷方式,使数据显示为表单和列表,对用户来说更容易一些。
为了解释 RESTful 如何与 TurboGears 配合使用,我们将定义一个简单的 Web 服务来公开学生列表。
学生模型的代码如下 −
model\student.py
# -* - coding: utf-8 -*-
from sqlalchemy import *

from sqlalchemy.orm import mapper, relation, relation, backref
from sqlalchemy import Table, ForeignKey, Column
from sqlalchemy.types import Integer, Unicode, DateTime
from hello.model import DeclarativeBase, metadata, DBSession
from datetime import datetime

class student(DeclarativeBase):
   __tablename__ = 'student'

   uid = Column(Integer, primary_key = True)
   name = Column(Unicode(20), nullable = False, default = '')
   city = Column(Unicode(20), nullable = False, default = '')
   address = Column(Unicode(100), nullable = False, default = '')
   pincode = Column(Unicode(10), nullable = False, default = '')
现在基于 RestController 创建一个控制器并提供一个视图函数来以 json 格式列出学生列表。
Controllers\student.py
from tg import RestController
from tg import expose
from hello import model
from hello.model import DBSession
from hello.model.student import student
from tg.decorators import with_trailing_slash

class StudentController(RestController):
   @expose('json')
   def get_all(self):
      students = DBSession.query(student).all()
      return dict(students=students)
通过在 root.py 中合并以下行,将此 StudentController 挂载到应用程序的 RootController 中 −
from hello.controllers.student import StudentController

class RootController(BaseController):

    students = StudentController()
转到 http://localhost:8080/students,它将提供以 json 格式编码的学生列表。
我们使用 post 方法来定义如何将学生保存到数据库。每当使用 POST 请求访问 http://localhost:8080/student url 时,都会调用此方法 −
@expose('json')
def post(self, name, city, address, pincode):
   newstudent = student(name = name, city = city, address = address, pincode = pincode)
   DBSession.add(newstudent)
   DBSession.flush()
   return dict(student = newstudent)
使用 get_one() 方法,我们可以向用户显示数据库中的一项 −
@expose('json')
def get_one(self, movie_id):
   newstudent = DBSession.query(student).get(uid)
   return dict(movie = movie)
PUT 是使用 REST 更新现有记录的方法 −
@expose('json')
def put(self, name = name, city = city, address =  address, pincode = pincode, **kw):
   newstudent = DBSession.query(student).get(name)
   newstudent.name = name
   newstudent.city = city
   newstudent.address = address
   newstudent.pincode = pincode
   return dict(student = newstudent)
删除的主要部分附加在 post_delete 方法中。在这里我们实际上从数据库中删除记录,然后重定向回列表页面 −
@expose('json')
def post_delete(self, uid, **kw):
   newstudent = DBSession.query(student).get(uid)
   DBSession.delete(newstudent)
   return dict(movie = newstudent.uid)
TurboGears - 部署
要从开发环境切换到成熟的生产环境,需要在真实的 Web 服务器上部署应用程序。根据您拥有的内容,可以使用不同的选项来部署 TurboGears Web 应用程序。
带有 mod_wsgi 的 Apache
mod_wsgi 是 Graham Dumpleton 开发的 Apache 模块。它允许使用 Apache Web 服务器提供 WSGI 程序。
首先,如果尚未安装,请为您的平台安装 Apache 2.X。安装 Apache 后,安装 mod_wsgi。在服务器上创建并激活 Python 虚拟环境,并在其中安装 TurboGears。
在应用程序目录中安装您的应用程序,然后创建一个名为 app.wsgi 的脚本。
按如下方式配置 Apache 安装 −
<VirtualHost *:80>
   ServerName www.site1.com
   WSGIProcessGroup www.site1.com
   WSGIDaemonProcess www.site1.com user = <username>
      group = www-data threads = 4 python-path = <pythonpath>
   WSGIScriptAlias myapp/app.wsgi

   #Serve static files directly without TurboGears
   Alias /images
   Alias /css
   Alias /js
   CustomLog
   ErrorLog
</VirtualHost>
重新启动 Apache
在浏览器中输入 http://www.site1.com/ 以访问应用程序。
Circus 和 Chaussette 下的 TurboGears
Circus 是一个进程和套接字管理器。它可用于监视和控制进程和套接字。与 Chaussette WSGI 服务器配对时,它可以成为部署应用程序和管理应用程序所需的任何相关进程的强大工具。
TurboGears - GoogleAppEngine
从以下 URL 安装适用于 Python 的 Google AppEngine SDK − https://cloud.google.coms
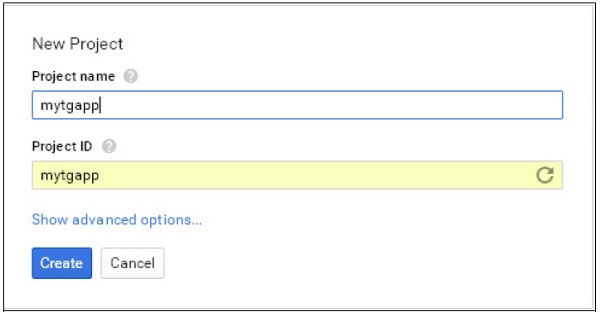
在您的系统上安装 Google AppEngine。然后打开 Google 开发者控制台并使用您的 Google 帐户登录 − https://console.developers.google.com/start
创建一个名为 mytgapp 的新项目 −
使用 Google AppEngine Launcher 创建一个名为 mytgapp 的新应用程序。
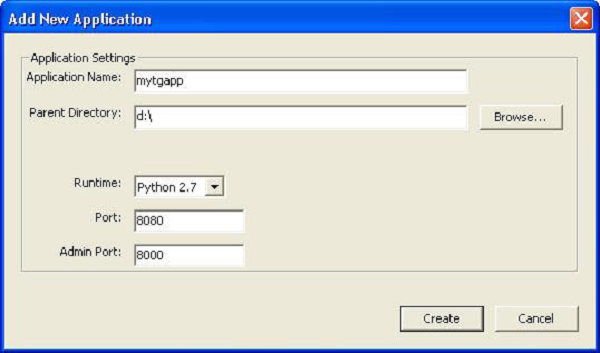
将在指定目录中创建以下文件 −
- app.yaml
- favicon.ico
- index.yaml
- main.py
默认情况下,创建的应用程序依赖于 Webapp2 框架。要删除此依赖项,请编辑 app.yaml 文件并删除以下部分 −
libraries:
    - name: webapp2
    version: "2.5.2"
在名为 mytgapp 的目录中创建一个临时虚拟环境并安装 TurboGears。在其中创建一个 TurboGears 应用程序。现在我们可以继续编辑由 AppEngine 启动以运行我们的应用程序的 main.py 文件,并在其中实际编写一个 TurboGears 应用程序。
在 main.py 中添加以下内容−
import os
import site
site.addsitedir(os.path.join(os.path.dirname(__file__), 'packages'))
from tg import expose, TGController, AppConfig

class RootController(TGController):
   @expose()
   def index(self):
      return "<h1>Hello World</h1>"

config = AppConfig(minimal = True, root_controller = RootController())
app = config.make_wsgi_app()
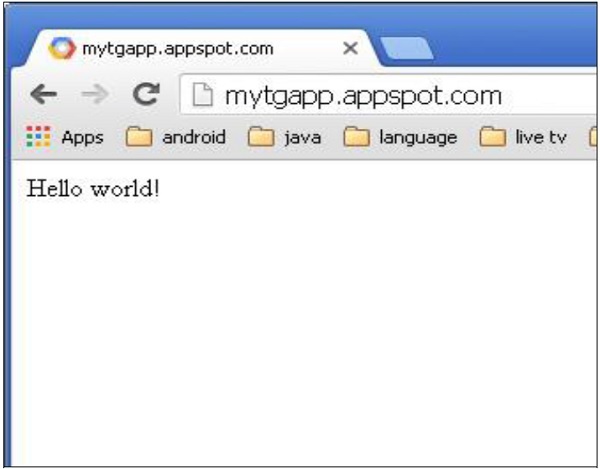
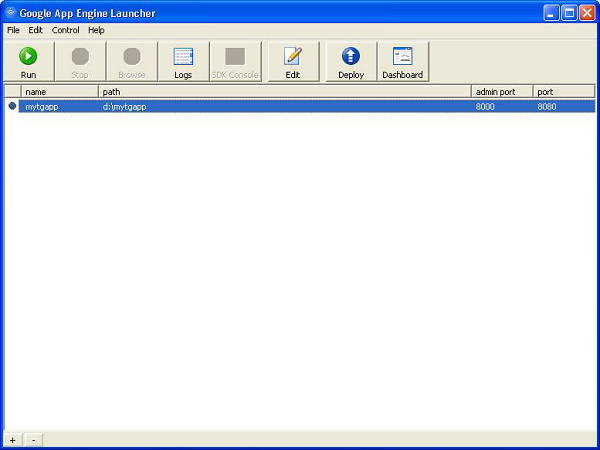
现在从 AppEngine Launcher 运行应用程序并单击浏览按钮以查看该应用程序在本地主机上是否正常运行。
我们已经在开发者控制台中创建了一个名为 mytgapp 的项目。现在单击 Launcher 中的部署按钮。部署过程结束后,请访问 http://mytgapp.appspot.com/ 在线查看我们的应用程序。