Symfony - 快速指南
Symfony - 简介
PHP Web 框架是一组类,有助于开发 Web 应用程序。Symfony 是一个开源 MVC 框架,用于快速开发现代 Web 应用程序。Symfony 是一个全栈 Web 框架。它包含一组可重复使用的 PHP 组件。您可以在应用程序中使用任何 Symfony 组件,独立于框架。
Symfony 具有大量功能和活跃的社区。它具有使用 YAML、XML 或注释的灵活配置。Symfony 与独立库和 PHP Unit 集成。Symfony 主要受到 Ruby on Rails、Django 和 Spring Web 应用程序框架的启发。许多开源项目都在使用 Symfony 组件,包括 Composer、Drupal 和 phpBB。
Symfony 框架由多个组件组成,例如 HttpFoundation 组件,它理解 HTTP 并提供其他组件使用的良好请求和响应对象。其他组件只是辅助组件,例如 Validator,它有助于验证数据。Kernel 组件是系统的核心。Kernel 基本上是管理环境的"主类",负责处理 http 请求。
Symfony 结构井然有序、代码整洁、编程习惯良好,让 Web 开发变得更加简单。 Symfony 非常灵活,可用于构建微型网站并处理具有数十亿个连接的企业应用程序。
Symfony 框架 - 功能
Symfony 旨在优化 Web 应用程序的开发,并且每次发布时功能都会增加。
Symfony 框架的一些显着功能如下 −
- 基于模型-视图-控制器的系统
- 高性能 PHP 框架
- 灵活的 URI 路由
- 代码可重用且更易于维护
- 会话管理
- 错误日志记录
- 功能齐全的数据库类,支持多个平台
- 支持庞大而活跃的社区
- 一组解耦且可重用的组件
- 标准化和互操作性应用程序
- 防止跨站点请求伪造和其他攻击
- Twig 模板引擎
Symfony 为开发人员提供了很大的灵活性。它具有出色的调试、代码可读性和开发可扩展程序的功能。
Symfony 是一个全栈 Web 框架;它是创建 Web 应用程序的非常有效的工具。许多公司为客户提供 Symfony 服务。
以下是使用 Symfony 框架可获得的一些好处。
微框架 − Symfony 可用于开发特定功能。您无需重新开发或安装整个框架。
减少开发时间开销。
极其成熟的模板引擎,可快速向用户提供内容。
兼容且可扩展 − 程序员可以轻松扩展所有框架类。
Symfony 框架 - 应用程序
Symfony 组件可用作其他应用程序的一部分,例如 Drupal、Laravel、phpBB、Behat、Doctrine 和 Joomla。
Drupal 8 − Drupal 是一个开源内容管理 PHP 框架。 Drupal 8 使用 Symfony 的核心层并对其进行扩展以提供对 Drupal 模块的支持。
Thelia − Thelia 是一个基于 Symfony 的电子商务解决方案。最初,Thelia 是用 PHP 代码和 MySQL 编写的,但是,它无法生成更快的应用程序。为了克服这个缺点,Thelia 与 Symfony 集成以可定制的方式开发应用程序。
Dailymotion − Dailymotion 是世界上最大的独立视频娱乐网站之一,总部位于法国。一旦他们决定迁移具有大型社区的开源框架,Dailymotion 开发人员就决定使用 Symfony 组件功能来获得其灵活性。
Symfony - 安装
本章介绍如何在您的机器上安装 Symfony 框架。Symfony 框架的安装非常简单易行。您有两种方法可以在 Symfony 框架中创建应用程序。第一种方法是使用 Symfony Installer,这是一个在 Symfony 框架中创建项目的应用程序。第二种方法是基于作曲家的安装。让我们在以下部分逐一详细介绍每种方法。
系统要求
在安装之前,您需要满足以下系统要求。
- Web 服务器(以下任一项)
- WAMP (Windows)
- LAMP (Linux)
- XAMP (Multi-platform)
- MAMP (Macintosh)
- Nginx (Multi-platform)
- Microsoft IIS (Windows)
- PHP built-in development web server (Multi-platform)
- 操作系统:跨平台
- 浏览器支持:IE(Internet Explorer 8+)、Firefox、Google Chrome、Safari、Opera
- PHP 兼容性:PHP 5.4 或更高版本。要获得最大收益,请使用最新版本。
我们将在本教程中使用 PHP 内置开发 Web 服务器。
Symfony 安装程序
Symfony 安装程序用于在 Symfony 框架中创建 Web 应用程序。现在,让我们使用以下命令配置 Symfony 安装程序。
$ sudo mkdir -p /usr/local/bin
$ sudo curl -LsS https://symfony.com/installer -o /usr/local/bin/symfony
$ sudo chmod a+x /usr/local/bin/symfony
现在,您已在计算机上安装了 Symfony 安装程序。
创建您的第一个 Symfony 应用程序
以下语法用于创建最新版本的 Symfony 应用程序。
语法
symfony new app_name
这里,app_name 是您的新应用程序名称。您可以指定任何您想要的名称。
示例
symfony new HelloWorld
执行上述命令后,您将看到以下响应。
Downloading Symfony...

0 B/5.5 MiB ░░░░░░░░░░░
……………………………………………………………
……………………………………………………………
Preparing project...
✔  Symfony 3.2.7 was successfully installed. Now you can:
   * Change your current directory to /Users/../workspace/firstapp
   * Configure your application in app/config/parameters.yml file.
   * Run your application:
      1. Execute the php bin/console server:run command.
      2. Browse to the http://localhost:8000 URL.
   * Read the documentation at http://symfony.com/doc
此命令会创建一个名为"firstapp/"的新目录,其中包含 Symfony 框架最新版本的空项目。
安装特定版本
如果您需要安装特定的 Symfony 版本,请使用以下命令。
symfony new app_name 2.8
symfony new app_name 3.1
基于 Composer 的安装
您可以使用 Composer 创建 Symfony 应用程序。希望您已在计算机上安装了 Composer。如果未安装 Composer,请下载并安装。
以下命令用于使用 Composer 创建项目。
$ composer create-project symfony/framework-standard-edition app_name
如果需要指定特定版本,可以在上述命令中指定。
运行应用程序
移动到项目目录并使用以下命令运行应用程序。
cd HelloWorld
php bin/console server:run
执行上述命令后,打开浏览器并请求 URL http://localhost:8000/。它会产生以下结果。
结果

Symfony - 架构
Symfony 基本上是高质量组件和包的集合。组件是提供单一核心功能的类的集合。例如,Cache 组件 提供缓存功能,可将其添加到任何应用程序中。组件是 Symfony 应用程序的构建块。Symfony 拥有 30 多个高质量组件,它们用于许多 PHP 框架,如 Laravel、Silex 等。
包类似于插件,但易于创建和使用。实际上,Symfony 应用程序本身就是由其他包组成的包。单个包可以使用任意数量的 Symfony 组件以及第三方组件来提供 Web 框架、数据库访问等功能。Symfony 核心 Web 框架是一个名为 FrameworkBundle 的包,还有一个名为 FrameworkExtraBundle 的包,它提供了编写 Web 应用程序的更复杂的选项。
下图中指定了组件、包和 Symfony 应用程序之间的关系。

Web 框架
Symfony 主要用于相对轻松地编写高质量的 Web 应用程序。它提供了各种选项来编写不同类型的 Web 应用程序,从简单的网站到基于 REST 的高级 Web 服务。Symfony 将 Web 框架作为单独的包提供。 Symfony Web 框架中使用的常见包如下 −
- FrameworkBundle
- FrameworkExtraBundle
- DoctrineBundle
Symfony Web 框架基于模型-视图-控制器 (MVC) 架构。Model 表示我们业务实体的结构。View 根据情况以最佳方式向用户显示模型。Controller 处理来自用户的所有请求,通过与 Model 交互完成实际工作,并最终向 View 提供必要的数据以将其显示给用户。
Symfony Web 框架提供了企业级应用程序所需的所有高级功能。以下是 Symfony Web 应用程序的简单工作流程。
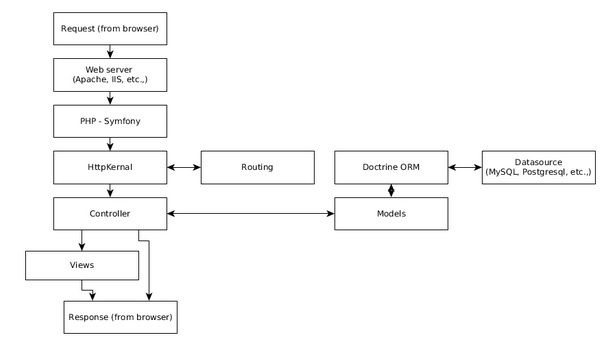
工作流程包括以下步骤。
步骤 1 − 用户通过浏览器向应用程序发送请求,例如 http://www.symfonyexample.com/index。
步骤 2 − 浏览器将向 Web 服务器发送请求,例如 Apache Web 服务器。
步骤 3 − Web 服务器将请求转发到底层 PHP,然后 PHP 将其发送到 Symfony Web 框架。
步骤 4 − HttpKernel 是 Symfony Web 框架的核心组件。 HttpKernel 使用路由组件解析给定请求的控制器,并将请求转发到目标控制器。
步骤 5 − 所有业务逻辑都发生在目标控制器中。
步骤 6 − 控制器将与模型交互,模型又通过 Doctrine ORM 与数据源交互。
步骤 7 − 一旦控制器完成该过程,它将自己或通过视图引擎生成响应,并将其发送回 Web 服务器。
步骤 8 − 最后,Web 服务器将响应发送到请求的浏览器。
Symfony - 组件
如前所述,Symfony 组件是独立的 PHP 库,提供特定功能,可用于任何 PHP 应用程序。Symfony 的每个版本都引入了有用的新组件。目前,Symfony 框架中有 30 多个高质量组件。让我们在本章中了解 Symfony 组件的用法。
安装 Symfony 组件
可以使用 composer 命令轻松安装 Symfony 组件。可以使用以下通用命令安装任何 Symfony 组件。
cd /path/to/project/dir
composer require symfony/<component_name>
让我们创建一个简单的 php 应用程序并尝试安装 Filesystem 组件。
步骤 1 − 为应用程序创建一个文件夹,filesystem-example
cd /path/to/dev/folder
mdkir filesystem-example
cd filesystem-example
步骤 2 − 使用以下命令安装 Filesystem 组件。
composer require symfony/filesystem
步骤 3 − 创建一个文件 main.php 并输入以下代码。
<?php
   require_once __DIR__ . '/vendor/autoload.php';
   use Symfony\Component\Filesystem\Filesystem;
   use Symfony\Component\Filesystem\Exception\IOExceptionInterface;

   $fs = new Filesystem();
   try {
      $fs->mkdir('./sample-dir');
      $fs->touch('./sample-dir/text.txt');
   } catch (IOExceptionInterface $e) {
      echo $e;
   }
?>
第一行非常重要,它从使用 Composer 命令安装的所有组件中加载所有必要的类。接下来的几行使用 Filesystem 类。
步骤 4 − 使用以下命令运行应用程序,它将在其下创建一个新文件夹 sample-dir 和一个文件 test.txt。
php main.php
Symfony 组件的详细信息
Symfony 提供的组件范围广泛,从简单功能(例如文件系统)到高级功能(例如事件、容器技术和依赖注入)。在以下部分中,让我们逐一了解所有组件。
文件系统
文件系统组件提供与文件和目录相关的基本系统命令,例如文件创建、文件夹创建、文件存在等。可以使用以下命令安装文件系统组件。
composer require symfony/filesystem
Finder
Finder 组件提供流畅的类来查找指定路径中的文件和目录。它提供了一种简单的方法来迭代路径中的文件。可以使用以下命令安装 Finder 组件。
composer require symfony/finder
控制台
控制台组件提供各种选项来轻松创建可以在终端中执行的命令。 Symfony 广泛使用 Command 组件来提供各种功能,例如创建新应用程序、创建包等。甚至可以使用 Symfony 命令 php bin/console server:run 调用内置的 PHP Web 服务器,如安装部分所示。可以使用以下命令安装 Console 组件。
composer require symfony/console
让我们创建一个简单的应用程序,并使用 Console 组件创建一个命令 HelloCommand 并调用它。
步骤 1 −使用以下命令创建一个项目。
cd /path/to/project
composer require symfony/console
步骤 2 − 创建文件 main.php 并包含以下代码。
<?php
   require __DIR__ . '/vendor/autoload.php';
   use Symfony\Component\Console\Application;

   $app = new Application();
   $app->run();
?>
Application 类设置了基本控制台应用程序的必要功能。
步骤 3 − 运行应用程序 php main.php,它将产生以下结果。
Console Tool
Usage:
   command [options] [arguments]
Options:
   -h, --help            Display this help message
   -q, --quiet           Do not output any message
   -V, --version         Display this application version
         --ansi            Force ANSI output
         --no-ansi         Disable ANSI output
   -n, --no-interaction  Do not ask any interactive question
   -v|vv|vvv, --verbose  Increase the verbosity of messages: 1 for normal output,
      2 for more verbose output and 3 for debug
Available commands:
   help  Displays help for a command
   list  Lists commands
步骤 4 − 创建一个名为 HelloCommand 的类,并扩展 main.php 中的 Command 类。
use Symfony\Component\Console\Command\Command;
use Symfony\Component\Console\Input\InputInterface;
use Symfony\Component\Console\Output\OutputInterface;
use Symfony\Component\Console\Input\InputArgument;

class HelloCommand extends Command {
}
该应用程序使用 Command 组件中提供的以下四个类。
Command − 用于创建新命令
InputInterface − 用于设置用户输入
InputArgument − 用于获取用户输入
OutputInterface − 用于将输出打印到控制台
步骤 5 − 创建函数 configure() 并设置名称、说明和帮助文本。
protected function configure() {
   $this
      ->setName('app:hello')
      ->setDescription('Sample command, hello')
      ->setHelp('This command is a sample command')
}
步骤 6 − 为命令创建一个输入参数 user 并设置为强制参数。
protected function configure() {
   $this
      ->setName('app:hello')
      ->setDescription('Sample command, hello')
      ->setHelp('This command is a sample command')
      ->addArgument('name', InputArgument::REQUIRED, 'name of the user');
}
步骤 7 − 创建一个函数 execute(),其中包含两个参数 InputArgument 和 OutputArgument。
protected function execute(InputInterface $input, OutputInterface $output) {
}
步骤 8 − 使用 InputArgument 获取用户输入的用户详细信息,并使用 OutputArgument 将其打印到控制台。
protected function execute(InputInterface $input, OutputInterface $output) {
   $name = $input->getArgument('name');
   $output->writeln('Hello, ' . $name);
}
步骤 9 − 使用 Application 类的 add 方法将 HelloCommand 注册到应用程序中。
$app->add(new HelloCommand());
完整的应用程序如下。
<?php
   require __DIR__ . '/vendor/autoload.php';
   use Symfony\Component\Console\Application;
   use Symfony\Component\Console\Command\Command;
   use Symfony\Component\Console\Input\InputInterface;
   use Symfony\Component\Console\Output\OutputInterface;
   use Symfony\Component\Console\Input\InputArgument;

   class HelloCommand extends Command {
      protected function configure() {
         $this
            ->setName('app:hello')
            ->setDescription('Sample command, hello')
            ->setHelp('This command is a sample command')
            ->addArgument('name', InputArgument::REQUIRED, 'name of the user');
      }
      protected function execute(InputInterface $input, OutputInterface $output) {
         $name = $input->getArgument('name');
         $output->writeln('Hello, ' . $name);
      }
      $app = new Application();
      $app->add(new HelloCommand());
      $app->run();
   }
?>
步骤 10 − 现在,使用以下命令执行应用程序,结果将如预期的那样为 Hello, Jon。
php main.php app:hello Jon
Symfony 在任何 Symfony Web 应用程序的 bin 目录中附带一个名为 console 的预构建二进制文件,可用于调用应用程序中的命令。
进程
进程组件提供以安全高效的方式在子进程中运行任何系统命令的选项。可以使用以下命令安装进程组件。
composer require symfony/process
ClassLoader
ClassLoader 组件为 PSR-0 和 PSR-4 类加载器标准提供实现。它可用于自动加载类。它将在不久的将来被弃用。基于 Composer 的类加载器优于此组件。可以使用以下命令安装 ClassLoader 组件。
composer require symfony/class-loader
PropertyAccess
PropertyAccess 组件提供各种选项,可使用字符串表示法读取和写入对象和数组详细信息。例如,可以使用 [price] 字符串动态访问具有键 price 的数组 Product。
$product = array(
   'name' => 'Cake'
   'price' => 10
);
var priceObj = $propertyAccesserObj->getValue($product, '[price]');
可以使用以下命令安装 PropertyAccess 组件。
composer require symfony/property-access
PropertyInfo
PropertyInfo 组件与 PropertyAccess 组件类似,但它仅适用于 PHP 对象并提供更多功能。
class Product {
   private $name = 'Cake';
   private $price = 10;

   public function getName() {
      return $this->name;
   }
   public function getPrice() {
      return $this->price;
   }
}
$class = Product::class;
$properties = $propertyInfoObj->getProperties($class);
/*
   Example Result
   --------------
   array(2) {
      [0] => string(4) "name"
      [1] => string(5) "price"
   }
*/
可以使用以下命令安装 PropertyInfo 组件。
composer require symfony/property-info
EventDispatcher
EventDispatcher 组件在 PHP 中提供基于事件的编程。它使对象能够通过分派事件并监听它们来相互通信。我们将在事件和事件监听器章节中学习如何创建事件并监听它们。
可以使用以下命令安装 EventDispatcher 组件。
composer require symfony/event-dispatcher
DependencyInjection
DependencyInjection 组件提供了一种简单而有效的机制来创建具有其依赖项的对象。当项目增长时,它会具有许多具有深度依赖性的类,需要正确处理。否则,项目将失败。 DependencyInjection 提供了一个简单而强大的容器来处理依赖关系。我们将在服务容器章节中了解容器和依赖注入概念。
可以使用以下命令安装 DependencyInjection 组件。
composer require symfony/dependency-injection
Serializer
Serializer 组件提供了一个选项,可以将 PHP 对象转换为特定格式,例如 XML、JSON、二进制等,然后允许它将其转换回原始对象而不会丢失任何数据。
可以使用以下命令安装 Serializer 组件。
composer require symfony/serializer
Config
Config 组件提供了加载、解析、读取和验证 XML、YAML、PHP 和 ini 类型配置的选项。它还提供了各种选项来从数据库加载配置详细信息。这是以清晰简洁的方式配置 Web 应用程序的重要组件之一。可以使用以下命令安装配置组件。
composer require symfony/config
ExpressionLanguage
ExpessionLanguage 组件提供了一个成熟的表达式引擎。表达式是一行代码,旨在返回一个值。表达式引擎可以轻松编译、解析和获取表达式的值。它允许非 PHP 程序员(例如系统管理员)在配置环境(文件)中使用一个或多个表达式。 ExpressionLanguage 组件可以使用以下命令安装。
composer require symfony/expression-language
OptionsResolver
OptionsResolver 组件提供了一种方法来验证我们系统中使用的选项系统。例如,数据库设置放在一个数组 dboption 中,以主机、用户名、密码等作为键。在使用它连接到数据库之前,您需要验证条目。OptionsResolver 通过提供一个简单的类 OptionsResolver 和一个方法解析器来简化此任务,它可以解析数据库设置,如果有任何验证问题,它会报告它。
$options = array(
   'host'     => '<db_host>',
   'username' => '<db_user>',
   'password' => '<db_password>',
);
$resolver = new OptionsResolver();
$resolver->setDefaults(array(
   'host'     => '<default_db_host>',
   'username' => '<default_db_user>',
   'password' => '<default_db_password>',
));
$resolved_options = $resolver->resolve($options);
可以使用以下命令安装 OptionsResolver 组件。
composer require symfony/options-resolver
Dotenv
Dotenv 组件提供各种选项来解析 .env 文件,并使其中定义的变量可通过 getenv()、$_ENV 或 $_SERVER 访问。可以使用以下命令安装 Dotenv 组件。
composer require symfony/dotenv
Cache
Cache 组件提供了扩展的 PSR-6 实现。它可用于向我们的 Web 应用程序添加缓存功能。由于它遵循 PSR-6,因此很容易上手,并且可以轻松地代替另一个基于 PSR-6 的缓存组件使用。可以使用以下命令安装缓存组件。
composer require symfony/cache
Intl
Intl 组件是 C Intl 扩展的替换库。可以使用以下命令安装 Intl 组件。
composer require symfony/intl
翻译
翻译组件提供了各种选项来使我们的应用程序国际化。通常,不同语言的翻译详细信息将存储在一个文件中,每种语言一个文件,并在应用程序运行时动态加载。有不同的格式来编写翻译文件。翻译组件提供了各种选项来加载任何类型的格式,例如纯 PHP 文件、CSV、ini、Json、Yaml、ICU 资源文件等。可以使用以下命令安装翻译组件。
composer require symfony/translation
Workflow
Workflow 组件提供了处理有限状态机的高级工具。通过以简单且面向对象的方式提供此功能,Workflow 组件可以相对轻松地在 PHP 中进行高级编程。我们将在高级概念章节中详细了解它。
可以使用以下命令安装工作流组件。
composer require symfony/workflow
Yaml
Yaml 组件提供了一个选项,用于解析 YAML 文件格式并将其转换为 PHP 数组。它还能够从纯 php 数组写入 YAML 文件。可以使用以下命令安装 Yaml 组件。
composer require symfony/yaml
Ldap
Ldap 组件提供 PHP 类来连接到 LDAP 或 Active Directory 服务器并根据该服务器对用户进行身份验证。它提供了一个选项来连接到 Windows 域控制器。可以使用以下命令安装 Ldap 组件。
composer require symfony/ldap
Debug
Debug 组件提供了各种选项以在 PHP 环境中启用调试。通常,调试 PHP 代码很难,但调试组件提供了简单的类来简化调试过程并使其干净且结构化。可以使用以下命令安装调试组件。
composer require symfony/debug
Stopwatch
Stopwatch 组件提供了 Stopwatch 类来分析我们的 PHP 代码。简单的用法如下。
use Symfony\Component\Stopwatch\Stopwatch;
$stopwatch = new Stopwatch();
$stopwatch->start('somename');

// 我们要分析的代码
$profiled_data = $stopwatch->stop('somename');
echo $profiled_data->getPeriods()
可以使用以下命令安装 Stopwatch 组件。
composer require symfony/stopwatch
VarDumper
VarDumper 组件提供了更好的 dump() 函数。只需包含 VarDumper 组件并使用 dump 函数即可获得改进的功能。可以使用以下命令安装 VarDumper 组件。
composer require symfony/var-dumper
BrowserKit
BrowserKit 组件提供了一个抽象的浏览器客户端接口。它可用于以编程方式测试 Web 应用程序。例如,它可以请求表单,输入示例数据并提交,以便以编程方式查找表单中的任何问题。可以使用以下命令安装 BrowserKit 组件。
composer require symfony/browser-kit
PHPUnit Bridge
PHPUnit Bridge 组件提供了许多选项来改善 PHPUnit 测试环境。可以使用以下命令安装 PHPUnit Bridge 组件。
composer require symfony/phpunit-bridge
Asset
Asset 组件在 Web 应用程序中提供通用资产处理。它为 CSS、HTML、JavaScript 等资产生成 URL,并执行版本维护。我们将在 View Engine 章节中详细检查资产组件。可以使用以下命令安装 Asset 组件。
composer require symfony/asset
CssSelector
CssSelector 组件提供了将基于 CSS 的选择器转换为 XPath 表达式的选项。Web 开发人员比 XPath 表达式更了解基于 CSS 的选择器表达式,但在 HTML 和 XML 文档中查找元素的最有效表达式是 XPath 表达式。
CssSelector 使开发人员能够在 CSS 选择器 中编写表达式,但是,组件在执行之前会将其转换为 XPath 表达式。因此,开发人员具有 CSS 选择器的简单性和 XPath 表达式的效率的优势。
可以使用以下命令安装 CssSelector 组件。
composer require symfony/css-selector
DomCrawler
DomCrawler 组件提供了各种选项,可使用 DOM 概念在 HTML 和 XML 文档中查找元素。它还提供了使用 XPath 表达式查找元素的选项。DomCrawler 组件可与 CssSelector 组件一起使用,以使用 CSS 选择器代替 XPath 表达式。可以使用以下命令安装 DomCrawler 组件。
composer require symfony/dom-crawler
Form
Form 组件可轻松在 Web 应用程序中创建表单。我们将在 Form 章节中详细学习表单编程。可以使用以下命令安装 Form 组件。
composer require symfony/form
HttpFoundation
HttpFoundation 组件为 HTTP 规范提供了一个面向对象的层。默认情况下,PHP 以基于数组的对象形式提供 HTTP 请求和响应详细信息,例如 $_GET、$_POST、$_FILES、$_SESSION 等。可以使用简单、朴素的旧函数 setCookie() 来实现基于 HTTP 的功能(例如设置 cookie)。HttpFoundation 在 Request、Response、RedirectResponse 等一小组类中提供了所有与 HTTP 相关的功能,我们将在后面的章节中了解这些类。
可以使用以下命令安装 HttpFoundation 组件。
composer require symfony/http-foundation
HttpKernel
HttpKernel 组件是 Symfony Web 设置中的核心组件。它提供了 Web 应用程序所需的所有功能 - 从接收 Request 对象到发回 Response 对象。 Symfony Web 应用程序的完整架构由 HttpKernel 提供,如 Symfony Web 框架的架构中所述。
可以使用以下命令安装 HttpKernel 组件。
composer require symfony/http-kernel
路由
路由组件将 HTTP 请求映射到一组预定义的配置变量。路由决定我们应用程序的哪个部分应该处理请求。我们将在路由章节中了解有关路由的更多信息。
可以使用以下命令安装路由组件。
composer require symfony/filesystem
templating
templating 模板组件提供了构建高效模板系统所需的基础架构。Symfony 使用模板组件来实现其视图引擎。我们将在视图引擎章节中详细了解模板组件。
可以使用以下命令安装模板组件。
composer require symfony/templating
validator
validator 验证器组件提供了 JSR-303 Bean 验证规范 的实现。它可用于在 Web 环境中验证表单。我们将在验证章节中学习更多关于验证器的知识。
可以使用以下命令安装验证器组件。
composer require symfony/validator
security
security 安全组件为我们的 Web 应用程序提供了完整的安全系统,包括 HTTP 基本身份验证、HTTP 摘要身份验证、基于交互式表单的身份验证、X.509 认证登录等。它还通过内置 ACL 系统提供基于用户角色的授权机制。我们将在高级概念章节中详细了解。
可以使用以下命令安装安全组件。
composer require symfony/security
Symfony - 服务容器
在任何应用程序中,对象都会随着应用程序的增长而增加。随着对象的增加,对象之间的依赖关系也会增加。为了成功实现应用程序,需要正确处理对象依赖关系。
如组件章节中所述,Symfony 提供了一个简单高效的组件 DependencyInjection 来处理对象依赖关系。服务容器是一个对象容器,其中的对象之间具有正确解析的依赖关系。让我们在本章中学习如何使用 DependencyInjection 组件。
让我们创建一个 Greeter 类。Greeter 类的目的是向用户打招呼,如以下示例所示。
$greeter = new Greeter('Hi');
$greeter->greet('Jon'); // 打印"Hi, Jon"
Greeter 类的完整代码如下。
class Greeter {
   private $greetingText;

   public function __construct($greetingText) {
      $this->greetingText = $greetingText;
   }
   public function greet($name) {
      echo $this->greetingText . ", " . $name . "
";
   }
}
现在,让我们将 Greeter 类添加到服务容器中。Symfony 提供 ContainerBuilder 来创建新容器。创建容器后,可以使用容器的 register 方法将 Greeter 类注册到其中。
use Symfony\Component\DependencyInjection\ContainerBuilder;
$container = new ContainerBuilder();
$container
   ->register('greeter', 'Greeter')
   ->addArgument('Hi');
在这里,我们使用静态参数来指定问候语文本 Hi。Symfony 还提供了参数的动态设置。要使用动态参数,我们需要选择一个名称并在 % 之间指定它,然后可以使用容器的 setParameter 方法设置该参数。
$container = new ContainerBuilder();
$container
   ->register('greeter', 'Greeter')
   ->addArgument('%greeter.text%');
$container->setParameter('greeter.text', 'Hi');
我们已经注册了一个具有适当设置的 Greeter 类。现在,我们可以使用容器 get 方法要求容器提供正确配置的 Greeter 对象。
$greeter = $container->get('greeter');
$greeter->greet('Jon'); // 打印"Hi, Jon"
我们已经成功地将 Greeter 类注册到容器中,从容器中获取并使用它。现在,让我们创建另一个使用 Greeter 类的类 User,并了解如何注册它。
class User {
   private $greeter;
   public $name;
   public $age;

   public function setGreeter(\Greeter $greeter) {
      $this->greeter = $greeter;
   }
   public function greet() {
      $this->greeter->greet($this->name);
   }
}
User 类使用其 setter 方法之一 setGreeter 获取 Greeter 类。对于这种情况,Symfony 提供了一种方法 addMethodCall 和一个类 Reference 来引用另一个类,如以下代码所示。
use Symfony\Component\DependencyInjection\Reference;
$container
   ->register('user', 'User')
   ->addMethodCall('setGreeter', array(new Reference('greeter')));
最后,我们注册了两个类,Greeter 和 User,它们之间有很强的关系。现在,我们可以安全地从容器中获取具有正确配置的 Greeter 类的 User 对象,如以下代码所示。
$container->setParameter('greeter.text', 'Hi');
$user = $container->get('user');
$user->name = "Jon";
$user->age = 20;
$user->greet(); // 打印"Hi, Jon"
我们已经了解了如何使用 PHP 本身在容器中配置对象。Symfony 还提供了其他机制。它们是 XML 和 YAML 配置文件。让我们看看如何使用 YAML 配置容器。为此,安装 symfony/config 和 symfony/yaml 组件以及 symfony/dependency-injection 组件。
cd /path/to/dir
mkdir dependency-injection-example
cd dependency-injection-example
composer require symfony/dependency-injection
composer require symfony/config
composer require symfony/yaml
YAML 配置将写在单独的文件 services.yml 中。YAML 配置由两个部分组成,parameters 和 services。Parameters 部分定义所有必需的参数。Services 部分定义所有对象。Services 部分进一步分为多个部分,即 class、arguments 和 calls。Class 指定实际的类。 Arguments 指定构造函数的参数。最后,calls 指定 setter 方法。可以使用 @ 符号 @greeter 引用另一个类。
parameters:
   greeter.text: 'Hello'
services:
   greeter:
      class: Greeter
      arguments: ['%greeter.text%']
   user:
      class: User
      calls:
         - [setGreeter, ['@greeter']]
现在,可以使用 FileLoader 和 YamlFileLoader 加载和配置 services.yml,如以下代码所示。
use Symfony\Component\Config\FileLocator;
use Symfony\Component\DependencyInjection\Loader\YamlFileLoader;

$yamlContainer = new ContainerBuilder();
$loader = new YamlFileLoader($yamlContainer, new FileLocator(__DIR__));
$loader->load('services.yml');

$yamlUser = $yamlContainer->get('user');
$yamlUser->name = "Jon";
$yamlUser->age = 25;
$yamlUser->greet();
完整代码清单如下。
main.php
<?php
   require __DIR__ . '/vendor/autoload.php';
   use Symfony\Component\DependencyInjection\ContainerBuilder;
   use Symfony\Component\Config\FileLocator;
   use Symfony\Component\DependencyInjection\Loader\YamlFileLoader;
   use Symfony\Component\DependencyInjection\Reference;

   class Greeter {
      private $greetingText;

      public function __construct($greetingText) {
         $this->greetingText = $greetingText;
      }
      public function greet($name) {
         echo $this->greetingText . ", " . $name . "
";
      }
   }
   class User {
      private $greeter;
      public $name;
      public $age;

      public function setGreeter(\Greeter $greeter) {
         $this->greeter = $greeter;
      }
      public function greet() {
         $this->greeter->greet($this->name);
      }
   }
   $container = new ContainerBuilder();
   $container
      ->register('greeter', 'Greeter')
      ->addArgument('%greeter.text%');
   $container
      ->register('user', 'User')
      ->addMethodCall('setGreeter', array(new Reference('greeter')));

   $container->setParameter('greeter.text', 'Hi');
   $greeter = $container->get('greeter');
   $greeter->greet('Jon');

   $user = $container->get('user');
   $user->name = "Jon";
   $user->age = 20;
   $user->greet();

   $yamlContainer = new ContainerBuilder();
   $loader = new YamlFileLoader($yamlContainer, new FileLocator(__DIR__));
   $loader->load('services.yml');

   $yamlHello = $yamlContainer->get('greeter');
   $yamlHello->greet('Jon');

   $yamlUser = $yamlContainer->get('user');
   $yamlUser->name = "Jon";
   $yamlUser->age = 25;
   $yamlUser->greet();
?>
services.yml
parameters:
   greeter.text: 'Hello'
services:
   greeter:
      class: Greeter
      arguments: ['%greeter.text%']
   user:
      class: User
      calls:
         - [setGreeter, ['@greeter']]
Symfony Web 框架广泛使用依赖注入组件。所有组件都由集中式服务容器绑定。Symfony Web 框架通过 container 属性在其所有 Controller 中公开容器。我们可以通过它获取在其中注册的所有对象,例如记录器、邮件程序等。
$logger = $this->container->get('logger');
$logger->info('Hi');
要查找在容器中注册的对象,请使用以下命令。
cd /path/to/app
php bin/console debug:container
在安装章节中创建的 hello Web 应用程序中有大约 200 多个对象。
Symfony - 事件和 EventListener
Symfony 通过其 EventDispatcher 组件提供基于事件的编程。任何企业应用程序都需要基于事件的编程来创建高度可定制的应用程序。事件是对象之间交互的主要工具之一。没有事件,对象就无法有效地交互。
基于事件的编程过程可以概括为 - 一个名为 Event source 的对象要求中央调度程序对象注册一个事件,例如 user.registered。一个或多个对象(称为 listener)要求中央调度程序对象监听特定事件,例如 user.registered。在某个时间点,事件源对象要求中央调度程序对象调度事件,例如 user.registered 以及带有必要信息的事件对象。中央调度程序向所有侦听器对象通知有关事件的信息,例如 user.registered 及其 Event* 对象。
在基于事件的编程中,我们有四种类型的对象:事件源、事件侦听器、事件调度程序和事件本身。
让我们编写一个简单的应用程序来理解这个概念。
步骤 1 − 创建一个项目,event-dispatcher-example。
cd /path/to/dir
mkdir event-dispatcher-example
cd event-dispatcher-example
composer require symfony/event-dispatcher
步骤 2 − 创建一个类,.User。
class User {
   public $name;
   public $age;
}

$user = new User();
$user->name = "Jon";
$user->age = 25
步骤 3 − 创建一个事件 UserRegisteredEvent。
use Symfony\Component\EventDispatcher\Event;
class UserRegisteredEvent extends Event {
   const NAME = 'user.registered';
   protected $user;

   public function __construct(User $user) {
      $this-<user = $user;
   }
   public function getUser() {
      return $this-<user;
   }
}
$event = new UserRegisteredEvent($user);
此处,UserRegisteredEvent 可以访问 User 对象。事件的名称为 user.registered。
步骤 4 − 创建一个监听器,UserListener。
class UserListener {
   public function onUserRegistrationAction(Event $event) {
      $user = $event->getUser();
         echo $user->name . "
";
         echo $user->age . "
";
   }
}
$listener = new UserListener();
步骤 5 − 创建事件调度器对象。
use Symfony\Component\EventDispatcher\EventDispatcher;
$dispatcher = new EventDispatcher();
步骤 6 − 使用调度器对象及其方法 addListener 连接侦听器和事件。
$dispatcher
   ->addListener(
      UserRegisteredEvent::NAME,
      array($listener, 'onUserRegistrationAction'));
我们还可以添加一个匿名函数作为事件监听器,如下面的代码所示。
$dispatcher
   ->addListener(
      UserRegisteredEvent::NAME,

      function(Event $event) {
         $user = $event->getUser();
         echo $user->name . "
";
      });
步骤 7 − 最后,使用事件调度程序的方法 dispatch 触发/调度事件。
$dispatcher->dispatch(UserRegisteredEvent::NAME, $event);
完整代码清单如下。
main.php
<?php
   require __DIR__ . '/vendor/autoload.php';
   use Symfony\Component\EventDispatcher\EventDispatcher;
   use Symfony\Component\EventDispatcher\Event;

   class User {
      public $name;
      public $age;
   }
   class UserRegisteredEvent extends Event {
      const NAME = 'user.registered';
      protected $user;

      public function __construct(User $user) {
         $this->user = $user;
      }
      public function getUser() {
         return $this->user;
      }
   }
   class UserListener {
      public function onUserRegistrationAction(Event $event) {
         $user = $event->getUser();
         echo $user->name . "
";
         echo $user->age . "
";
      }
   }
   $user = new User();
   $user->name = "Jon";
   $user->age = 25;

   $event = new UserRegisteredEvent($user);
   $listener = new UserListener();

   $dispatcher = new EventDispatcher();
   $dispatcher
      ->addListener(
         UserRegisteredEvent::NAME,

         function(Event $event) {
            $user = $event->getUser();
            echo $user->name . "
";
         });
   $dispatcher
      ->addListener(
         UserRegisteredEvent::NAME, array($listener, 'onUserRegistrationAction'));

   $dispatcher->dispatch(UserRegisteredEvent::NAME, $event);
?>
结果
Jon
Jon
25
Symfony Web 框架有很多事件,可以为这些事件注册监听器并进行相应的编程。其中一个示例事件是 kernel.exception,对应的事件是 GetResponseForExceptionEvent,它保存响应对象(Web 请求的输出)。这用于捕获异常并使用通用错误信息修改响应,而不是向用户显示运行时错误。
Symfony - 表达式
正如我们之前所讨论的,表达式语言是 Symfony 应用程序的显著特点之一。Symfony 表达式主要用于配置环境。它使非程序员能够轻松配置 Web 应用程序。让我们创建一个简单的应用程序来测试表达式。
步骤 1 − 创建一个项目,expression-language-example。
cd /path/to/dir
mkdir expression-language-example
cd expression-language-example
composer require symfony/expression-language
步骤 2 −创建一个表达式对象。
use Symfony\Component\ExpressionLanguage\ExpressionLanguage;
$language = new ExpressionLanguage();
步骤 3 − 测试一个简单的表达式。
echo "Evaluated Value: " . $language->evaluate('10 + 12') . "
" ;
echo "Compiled Code: " . $language->compile('130 % 34') . "
" ;
步骤 4 − Symfony 表达式功能强大,它可以在表达式语言中拦截 PHP 对象及其属性。
class Product {
   public $name;
   public $price;
}
$product = new Product();
$product->name = 'Cake';
$product->price = 10;

echo "Product price is " . $language
   ->evaluate('product.price', array('product' => $product,)) . "
";
echo "Is Product price higher than 5: " . $language
   ->evaluate('product.price > 5', array('product' => $product,)) . "
";
此处,表达式 product.price 和 product.price > 5 截取 $product 对象的属性 price 并计算结果。
完整代码如下。
main.php
<?php
   require __DIR__ . '/vendor/autoload.php';
   use Symfony\Component\ExpressionLanguage\ExpressionLanguage;
   $language = new ExpressionLanguage();

   echo "Evaluated Value: " . $language->evaluate('10 + 12') . "
" ;
   echo "Compiled Code: " . $language->compile('130 % 34') . "
" ;

   class Product {
      public $name;
      public $price;
   }
   $product = new Product();
   $product->name = 'Cake';
   $product->price = 10;

   echo "Product price is " . $language
      ->evaluate('product.price', array('product' => $product,)) . "
";
   echo "Is Product price higher than 5: " . $language
      ->evaluate('product.price > 5', array('product' => $product,)) . "
";
?>
结果
Evaluated Value: 22
Compiled Code: (130 % 34)
Product price is 10
Is Product price higher than 5: 1
Symfony - Bundles
Symfony Bundle 是按特定结构组织的文件和文件夹的集合。这些 Bundle 的建模方式使其可以在多个应用程序中重复使用。主应用程序本身打包为一个 Bundle,通常称为 AppBundle。
Bundle 可以针对特定应用程序进行打包,例如 AdminBundle(管理部分)、BlogBundle(站点博客)等。此类 Bundle 不能在应用程序之间共享。相反,我们可以将应用程序的某个部分(例如博客)建模为通用 Bundle,这样我们就可以简单地将 Bundle 从一个应用程序复制到另一个应用程序以重用博客功能。
Bundle 的结构
Bundle 的基本结构如下。
控制器 −所有的控制器都需要放在这里。
DependencyInjection − 所有的依赖注入相关的代码和配置都需要放在这里。
Resources/config − Bundle相关的配置放在这里。
Resources/view − Bundle相关的视图模板放在这里。
Resources/public − Bundle相关的样式表、JavaScript、图像等都放在这里。
测试 −捆绑包相关的单元测试文件放在这里。
创建捆绑包
让我们在 HelloWorld 应用程序中创建一个简单的捆绑包 TutorialspointDemoBundle。
步骤 1 − 选择一个命名空间。捆绑包的命名空间应包括供应商名称和捆绑包名称。在我们的例子中,它是 Tutorialspoint\DemoBundle。
步骤 2 − 通过扩展 Bundle 类创建一个空类 TutorialspointDemoBundle,并将其放在 src/Tutorialspoint/DemoBundle 下。
namespace Tutorialspoint\DemoBundle;
use Symfony\Component\HttpKernel\Bundle\Bundle;

class TutorialspointDemoBundle extends Bundle {
}
步骤 3 − 在 AppKernel 类中将该类注册到应用程序支持的捆绑包列表中。
public function registerBundles() {
   $bundles = array(
      // ...
      // register your bundle
      new Tutorialspoint\DemoBundle\TutorialspointDemoBundle(),
   );
   return $bundles;
}
这就是创建一个空包所需的全部内容,其他所有概念与应用程序相同。Symfony 还提供了一个控制台命令 generate:bundle 来简化创建新包的过程,如下所示。
php bin/console generate:bundle --namespace = Tutorialspoint/DemoBundle
结果
Welcome to the Symfony bundle generator!

Are you planning on sharing this bundle across multiple applications? [no]: no

Your application code must be written in bundles. This command helps
you generate them easily.

Give your bundle a descriptive name, like BlogBundle.
Bundle name [Tutorialspoint/DemoBundle]:

In your code, a bundle is often referenced by its name. It can be the
concatenation of all namespace parts but it's really up to you to come
up with a unique name (a good practice is to start with the vendor name).
Based on the namespace, we suggest TutorialspointDemoBundle.

Bundle name [TutorialspointDemoBundle]:
Bundles are usually generated into the src/ directory. Unless you're
doing something custom, hit enter to keep this default!
Target Directory [src/]:

What format do you want to use for your generated configuration?

Configuration format (annotation, yml, xml, php) [annotation]:

Bundle generation

> Generating a sample bundle skeleton into app/../src/Tutorialspoint/DemoBundle
   created ./app/../src/Tutorialspoint/DemoBundle/
   created ./app/../src/Tutorialspoint/DemoBundle/TutorialspointDemoBundle.php
   created ./app/../src/Tutorialspoint/DemoBundle/Controller/
   created ./app/../src/Tutorialspoint/DemoBundle/Controller/DefaultController.php
   created ./app/../tests/TutorialspointDemoBundle/Controller/
   created ./app/../tests/TutorialspointDemoBundle/Controller/DefaultControllerTest.php
   created ./app/../src/Tutorialspoint/DemoBundle/Resources/views/Default/
   created ./app/../src/Tutorialspoint/DemoBundle/Resources/views/Default/index.html.twig
   created ./app/../src/Tutorialspoint/DemoBundle/Resources/config/
   created ./app/../src/Tutorialspoint/DemoBundle/Resources/config/services.yml
> Checking that the bundle is autoloaded
> Enabling the bundle inside app/AppKernel.php
   updated ./app/AppKernel.php
> Importing the bundle's routes from the app/config/routing.yml file
   updated ./app/config/routing.yml
> Importing the bundle's services.yml from the app/config/config.yml file
   updated ./app/config/config.yml
Everything is OK! Now get to work :).
Symfony - 创建一个简单的 Web 应用程序
本章介绍如何在 Symfony 框架中创建一个简单的应用程序。如前所述,您知道如何在 Symfony 中创建一个新项目。
我们可以以"student"详细信息为例。让我们首先使用以下命令创建一个名为"student"的项目。
symfony new student
执行命令后,将创建一个空项目。
控制器
Symfony 基于模型-视图-控制器 (MVC) 开发模式。MVC 是一种将应用程序逻辑与表示分离的软件方法。控制器在 Symfony 框架中扮演着重要的角色。应用程序中的所有网页都需要由控制器处理。
DefaultController 类位于 "src/AppBundle/Controller"。您可以在那里创建自己的 Controller 类。
移动到位置 "src/AppBundle/Controller" 并创建一个新的 StudentController 类。
以下是 StudentController 类的基本语法。
StudentController.php
namespace AppBundle\Controller;
use Symfony\Component\HttpFoundation\Response;
class StudentController {
}
现在,您已经创建了一个 StudentController。在下一章中,我们将详细讨论有关 Controller 的更多信息。
创建路由
创建 Controller 后,我们需要为特定页面路由。路由将请求 URI 映射到特定控制器的方法。
以下是路由的基本语法。
namespace AppBundle\Controller;
use Sensio\Bundle\FrameworkExtraBundle\Configuration\Route;
use Symfony\Component\HttpFoundation\Response;
use Symfony\Bundle\FrameworkBundle\Controller\Controller;

class StudentController {
   /**
      * @Route("/student/home")
   */
   public function homeAction() {
      return new Response('Student details application!');
   }
}
在上述语法中,@Route("/student/home") 是路由。它定义了页面的 URL 模式。
homeAction() 是操作方法,您可以在其中构建页面并返回 Response 对象。
我们将在下一章中详细介绍路由。现在,请求 URL"http://localhost:8000/student/home",它会产生以下结果。
结果

Symfony - 控制器
控制器负责处理进入 Symfony 应用程序的每个请求。控制器从请求中读取信息。然后,创建并返回响应对象给客户端。
根据 Symfony,DefaultController 类位于 "src/AppBundle/Controller"。其定义如下。
DefaultController.php
<?php
namespace AppBundle\Controller;
use Symfony\Bundle\FrameworkBundle\Controller\Controller;
use Symfony\Component\HttpFoundation\Response;

class DefaultController extends Controller {
}
此处,HttpFoundation 组件为 HTTP 规范定义了一个面向对象层,而 FrameworkBundle 包含大部分"基础"框架功能。
Request 对象
Request 类是 HTTP 请求消息的面向对象表示。
创建请求对象
可以使用 createFromGlobals() 方法创建请求。
use Symfony\Component\HttpFoundation\Request;
$request = Request::createFromGlobals();
您可以使用 Globals 模拟请求。除了基于 PHP 全局变量创建请求之外,您还可以模拟请求。
$request = Request::create(
   '/student',
   'GET',
   array('name' => 'student1')
);
此处,create() 方法基于 URI、方法和一些参数创建请求。
覆盖请求对象
您可以使用 overrideGlobals() 方法覆盖 PHP 全局变量。其定义如下。
$request->overrideGlobals();
访问请求对象
可以使用基本控制器的 getRequest() 方法在控制器(操作方法)中访问网页的请求。
$request = $this->getRequest();
识别请求对象
如果您想在应用程序中识别请求,"PathInfo" 方法将返回请求 URL 的唯一标识。其定义如下。
$request->getPathInfo();
响应对象
对控制器的唯一要求是返回响应对象。 Response 对象保存来自给定请求的所有信息并将其发送回客户端。
以下是一个简单的示例。
示例
use Symfony\Component\HttpFoundation\Response;
$response = new Response('Default'.$name, 10);
您可以按如下方式在 JSON 中定义 Response 对象。
$response = new Response(json_encode(array('name' => $name)));
$response->headers->set('Content-Type', 'application/json');
响应构造函数
构造函数包含三个参数 −
- 响应内容
- 状态代码
- HTTP 标头数组
以下是基本语法。
use Symfony\Component\HttpFoundation\Response;
$response = new Response(
   'Content',
   Response::HTTP_OK,
   array('content-type' => 'text/html')
);
例如,您可以将内容参数传递为,
$response->setContent('Student details');
同样,您也可以传递其他参数。
发送响应
您可以使用 send() 方法向客户端发送响应。它定义如下。
$response->send();
要将客户端重定向到另一个 URL,您可以使用 RedirectResponse 类。
它定义如下。
use Symfony\Component\HttpFoundation\RedirectResponse;
$response = new RedirectResponse('http://tutorialspoint.com/');
FrontController
一个 PHP 文件,处理进入应用程序的每个请求。FrontController 执行将不同 URL 路由到应用程序内部不同部分的操作。
以下是 FrontController 的基本语法。
use Symfony\Component\HttpFoundation\Request;
use Symfony\Component\HttpFoundation\Response;

$request = Request::createFromGlobals();
$path = $request->getPathInfo(); // the URI path being requested

if (in_array($path, array('', '/')))  {
   $response = new Response('Student home page.');
} elseif ('/about' === $path) {
   $response = new Response('Student details page');
} else {
   $response = new Response('Page not found.', Response::HTTP_NOT_FOUND);
}
$response->send();
此处,in_array() 函数在数组中搜索特定值。
Symfony - 路由
路由将请求 URI 映射到特定控制器的方法。一般来说,任何 URI 都有以下三个部分 −
- 主机名段
- 路径段
- 查询段
例如,在 URI / URL 中,http://www.tutorialspoint.com/index?q=data,www.tutorialspoint.com 是主机名段,index 是路径段,q=data 是查询段。通常,路由会根据一组约束检查页面段。如果任何约束匹配,则返回一组值。其中一个主要值是控制器。
注释
注释在 Symfony 应用程序的配置中起着重要作用。注释通过在编码本身中声明配置来简化配置。注释只不过是提供有关类、方法和属性的元信息。路由广泛使用注释。尽管路由可以在没有注释的情况下完成,但注释在很大程度上简化了路由。
以下是示例注释。
/**
   * @Route("/student/home")
*/
public function homeAction() {
   // ...
}
路由概念
考虑在"student"项目中创建的StudentController类。
StudentController.php
// src/AppBundle/Controller/StudentController.php
namespace AppBundle\Controller;

use Symfony\Bundle\FrameworkBundle\Controller\Controller;
use Sensio\Bundle\FrameworkExtraBundle\Configuration\Route;

class StudentController extends Controller {
   /**
      * @Route("/student/home")
   */
   public function homeAction() {
      // ...
   }

   /**
      * @Route("/student/about")
   */
   public function aboutAction() {
   }
}
此处,路由执行两个步骤。如果您转到 /student/home,则匹配第一个路由,然后执行 homeAction()。否则,如果您转到 /student/about,则匹配第二个路由,然后执行 aboutAction()。
添加通配符格式
假设您有一个分页的学生记录列表,其中 URL 分别为 /student/2 和 /student/3,分别对应第 2 页和第 3 页。然后,如果您想更改路由的路径,可以使用通配符格式。
示例
// src/AppBundle/Controller/BlogController.php
namespace AppBundle\Controller;

use Symfony\Bundle\FrameworkBundle\Controller\Controller;
use Sensio\Bundle\FrameworkExtraBundle\Configuration\Route;

class StudentController extends Controller {
   /**
      * @Route("/student/{page}", name = "student_about", requirements = {"page": "\d+"})
   */
   public function aboutAction($page) {
      // ...
   }
}
此处的 \d+ 是匹配任意长度数字的正则表达式。
分配占位符
您可以在路由中分配占位符值。其定义如下。
// src/AppBundle/Controller/BlogController.php
namespace AppBundle\Controller;

use Symfony\Bundle\FrameworkBundle\Controller\Controller;
use Sensio\Bundle\FrameworkExtraBundle\Configuration\Route;

class StudentController extends Controller {
   /**
      * @Route("/student/{page}", name = "student_about", requirements = {"page": "\d+"})
   */

   public function aboutAction($page = 1) {
      // ...
   }
}
此处,如果您访问 /student,则 student_about 路由 将匹配,并且 $page 将默认为 1。
重定向到页面
如果您想将用户重定向到另一个页面,请使用 redirectToRoute() 和 redirect() 方法。
public function homeAction() {
   // redirect to the "homepage" route
   return $this->redirectToRoute('homepage');

   // redirect externally

eturn $this->redirect('http://example.com/doc');
}
生成 URL
要生成 URL,请考虑路由名称 student_name 和该路由路径中使用的通配符名称 student-names。生成 URL 的完整列表定义如下。
class StudentController extends Controller {
   public function aboutAction($name) {
      // ...
      // /student/student-names
      $url = $this->generateUrl(
         'student_name',
         array('name' =>
         'student-names')
      );
   }
}
StudentController
考虑 StudentController 类中路由的一个简单示例,如下所示。
StudentController.php
<?php
namespace AppBundle\Controller;

use Sensio\Bundle\FrameworkExtraBundle\Configuration\Route;
use Symfony\Component\HttpFoundation\Response;
use Symfony\Bundle\FrameworkBundle\Controller\Controller;

class StudentController  {
   /**
      * @Route("/student/home")
   */

   public function homeAction() {
      $name = 'Student details application';
      return new Response(
         '<html><body>Project: '.$name.'</body></html>'
      );
   }
}
现在,请求 URL"http://localhost:8000/student/home",它会产生以下结果。

同样,您也可以为 aboutAction() 创建另一个路由。
Symfony - 视图引擎
视图层是 MVC 应用程序的表示层。它将应用程序逻辑与表示逻辑分开。
当控制器需要生成 HTML、CSS 或任何其他内容时,它会将任务转发给模板引擎。
模板
模板基本上是用于生成任何基于文本的文档(如 HTML、XML 等)的文本文件。它用于节省时间并减少错误。
默认情况下,模板可以位于两个不同的位置 −
app/Resources/views/ − 应用程序的 views 目录可以包含应用程序的布局和应用程序包的模板。它还会覆盖第三方包模板。
vendor/path/to/Bundle/Resources/views/ −每个第三方包都在其"Resources/views/"目录中包含其模板。
Twig 引擎
Symfony 使用一种名为 Twig 的强大模板语言。Twig 允许您以非常简单的方式编写简洁易读的模板。Twig 模板很简单,不会处理 PHP 标签。Twig 执行空格控制、沙盒和自动 HTML 转义。
语法
Twig 包含三种特殊语法 −
{{ ... }> − 将变量或表达式的结果打印到模板。
{% ... %} − 控制模板逻辑的标签。它主要用于执行一个函数。
{# ... #} − 注释语法。它用于添加单行或多行注释。
Twig 基础模板位于 "app/Resources/views/base.html.twig"。
示例
让我们通过一个使用 Twig 引擎的简单示例来了解一下。
StudentController.php
<?php
namespace AppBundle\Controller;

use Sensio\Bundle\FrameworkExtraBundle\Configuration\Route;
use Symfony\Component\HttpFoundation\Response;
use Symfony\Bundle\FrameworkBundle\Controller\Controller;

class StudentController extends Controller {
   /**
      * @Route("/student/home")
   */
   public function homeAction() {
      return $this->render('student/home.html.twig');
   }
}
此处,render() 方法渲染模板并将内容放入 Response 对象中。
现在转到"views"目录并创建文件夹"student",然后在该文件夹中创建文件"home.html.twig"。在文件中添加以下更改。
home.html.twig
//app/Resources/views/student/home.html.twig
<h3>Student application!</h3>
您可以通过请求 URL"http://localhost:8000/student/home"获取结果。
默认情况下,Twig 带有一长串标签、过滤器和函数。让我们逐一详细了解一下。
标签
Twig 支持以下重要标签 −
Do
do 标签的功能与正则表达式类似,但它不会打印任何内容。其语法如下 −
{% do 5 + 6 %}
Include
include 语句包含一个模板并将该文件的渲染内容返回到当前命名空间。其语法如下 −
{% include 'template.html' %}
Extends
extends 标签可用于从另一个模板扩展一个模板。其语法如下 −
{% extends "template.html" %}
Block
Block 充当占位符并替换内容。块名称由字母数字字符和下划线组成。例如,
<title>{% block title %}{% endblock %}</title>
嵌入
嵌入标签执行包含和扩展的组合。它允许您包含另一个模板的内容。它还允许您覆盖包含的模板内定义的任何块,例如在扩展模板时。其语法如下 −
{% embed "new_template.twig" %}
   {# These blocks are defined in "new_template.twig" #}
   {% block center %}
      Block content
   {% endblock %}
{% endembed %}
filter
filter 过滤器部分允许您在模板数据块上应用常规 Twig 过滤器。例如,
{% filter upper %}
symfony 框架
{% endfilter %}
此处,文本将更改为大写。
For
For 循环按顺序获取每个项目。例如,
{% for x in 0..10 %}
   {{ x }}
{% endfor %}
If
Twig 中的 if 语句与 PHP 类似。表达式的计算结果为 true 或 false。例如,
{% if value == true %}
   <p>Simple If statement</p>
{% endif %}
过滤器
Twig 包含过滤器。它用于在呈现内容之前修改内容。以下是一些值得注意的过滤器。
Length
length 过滤器返回字符串的长度。其语法如下 −
{% if name|length > 5 %}
...
{% endif %}
Lower
lower 过滤器将值转换为小写。例如,
{{ 'SYMFONY'|lower }}
它将产生以下结果 −
symfony
同样,您可以尝试使用大写字母。
替换
替换过滤器通过替换占位符来格式化给定的字符串。例如,
{{ "tutorials point site %si% and %te%."|replace({'%si%': web, '%te%': "site"}) }}
它用来产生以下结果 −
tutorials point website
标题
标题过滤器返回值的标题大小写版本。例如,
{{ 'symfony framework '|title }}
它会产生以下结果 −
Symfony Framework
排序
sort 过滤器对数组进行排序。其语法如下 −
{% for user in names|sort %}
...
{% endfor %}
修剪
trim 过滤器会修剪字符串开头和结尾的空格(或其他字符)。例如,
{{ ' Symfony! '|trim }}
它将产生以下结果 −
Symfony!
函数
Twig 支持函数。它用于获取特定结果。以下是一些重要的 Twig 函数。
属性
attribute 函数可用于访问变量的"动态"属性。其语法如下 −
{{ attribute(object, method) }}
{{ attribute(object, method,arguments) }}
{{ attribute(array, item) }}
例如,
{{ attribute(object, method) is defined ? 'Method exists' : 'Method does not exist' }}
常量
常量函数返回指定字符串的常量值。例如,
{{ constant('Namespace\Classname::CONSTANT_NAME') }}
循环
循环函数在值数组上循环。例如,
{% set months = ['Jan', 'Feb', 'Mar'] %}
{% for x in 0..12 %}
   { cycle(months, x) }}
{% endfor %}
Date
将参数转换为日期以允许日期比较。例如,
<p>Choose your location before {{ 'next Monday'|date('M j, Y') }}</p>
它会产生以下结果 −
Choose your location before May 15, 2017
参数必须采用 PHP 支持的日期和时间格式之一。
您可以将时区作为第二个参数传递。
Dump
Dump 转储函数转储有关模板变量的信息。例如,
{{ dump(user) }}
Max
max 函数返回序列的最大值。例如,
{{ max(1, 5, 9, 11, 15) }}
Min
min 函数返回序列的最小值。例如,
{{ min(1, 3, 2) }}
Include
include 函数返回模板的渲染内容。例如,
{{ include('template.html') }}
Random
随机函数生成一个随机值。例如,
{{ random(['Jan', 'Feb', 'Mar', 'Apr']) }}
{# example output: Jan #}
Range
Range 函数返回一个包含整数等差数列的列表。例如,
{% for x in range(1, 5) %}
   {{ x }},
{% endfor %}
它将产生以下结果 −
1,2,3,4,5
布局
布局表示多个视图的公共部分,例如页眉和页脚。
模板继承
一个模板可以被另一个模板使用。我们可以使用模板继承概念来实现这一点。模板继承允许您构建一个基本"布局"模板,其中包含定义为块的网站所有公共元素。
让我们举一个简单的例子来了解有关模板继承的更多信息。
示例
考虑位于"app/Resources/views/base.html.twig"的基本模板。在文件中添加以下更改。
base.html.twig
<!DOCTYPE html>
<html>
   <head>
      <meta charset = "UTF-8">
      <title>{% block title %}Parent template Layout{% endblock %}</title>
   </head>
</html>
现在转到位于 "app/Resources/views/default/index.html.twig" 的索引模板文件。在其中添加以下更改。
index.html.twig
{% extends 'base.html.twig' %}
{% block title %}Child template Layout{% endblock %}
此处,{% extends %> 标签通知模板引擎首先评估基本模板,该模板设置布局并定义块。然后呈现子模板。子模板可以扩展基本布局并覆盖标题块。现在,请求 URL"http://localhost:8000",即可获得其结果。
Assets
Asset 管理 URL 生成和 Web 资源(如 CSS 样式表、JavaScript 文件和图像文件)的版本控制。
JavaScript
要包含 JavaScript 文件,请在任何模板中使用 javascripts 标签。
{# Include javascript #}
{% block javascripts %}
   {% javascripts '@AppBundle/Resources/public/js/*' %}
      <script src="{{ asset_url }}"></script>
   {% endjavascripts %}
{% endblock %}
样式表
要包含样式表文件,请在任何模板中使用 stylesheets 标签
{# include style sheet #}
{% block stylesheets %}
   {% stylesheets 'bundles/app/css/*' filter = 'cssrewrite' %}
      <link rel = "stylesheet" href="{{ asset_url }}" />
   {% endstylesheets %}
{% endblock %}
图像
要包含图像,您可以使用图像标签。其定义如下。
{% image '@AppBundle/Resources/public/images/example.jpg' %}
    <img src = "{{ asset_url }}" alt = "Example" />
{% endimage %}
复合资产
您可以将多个文件合并为一个。这有助于减少 HTTP 请求的数量,并提高前端性能。
{% javascripts
   '@AppBundle/Resources/public/js/*'
   '@AcmeBarBundle/Resources/public/js/form.js'
   '@AcmeBarBundle/Resources/public/js/calendar.js' %}
   <script src = "{{ asset_url }}"></script>
{% endjavascripts %}
Symfony - Doctrine ORM
在 Symfony Web 框架中,模型起着重要作用。它们是业务实体。它们要么由客户提供,要么从后端数据库获取,根据业务规则进行操作并持久保存回数据库。它们是视图呈现的数据。让我们在本章中了解模型以及它们如何与后端系统交互。
数据库模型
我们需要将模型映射到后端关系数据库项,以安全高效地获取和持久保存模型。可以使用对象关系映射 (ORM) 工具完成此映射。 Symfony 提供了一个单独的包 DoctrineBundle,它将 Symfony 与第三方 PHP 数据库 ORM 工具 Doctrine 集成在一起。
Doctrine ORM
默认情况下,Symfony 框架不提供任何用于处理数据库的组件。但是,它与 Doctrine ORM 紧密集成。 Doctrine 包含几个用于数据库存储和对象映射的 PHP 库。
以下示例将帮助您了解 Doctrine 的工作原理、如何配置数据库以及如何保存和检索数据。
Doctrine ORM 示例
在此示例中,我们将首先配置数据库并创建一个 Student 对象,然后在其中执行一些操作。
为此,我们需要遵循以下步骤。
步骤 1:创建 Symfony 应用程序
使用以下命令创建 Symfony 应用程序 dbsample。
symfony new dbsample
步骤 2:配置数据库
通常,数据库信息在"app/config/parameters.yml"文件中配置。
打开文件并添加以下内容更改。
parameter.yml
parameters:
   database_host: 127.0.0.1
   database_port: null
   database_name: studentsdb
   database_user: <user_name>
   database_password: <password>
   mailer_transport: smtp
   mailer_host: 127.0.0.1
   mailer_user: null
   mailer_password: null
   secret: 037ab82c601c10402408b2b190d5530d602b5809

   doctrine:
      dbal:
      driver:   pdo_mysql
      host:     '%database_host%'
      dbname:   '%database_name%'
      user:     '%database_user%'
      password: '%database_password%'
      charset: utf8mb4
现在,Doctrine ORM 可以连接到数据库了。
步骤 3:创建数据库
发出以下命令生成"studentsdb"数据库。此步骤用于在 Doctrine ORM 中绑定数据库。
php bin/console doctrine:database:create
执行命令后,它会自动生成一个空的"studentsdb"数据库。您可以在屏幕上看到以下响应。
为名为 default 的连接创建数据库 `studentsdb`
步骤 4:映射信息
映射信息不过是"元数据"。它是一组规则,用于告知 Doctrine ORM 如何将 Student 类及其属性映射到特定的数据库表。
好吧,此元数据可以采用多种不同的格式指定,包括 YAML、XML,或者您可以直接使用注释传递 Student 类。它的定义如下。
Student.php
在文件中添加以下更改。
<?php
namespace AppBundle\Entity;

use Doctrine\ORM\Mapping as ORM;
/**
   * @ORM\Entity
   * @ORM\Table(name = "students")
*/
class Student {
   /**
      * @ORM\Column(type = "integer")
      * @ORM\Id
      * @ORM\GeneratedValue(strategy = "AUTO")
   */
   private $id;

   /**
      * @ORM\Column(type = "string", length = 50)
   */
   private $name;

   /**
     * @ORM\Column(type = "text")
     */
   private $address;
}
此处,表名称是可选的。如果未指定表名称,则将根据实体类的名称自动确定。
步骤 5:绑定实体
Doctrine 为您创建简单的实体类。它可以帮助您构建任何实体。
发出以下命令以生成实体。
php bin/console doctrine:generate:entities AppBundle/Entity/Student
然后您将看到以下结果,并且实体将被更新。
Generating entity "AppBundle\Entity\Student"
   > backing up Student.php to Student.php~
   > generating AppBundle\Entity\Student
Student.php
<?php
namespace AppBundle\Entity;

use Doctrine\ORM\Mapping as ORM;
/**
   * @ORM\Entity
   * @ORM\Table(name="students")
*/
class Student {
   /**
      * @ORM\Column(type="integer")
      * @ORM\Id
      * @ORM\GeneratedValue(strategy="AUTO")
   */
   private $id;

   /**
      * @ORM\Column(type = "string", length = 50)
   */
   private $name;

   /**
      * @ORM\Column(type = "text")
   */
   private $address;

   /**
      * Get id
      *
      * @return integer
   */
   public function getId() {
      return $this->id;
   }

   /**
      * Set name
      *
      * @param string $name
      *
      * @return Student
   */

   public function setName($name) {
      $this->name = $name;
      return $this;
   }

   /**
      * Get name
      *
      * @return string
   */

   public function getName() {
      return $this->name;
   }

   /**
      * Set address
      *
      * @param string $address
      *
      * @return Student
   */

   public function setAddress($address) {
      $this->address = $address;
      return $this;
   }

   /**
      * Get address
      *
      * @return string
   */

   public function getAddress() {
      return $this->address;
   }
}
步骤 6:映射验证
创建实体后,应使用以下命令验证映射。
php bin/console doctrine:schema:validate
它会产生以下结果 −
[Mapping]  OK - The mapping files are correct.
[Database] FAIL - The database schema is not in sync with the current mapping file
由于我们尚未创建学生表,因此实体不同步。让我们在下一步中使用 Symfony 命令创建学生表。
步骤 7:创建架构
Doctrine 可以自动创建学生实体所需的所有数据库表。可以使用以下命令完成此操作。
php bin/console doctrine:schema:update --force
执行命令后,您可以看到以下响应。
Updating database schema...
Database schema updated successfully! "1" query was executed
此命令将数据库的应有外观与实际外观进行比较,并执行将数据库架构更新到应有位置所需的 SQL 语句。
现在,再次使用以下命令验证架构。
php bin/console doctrine:schema:validate
它将产生以下结果 −
[Mapping]  OK - The mapping files are correct.
[Database] OK - The database schema is in sync with the mapping files
步骤 8:Getter 和 setter
如绑定实体部分所示,以下命令为 Student 类生成所有 getter 和 setter。
$ php bin/console doctrine:generate:entities AppBundle/Entity/Student
步骤 9:将对象持久化到数据库
现在,我们已将 Student 实体映射到其对应的 Student 表。我们现在应该能够将 Student 对象持久化到数据库。将以下方法添加到包的 StudentController。
StudentController.php
<?php
namespace AppBundle\Controller;

use Sensio\Bundle\FrameworkExtraBundle\Configuration\Route;
use Symfony\Bundle\FrameworkBundle\Controller\Controller;
use Symfony\Component\HttpFoundation\Response;
use AppBundle\Entity\Student;

class StudentController extends Controller {
   /**
      * @Route("/student/add")
   */
   public function addAction() {
      $stud = new Student();
      $stud->setName('Adam');
      $stud->setAddress('12 north street');
      $doct = $this->getDoctrine()->getManager();

      // 告诉 Doctrine 你想要保存产品
      $doct->persist($stud);

      //执行查询(即 INSERT 查询)
      $doct->flush();

      return new Response('Saved new student with id ' . $stud->getId());
   }
}
在这里,我们通过基础控制器的 getDoctrine() 使用 getManager() 方法访问了教义管理器,然后使用教义管理器的 persist() 方法持久化当前对象。persist() 方法将命令添加到队列,但 flush() 方法执行实际工作(持久化学生对象)。
步骤 10:从数据库获取对象
在 StudentController 中创建一个将显示学生详细信息的函数。
StudentController.php
/**
   * @Route("/student/display")
*/
public function displayAction() {
   $stud = $this->getDoctrine()
   ->getRepository('AppBundle:Student')
   ->findAll();
   return $this->render('student/display.html.twig', array('data' => $stud));
}
步骤 11:创建视图
让我们创建一个指向显示操作的视图。转到 views 目录并创建一个文件"display.html.twig"。在文件中添加以下更改。
display.html.twig
<style>
   .table { border-collapse: collapse; }
   .table th, td {
      border-bottom: 1px solid #ddd;
      width: 250px;
      text-align: left;
      align: left;
   }
</style>

<h2>Students database application!</h2>
<table class = "table">
   <tr>
      <th>Name</th>
      <th>Address</th>
   </tr>
   {% for x in data %}
   <tr>
      <td>{{ x.Name }}</td>
      <td>{{ x.Address }}</td>
   </tr>
   {% endfor %}
</table>
您可以通过在浏览器中请求 URL"http://localhost:8000/student/display"来获取结果。
它将在屏幕上产生以下输出 −

步骤 12:更新对象
要更新 StudentController 中的对象,请创建一个操作并添加以下更改。
/**
   * @Route("/student/update/{id}")
*/
public function updateAction($id) {
   $doct = $this->getDoctrine()->getManager();
   $stud = $doct->getRepository('AppBundle:Student')->find($id);

   if (!$stud) {
      throw $this->createNotFoundException(
         'No student found for id '.$id
      );
   }
   $stud->setAddress('7 south street');
   $doct->flush();

   return new Response('Changes updated!');
}
现在,请求 URL"http://localhost:8000/Student/update/1",它将产生以下结果。
它将在屏幕上产生以下输出 −

步骤 13:删除对象
删除对象类似,它需要调用实体(doctrine)管理器的 remove() 方法。
这可以使用以下命令完成。
/**
   * @Route("/student/delete/{id}")
*/
public function deleteAction($id) {
   $doct = $this->getDoctrine()->getManager();
   $stud = $doct->getRepository('AppBundle:Student')->find($id);

   if (!$stud) {
      throw $this->createNotFoundException('No student found for id '.$id);
   }

   $doct->remove($stud);
   $doct->flush();

   return new Response('Record deleted!');
}
Symfony - 表单
Symfony 提供各种内置标签,以便轻松安全地处理 HTML 表单。Symfony 的 Form 组件执行表单创建和验证过程。它连接模型和视图层。它提供了一组表单元素,用于从预定义模型创建完整的 html 表单。本章详细介绍了表单。
表单字段
Symfony 框架 API 支持大量字段类型。让我们详细了解每种字段类型。
FormType
它用于在 Symfony 框架中生成表单。其语法如下 −
use Symfony\Component\Form\Extension\Core\Type\TextType;
use Symfony\Component\Form\Extension\Core\Type\EmailType;
use Symfony\Component\Form\Extension\Core\Type\FormType;
// ...

$builder = $this->createFormBuilder($studentinfo);
$builder
   ->add('title', TextType::class);
此处,$studentinfo 是 Student 类型的实体。createFormBuilder 用于创建 HTML 表单。add 方法用于在表单内添加输入元素。title 指学生标题属性。TextType::class 指 html 文本字段。Symfony 为所有 html 元素提供类。
TextType
TextType 字段表示最基本的输入文本字段。其语法如下 −
use Symfony\Component\Form\Extension\Core\Type\TextType;
$builder->add('name', TextType::class);
此处,名称与实体映射。
TextareaType
呈现文本区域 HTML 元素。其语法如下 −
use Symfony\Component\Form\Extension\Core\Type\TextareaType;
$builder->add('body', TextareaType::class, array(
   'attr' => array('class' => 'tinymce'),
));
EmailType
EmailType 字段是使用 HTML5 email 标签呈现的文本字段。其语法如下 −
use Symfony\Component\Form\Extension\Core\Type\EmailType;
$builder->add('token', EmailType::class, array(
    'data' => 'abcdef', ));
PasswordType
PasswordType 字段呈现输入密码的文本框。其语法如下 −
use Symfony\Component\Form\Extension\Core\Type\PasswordType;
$bulder->add('password', PasswordType::class);
RangeType
RangeType 字段是使用 HTML5 range 标签呈现的滑块。其语法如下 −
use Symfony\Component\Form\Extension\Core\Type\RangeType;
// ...
$builder->add('name', RangeType::class, array(
   'attr' => array(
      'min' => 100,
      'max' => 200
   )
));
PercentType
PercentType 渲染输入文本字段,专门处理百分比数据。其语法如下 −
use Symfony\Component\Form\Extension\Core\Type\PercentType;
// ...
$builder->add('token', PercentType::class, array(
   'data' => 'abcdef',
));
DateType
呈现日期格式。其语法如下 −
use Symfony\Component\Form\Extension\Core\Type\DateType;
// ...
$builder->add('joined', DateType::class, array(
    'widget' => 'choice',
));
此处,Widget 是呈现字段的基本方式。
它执行以下功能。
choice − 呈现三个选择输入。选择的顺序在格式选项中定义。
text −呈现三字段文本类型输入(月、日、年)。
single_text − 呈现日期类型的单个输入。根据格式选项验证用户的输入。
CheckboxType
创建单个输入复选框。这应始终用于具有布尔值的字段。其语法如下 −
use Symfony\Component\Form\Extension\Core\Type\CheckboxType;
// ...
$builder-<add('sports', CheckboxType::class, array(
   'label'    =< 'Are you interested in sports?',
   'required' =< false,
));
RadioType
创建一个单选按钮。如果单选按钮被选中,该字段将被设置为指定的值。其语法如下 −
use Symfony\Component\Form\Extension\Core\Type\RadioType;
// ...
$builder->add('token', RadioType::class, array(
'data' => 'abcdef',
));
请注意,单选按钮不能取消选中,只有当另一个同名单选按钮被选中时,其值才会更改。
RepeatedType
这是一个特殊的字段"组",它创建两个相同的字段,其值必须匹配。其语法如下 −
use Symfony\Component\Form\Extension\Core\Type\RepeatedType;
use Symfony\Component\Form\Extension\Core\Type\PasswordType;

// ...
$builder->add('password', RepeatedType::class, array(
   'type' => PasswordType::class,
   'invalid_message' => 'The password fields must match.',
   'options' => array('attr' => array('class' => 'password-field')),
   'required' => true,
   'first_options'  => array('label' => 'Password'),
   'second_options' => array('label' => 'Repeat Password'),
));
这主要用于检查用户的密码或电子邮件。
ButtonType
一个简单的可点击按钮。其语法如下 −
use Symfony\Component\Form\Extension\Core\Type\ButtonType;
// ...
$builder->add('save', ButtonType::class, array(
'attr' => array('class' => 'save'),
));
ResetType
一个将所有字段重置为其初始值的按钮。其语法如下 −
use Symfony\Component\Form\Extension\Core\Type\ResetType;
// ...
$builder->add('save', ResetType::class, array(
'attr' => array('class' => 'save'),
));
ChoiceType
多用途字段用于允许用户"选择"一个或多个选项。它可以呈现为选择标签、单选按钮或复选框。其语法如下 −
use Symfony\Component\Form\Extension\Core\Type\ChoiceType;
// ...
$builder->add('gender', ChoiceType::class, array(
   'choices'  => array(
      'Male' => true,
      'Female' => false,
   ),
));
SubmitType
提交按钮用于提交表单数据。其语法如下 −
use Symfony\Component\Form\Extension\Core\Type\SubmitType;
// ...
$builder->add('save', SubmitType::class, array(
   'attr' => array('class' => 'save'),
))
表单辅助函数
表单辅助函数是用于在模板中轻松创建表单的分支函数。
form_start
返回指向有效操作、路由或 URL 的 HTML 表单标记。其语法如下 −
{{ form_start(form, {'attr': {'id': 'form_person_edit'}}) }}
form_end
关闭使用 form_start 创建的 HTML 表单标记。其语法如下 −
{{ form_end(form) }}
textarea
返回一个 textarea 标签,可选择使用内联富文本 JavaScript 编辑器进行包装。
checkbox
返回一个符合 XHTML 规范的输入标签,类型为"checkbox"。其语法如下 −
echo checkbox_tag('choice[]', 1);
echo checkbox_tag('choice[]', 2);
echo checkbox_tag('choice[]', 3);
echo checkbox_tag('choice[]', 4);
input_password_tag
返回一个符合 XHTML 规范的 type ="password"的输入标签。其语法如下 −
echo input_password_tag('password');
echo input_password_tag('password_confirm');
input_tag
返回一个符合 XHTML 规范的 type ="text"的输入标签。其语法如下 −
echo input_tag('name');
label
返回一个带有指定参数的 label 标签。
radiobutton
返回一个符合 XHTML 规范的 type ="radio"的输入标签。其语法如下 −
echo ' Yes '.radiobutton_tag('true', 1);
echo ' No '.radiobutton_tag('false', 0);
reset_tag
返回一个符合 XHTML 规范的输入标签,其类型为"reset"。其语法如下 −
echo reset_tag('Start Over');
select
返回一个包含世界上所有国家/地区的 select 标签。其语法如下 −
echo select_tag(
   'url', options_for_select($url_list),
   array('onChange' => 'Javascript:this.form.submit();'));
submit
返回一个符合 XHTML 规范的输入标签,其类型为"submit"。其语法如下 −
echo submit_tag('Update Record');
在下一节中,我们将学习如何使用表单字段创建表单。
Student 学生表单应用程序
让我们使用 Symfony 表单字段创建一个简单的学生详细信息表单。为此,我们应遵循以下步骤 −
步骤 1:创建 Symfony 应用程序
使用以下命令创建 Symfony 应用程序 formsample。
symfony new formsample
实体通常在"src/AppBundle/Entity/"目录下创建。
步骤 2:创建实体
在"src/AppBundle/Entity/"目录下创建文件"StudentForm.php"。在文件中添加以下更改。
StudentForm.php
<?php
namespace AppBundle\Entity;

class StudentForm {
   private $studentName;
   private $studentId;
   public $password;
   private $address;
   public $joined;
   public $gender;
   private $email;
   private $marks;
   public $sports;

   public function getStudentName() {
      return $this->studentName;
   }
   public function setStudentName($studentName) {
      $this->studentName = $studentName;
   }
   public function getStudentId() {
      return $this->studentId;
   }
   public function setStudentId($studentid) {
      $this->studentid = $studentid;
   }
   public function getAddress() {
      return $this->address;
   }
   public function setAddress($address) {
      $this->address = $address;
   }
   public function getEmail() {
      return $this->email;
   }
   public function setEmail($email) {
      $this->email = $email;
   }
   public function getMarks() {
      return $this->marks;
   }
   public function setMarks($marks) {
      $this->marks = $marks;
   }
}
步骤 3:添加 StudentController
移至目录"src/AppBundle/Controller",创建"StudentController.php"文件,并在其中添加以下代码。
StudentController.php
<?php
namespace AppBundle\Controller;

use AppBundle\Entity\StudentForm;
use AppBundle\Form\FormValidationType;

use Symfony\Bundle\FrameworkBundle\Controller\Controller;
use Symfony\Component\HttpFoundation\Request;
use Sensio\Bundle\FrameworkExtraBundle\Configuration\Route;

use Symfony\Component\HttpFoundation\Response;
use Symfony\Component\Form\Extension\Core\Type\TextType;
use Symfony\Component\Form\Extension\Core\Type\DateType;
use Symfony\Component\Form\Extension\Core\Type\SubmitType;
use Symfony\Component\Form\Extension\Core\Type\ChoiceType;
use Symfony\Component\Form\Extension\Core\Type\PasswordType;
use Symfony\Component\Form\Extension\Core\Type\RangeType;
use Symfony\Component\Form\Extension\Core\Type\EmailType;
use Symfony\Component\Form\Extension\Core\Type\CheckboxType;
use Symfony\Component\Form\Extension\Core\Type\ButtonType;
use Symfony\Component\Form\Extension\Core\Type\TextareaType;
use Symfony\Component\Form\Extension\Core\Type\PercentType;
use Symfony\Component\Form\Extension\Core\Type\RepeatedType;

class StudentController extends Controller {
   /**
      * @Route("/student/new")
   */
   public function newAction(Request $request) {
      $stud = new StudentForm();
      $form = $this->createFormBuilder($stud)
         ->add('studentName', TextType::class)
         ->add('studentId', TextType::class)
         ->add('password', RepeatedType::class, array(
            'type' => PasswordType::class,
            'invalid_message' => 'The password fields
            must match.', 'options' => array('attr' => array('class' => 'password-field')),
            'required' => true, 'first_options'  => array('label' => 'Password'),
            'second_options' => array('label' => 'Re-enter'),
         ))

         ->add('address', TextareaType::class)
         ->add('joined', DateType::class, array(
               'widget' => 'choice',
         ))

         ->add('gender', ChoiceType::class, array(
            'choices'  => array(
               'Male' => true,
               'Female' => false,
            ),
         ))

         ->add('email', EmailType::class)
         ->add('marks', PercentType::class)
         ->add('sports', CheckboxType::class, array(
            'label'    => 'Are you interested in sports?', 'required' => false,
         ))

         ->add('save', SubmitType::class, array('label' => 'Submit'))
         ->getForm();
         return $this->render('student/new.html.twig', array(
            'form' => $form->createView(),
         ));
   }
}
步骤 4:渲染视图
移至目录"app/Resources/views/student/",创建"new.html.twig"文件并在其中添加以下更改。
{% extends 'base.html.twig' %}
{% block stylesheets %}
<style>
   #simpleform {
      width:600px;
      border:2px solid grey;
      padding:14px;
   }
   #simpleform label {
      font-size:14px;
      float:left;
      width:300px;
      text-align:right;
      display:block;
   }
   #simpleform span {
      font-size:11px;
      color:grey;
      width:100px;
      text-align:right;
      display:block;
   }
   #simpleform input {
      border:1px solid grey;
      font-family:verdana;
      font-size:14px;
      color:light blue;
      height:24px;
      width:250px;
      margin: 0 0 10px 10px;
   }
   #simpleform textarea {
      border:1px solid grey;
      font-family:verdana;
      font-size:14px;
      color:light blue;
      height:120px;
      width:250px;
      margin: 0 0 20px 10px;
   }
   #simpleform select {
      margin: 0 0 20px 10px;
   }
   #simpleform button {
      clear:both;
      margin-left:250px;
      background: grey;
      color:#FFFFFF;
      border:solid 1px #666666;
      font-size:16px;
   }
</style>

{% endblock %}
   {% block body %}
   <h3>Student details:</h3>
   <div id="simpleform">
      {{ form_start(form) }}
      {{ form_widget(form) }}
      {{ form_end(form) }}
   </div>
{% endblock %}
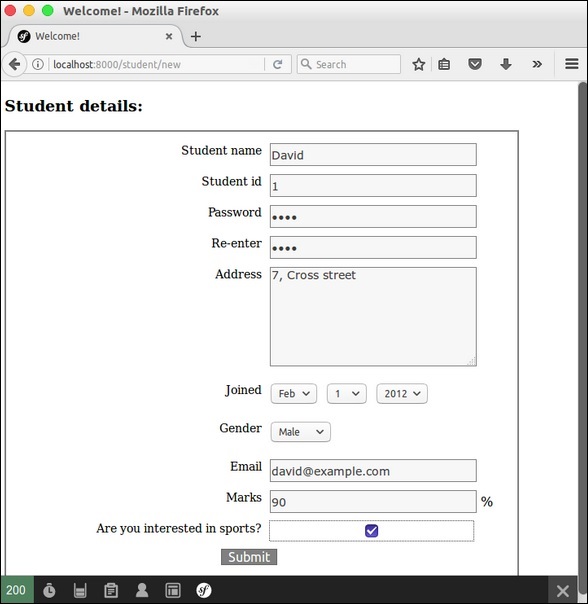
现在请求 URL"http://localhost:8000/student/new",它会产生以下结果。
结果
Symfony - 验证
验证是设计应用程序时最重要的方面。它验证传入的数据。本章详细介绍了表单验证。
验证约束
验证器旨在根据约束验证对象。如果验证对象,只需将一个或多个约束映射到其类,然后将其传递给验证器服务。默认情况下,在验证对象时,将检查相应类的所有约束,以查看它们是否真正通过。Symfony 支持以下值得注意的验证约束。
NotBlank
验证属性不为空。其语法如下 −
namespace AppBundle\Entity;
use Symfony\Component\Validator\Constraints as Assert;

class Student {
   /**
      * @Assert\NotBlank()
   */
   protected $studentName;
}
此 NotBlank 约束确保 studentName 属性不应为空。
NotNull
验证值不严格等于 null。其语法如下 −
namespace AppBundle\Entity;
use Symfony\Component\Validator\Constraints as Assert;

class Student {
   /**
      * @Assert\NotNull()
   */
   protected $studentName;
}
验证值是否为有效的电子邮件地址。其语法如下 −
namespace AppBundle\Entity;
use Symfony\Component\Validator\Constraints as Assert;

class Student {
   /**
      * @Assert\Email(
         * message = "The email '{{ value }}' is not a valid email.",
         * checkMX = true
      * )
   */
   protected $email;
}
IsNull
验证某个值是否完全等于 null。其语法如下 −
namespace AppBundle\Entity;
use Symfony\Component\Validator\Constraints as Assert;

class Student {
   /**
      * @Assert\IsNull()
   */
   protected $studentName;
}
Length
验证给定的字符串长度是否介于某个最小值和最大值之间。其语法如下−
namespace AppBundle\Entity;
use Symfony\Component\Validator\Constraints as Assert;

class Student {
   /**
      * @Assert\Length(
         * min = 5,
         * max = 25,
         * minMessage = "Your first name must be at least {{ limit }} characters long",
         * maxMessage = "Your first name cannot be longer than {{ limit }} characters"
      * )
   */
   protected $studentName;
}
Range
验证给定的数字是否介于某个最小数字和最大数字之间。其语法如下 −
namespace AppBundle\Entity;
use Symfony\Component\Validator\Constraints as Assert;
class Student {
   /**
      * @Assert\Range(
         * min = 40,
         * max = 100,
         * minMessage = "You must be at least {{ limit }} marks",
         * maxMessage = "Your maximum {{ limit }} marks"
      * )
   */
   protected $marks;
}
Date
验证值是否为有效日期。它遵循有效的 YYYY-MM-DD 格式。其语法如下
验证值是否为有效日期。它遵循有效的 YYYY-MM-DD 格式。其语法如下 −
namespace AppBundle\Entity;
use Symfony\Component\Validator\Constraints as Assert;

class Student {
   /**
      * @Assert\Date()
   */
   protected $joinedAt;
}
Choice
此约束用于确保给定值是给定的一组有效选项之一。它还可用于验证项目数组中的每个项目是否都是这些有效选项之一。其语法如下 −
namespace AppBundle\Entity;
use Symfony\Component\Validator\Constraints as Assert;

class Student {
   /**
      * @Assert\Choice(choices = {"male", "female"}, message = "Choose a valid gender.")
   */
   protected $gender;
}
UserPassword
这将验证输入值是否等于当前经过身份验证的用户的密码。这在用户可以更改密码但出于安全考虑需要输入旧密码的表单中很有用。其语法如下 −
namespace AppBundle\Form\Model;
use Symfony\Component\Security\Core\Validator\Constraints as SecurityAssert;

class ChangePassword {
   /**
      * @SecurityAssert\UserPassword(
         * message = "Wrong value for your current password"
      * )
   */
   protected $oldPassword;
}
此约束验证旧密码是否与用户的当前密码匹配。
验证示例
让我们编写一个简单的应用程序示例来理解验证概念。
步骤 1 − 创建验证应用程序。
使用以下命令创建 Symfony 应用程序 validationsample。
symfony new validationsample
步骤 2 − 在 "src/AppBundle/Entity/" 目录下的 "FormValidation.php" 文件中创建一个名为 FormValidation 的实体。在文件中添加以下更改。
FormValidation.php
<?php
namespace AppBundle\Entity;
use Symfony\Component\Validator\Constraints as Assert;

class FormValidation {
   /**
      * @Assert\NotBlank()
   */
   protected $name;

   /**
      * @Assert\NotBlank()
   */
   protected $id;
   protected $age;

   /**
      * @Assert\NotBlank()
   */
   protected $address;
   public $password;

   /**
      * @Assert\Email(
         * message = "The email '{{ value }}' is not a valid email.",
         * checkMX = true
      * )
   */
   protected $email;

   public function getName() {
      return $this->name;
   }
   public function setName($name) {
      $this->name = $name;
   }
   public function getId() {
      return $this->id;
   }
   public function setId($id) {
      $this->id = $id;
   }
   public function getAge() {
      return $this->age;
   }
   public function setAge($age) {
      $this->age = $age;
   }
   public function getAddress() {
      return $this->address;
   }
   public function setAddress($address) {
      $this->address = $address;
   }
   public function getEmail() {
      return $this->email;
   }
   public function setEmail($email) {
      $this->email = $email;
   }
}
步骤 3 − 在 StudentController 中创建一个 validateAction 方法。移动到目录 "src/AppBundle/Controller",创建 "studentController.php" 文件,并在其中添加以下代码。
StudentController.php
use AppBundle\Entity\FormValidation;
/**
   * @Route("/student/validate")
*/
public function validateAction(Request $request) {
   $validate = new FormValidation();
   $form = $this->createFormBuilder($validate)
      ->add('name', TextType::class)
      ->add('id', TextType::class)
      ->add('age', TextType::class)
      ->add('address', TextType::class)
      ->add('email', TextType::class)
      ->add('save', SubmitType::class, array('label' => 'Submit'))
      ->getForm();

   $form->handleRequest($request);
   if ($form->isSubmitted() && $form->isValid()) {
      $validate = $form->getData();
      return new Response('Form is validated.');
   }
   return $this->render('student/validate.html.twig', array(
      'form' => $form->createView(),
   ));
}
在这里,我们使用 Form 类创建了表单,然后处理了该表单。如果表单已提交且有效,则会显示表单验证消息。否则,将显示默认表单。
步骤 4 − 在 StudentController 中为上面创建的操作创建视图。移至目录 "app/Resources/views/student/"。创建 "validate.html.twig" 文件并在其中添加以下代码。
{% extends 'base.html.twig' %}
{% block stylesheets %}
   <style>
      #simpleform {
         width:600px;
         border:2px solid grey;
         padding:14px;
      }
      #simpleform label {
         font-size:14px;
         float:left;
         width:300px;
         text-align:right;
         display:block;
      }
      #simpleform span {
         font-size:11px;
         color:grey;
         width:100px;
         text-align:right;
         display:block;
      }
      #simpleform input {
         border:1px solid grey;
         font-family:verdana;
         font-size:14px;
         color:light blue;
         height:24px;
         width:250px;
         margin: 0 0 10px 10px;
      }
      #simpleform textarea {
         border:1px solid grey;
         font-family:verdana;
         font-size:14px;
         color:light blue;
         height:120px;
         width:250px;
         margin: 0 0 20px 10px;
      }
      #simpleform select {
         margin: 0 0 20px 10px;
      }
      #simpleform button {
         clear:both;
         margin-left:250px;
         background: grey;
         color:#FFFFFF;
         border:solid 1px #666666;
         font-size:16px;
      }
   </style>
{% endblock %}

{% block body %}
   <h3>Student form validation:</h3>
   <div id = "simpleform">
      {{ form_start(form) }}
      {{ form_widget(form) }}
      {{ form_end(form) }}
   </div>
{% endblock %}
在这里,我们使用表单标签来创建表单。
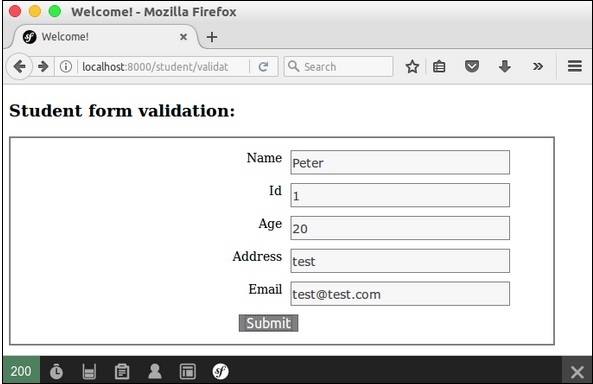
步骤 5 − 最后,运行应用程序 http://localhost:8000/student/validate。
结果:初始页面
结果:最终页面

Symfony - 文件上传
Symfony Form 组件提供 FileType 类来处理文件输入元素。它可以轻松上传图像、文档等。让我们学习如何使用 FileType 功能创建一个简单的应用程序。
步骤 1 − 使用以下命令创建一个新应用程序 fileuploadsample。
symfony new fileuploadsample
步骤 2 − 创建一个实体 Student,具有姓名、年龄和照片,如以下代码所示。
src/AppBundle/Entity/Student.php
<?php
namespace AppBundle\Entity;
use Symfony\Component\Validator\Constraints as Assert;  class Student {
   /**
      * @Assert\NotBlank()
   */
   private $name;

   /**
      * @Assert\NotBlank()
   */
   private $age;

   /**
      * @Assert\NotBlank(message="Please, upload the photo.")
      * @Assert\File(mimeTypes={ "image/png", "image/jpeg" })
   */
   private $photo;

   public function getName() {
      return $this->name;
   }
   public function setName($name) {
      $this->name = $name;
      return $this;
   }
   public function getAge() {
      return $this->age;
   }
   public function setAge($age) {
      $this->age = $age;
      return $this;
   }
   public function getPhoto() {
      return $this->photo;
   }
   public function setPhoto($photo) {
      $this->photo = $photo;
      return $this;
   }
}
这里,我们为照片属性指定了文件。
步骤 3 − 创建学生控制器 StudentController 和一个新方法 addAction,如以下代码所示。
<?php
namespace AppBundle\Controller;

use AppBundle\Entity\Student;
use AppBundle\Form\FormValidationType;
use Symfony\Bundle\FrameworkBundle\Controller\Controller;
use Sensio\Bundle\FrameworkExtraBundle\Configuration\Route;

use Symfony\Component\HttpFoundation\Request;
use Symfony\Component\HttpFoundation\Response;
use Symfony\Component\Form\Extension\Core\Type\TextType;
use Symfony\Component\Form\Extension\Core\Type\FileType;
use Symfony\Component\Form\Extension\Core\Type\SubmitType;

class StudentController extends Controller {
   /**
      * @Route("/student/new")
   */
   public function newAction(Request $request) {
      $student = new Student();
      $form = $this->createFormBuilder($student)
         ->add('name', TextType::class)
         ->add('age', TextType::class)
         ->add('photo', FileType::class, array('label' => 'Photo (png, jpeg)'))
         ->add('save', SubmitType::class, array('label' => 'Submit'))
         ->getForm();

      $form->handleRequest($request);
      if ($form->isSubmitted() && $form->isValid()) {
         $file = $student->getPhoto();
         $fileName = md5(uniqid()).'.'.$file->guessExtension();
         $file->move($this->getParameter('photos_directory'), $fileName);
         $student->setPhoto($fileName);
         return new Response("User photo is successfully uploaded.");
      } else {
         return $this->render('student/new.html.twig', array(
            'form' => $form->createView(),
         ));
      }
   }
}
在这里,我们为学生实体创建了表单并处理了请求。当用户提交表单并且表单有效时,我们使用参数 photos_directory 将上传的文件移动到我们的上传目录中。
步骤 4 − 使用以下表单标签创建视图 new.html.twig。
{% extends 'base.html.twig' %}
{% block javascripts %}
   <script language = "javascript" src = "https://code.jquery.com/jquery-2.2.4.min.js"></script>
{% endblock %}
{% block stylesheets %}
   <style>
      #simpleform {
         width:600px;
         border:2px solid grey;
         padding:14px;
      }
      #simpleform label {
         font-size:12px;
         float:left;
         width:300px;
         text-align:right;
         display:block;
      }
      #simpleform span {
         font-size:11px;
         color:grey;
         width:100px;
         text-align:right;
         display:block;
      }
      #simpleform input {
         border:1px solid grey;
         font-family:verdana;
         font-size:14px;
         color:grey;
         height:24px;
         width:250px;
         margin: 0 0 20px 10px;
      }
      #simpleform button {
         clear:both;
         margin-left:250px;
         background:grey;
         color:#FFFFFF;
         border:solid 1px #666666;
         font-size:16px;
      }
   </style>
{% endblock %}
{% block body %}
   <h3>Student form</h3>
   <div id="simpleform">
      {{ form_start(form) }}
      {{ form_widget(form) }}
      {{ form_end(form) }}
   </div>
{% endblock %}
步骤 5 − 在参数配置文件中设置参数 photos_directory,如下所示。
app/config/config.xml
parameters: photos_directory: '%kernel.root_dir%/../web/uploads/photos'
步骤 6 − 现在,运行应用程序并打开 http://localhost:8000/student/new 并上传照片。上传的照片将上传到 photos_directory,并显示成功消息。
结果:初始页面
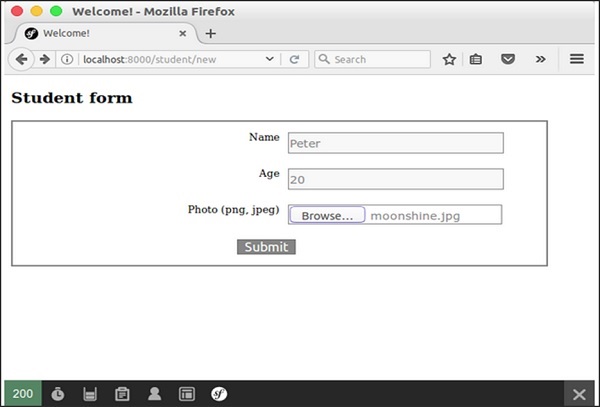
结果:文件上传页面

Symfony - Ajax 控件
AJAX 是 Web 编程中的一项现代技术。它提供了在网页中异步发送和接收数据的选项,而无需刷新页面。让我们在本章中学习 Symfony AJAX 编程。
Symfony 框架提供了识别请求类型是否为 AJAX 的选项。Symfony HttpFoundation 组件的 Request 类有一个方法 isXmlHttpRequest(),用于此目的。如果发出了 AJAX 请求,则当前请求对象的 isXmlHttpRequest() 方法返回 true,否则返回 false。
此方法用于在服务器端正确处理 AJAX 请求。
if ($request->isXmlHttpRequest()) {
    // Ajax 请求
} else {
    // 正常请求
}
Symfony 还提供了一个基于 JSON 的响应类 JsonResponse,用于以 JSON 格式创建响应。我们可以结合这两种方法来创建一个简单干净的基于 AJAX 的 Web 应用程序。
AJAX - 工作示例
让我们在学生应用程序中添加一个新页面 student/ajax,并尝试异步获取学生信息。
步骤 1 −在StudentController(src/AppBundle/Controller/StudentController.php)中添加ajaxAction方法。
/**
   * @Route("/student/ajax")
*/
public function ajaxAction(Request $request) {
   $students = $this->getDoctrine()
      ->getRepository('AppBundle:Student')
      ->findAll();

   if ($request->isXmlHttpRequest() || $request->query->get('showJson') == 1) {
      $jsonData = array();
      $idx = 0;
      foreach($students as $student) {
         $temp = array(
            'name' => $student->getName(),
            'address' => $student->getAddress(),
         );
         $jsonData[$idx++] = $temp;
      }
      return new JsonResponse($jsonData);
   } else {
      return $this->render('student/ajax.html.twig');
   }
}
此处,如果请求是 AJAX,我们将获取学生信息,将其编码为 JSON,并使用 JsonResponse 对象返回。否则,我们只呈现相应的视图。
步骤 2 − 在 Student 视图目录 app/Resources/views/student/ 中创建一个视图文件 ajax.html.twig,并添加以下代码。
{% extends 'base.html.twig' %}
{% block javascripts %}
   <script language = "javascript"
      src = "https://code.jquery.com/jquery-2.2.4.min.js"></script>

   <script language = "javascript">
      $(document).ready(function(){
         $("#loadstudent").on("click", function(event){
            $.ajax({
               url:        '/student/ajax',
               type:       'POST',
               dataType:   'json',
               async:      true,

               success: function(data, status) {
                  var e = $('<tr><th>Name</th><th>Address</th></tr>');
                  $('#student').html('');
                  $('#student').append(e);

                  for(i = 0; i < data.length; i++) {
                     student = data[i];
                     var e = $('<tr><td id = "name"></td><td id = "address"></td></tr>');

                     $('#name', e).html(student['name']);
                     $('#address', e).html(student['address']);
                     $('#student').append(e);
                  }
               },
               error : function(xhr, textStatus, errorThrown) {
                  alert('Ajax request failed.');
               }
            });
         });
      });
   </script>
{% endblock %}

{% block stylesheets %}
   <style>
      .table { border-collapse: collapse; }
      .table th, td {
         border-bottom: 1px solid #ddd;
         width: 250px;
         text-align: left;
         align: left;
      }
   </style>
{% endblock %}

{% block body %}
   <a id = "loadstudent" href = "#">Load student information</a>
   </br>
   </br>

   <table class = "table">
      <tbody id = "student"></tbody>
   </table>
{% endblock %}
在这里,我们创建了一个锚标记 (id: loadstudent),以使用 AJAX 调用加载学生信息。AJAX 调用使用 JQuery 完成。当用户单击 loadstudent 标记时,将激活附加到该标记的事件。然后,它将使用 AJAX 调用获取学生信息并动态生成所需的 HTML 代码。
步骤 3−最后,运行应用程序 http://localhost:8000/student/ajax 并单击"加载学生信息"锚点选项卡。
结果:初始页面

结果:包含学生信息的页面
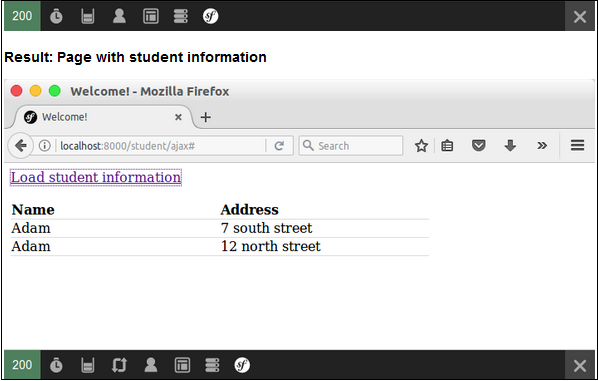
Symfony - Cookies 和 Session 管理
Symfony HttpFoundation 组件以面向对象的方式提供 cookie 和 session 管理。Cookie 提供客户端数据存储,仅支持少量数据。通常,每个域为 2KB,具体取决于浏览器。Session 提供服务器端数据存储,支持大量数据。让我们看看如何在 Symfony Web 应用程序中创建 cookie 和 session。
Cookie
Symfony 提供 Cookie 类来创建 cookie 项。让我们创建一个 cookie 颜色,其值为 blue,将在 24 小时内过期。 cookie类的构造函数参数如下。
- name (type: string) - cookie名称
- value (type: string) - cookie值
- expire (type: integer / string / datetime) - 过期信息
- path (type: string) - cookie所在的服务器路径
- domain (type: string) – cookie所在的域名地址
- secure (type: boolean) - cookie是否需要在HTTPS连接中传输
- httpOnly (type: boolean) - cookie是否仅在HTTP协议中可用
use Symfony\Component\HttpFoundation\Cookie;
$cookie = new Cookie('color', 'green', strtotime('tomorrow'), '/',
'somedomain.com', true, true);
Symfony 还提供了以下基于字符串的 cookie 创建选项。
$cookie = Cookie::fromString('color = green; expires = Web, 4-May-2017 18:00:00 +0100;
path=/; domain = somedomain.com; secure; httponly');
现在,需要将创建的 cookie 附加到 http 响应对象的标头,如下所示。
$response->headers->setCookie($cookie);
要获取 cookie,我们可以使用 Request 对象,如下所示。
$cookie = $request->cookie->get('color');
这里,request->cookie 属于 PropertyBag 类型,我们可以使用 PropertyBag 方法对其进行操作。
Session
Symfony 提供了一个实现 SessionInterface 接口的 Session 类。重要的会话 API 如下,
start − 启动会话。
Session $session = new Session();
$session->start();
invalidate −清除所有会话数据并重新生成会话 ID。
set − 使用密钥将数据存储在会话中。
$session->set('key', 'value');
我们可以在会话值中使用任何数据,无论是简单的整数还是复杂的对象。
get − 使用密钥从会话中获取数据。
$val = $session->get('key');
remove − 从会话中删除密钥。
clear − 删除会话数据。
FlashBag
Session 提供了另一个有用的功能,称为 FlashBag。它是会话内的一个特殊容器,仅在页面重定向期间保存数据。它在 http 重定向中很有用。在重定向到页面之前,可以将数据保存在 FlashBag 中,而不是普通的会话容器中,保存的数据将在下一个请求(重定向页面)中可用。然后,数据将自动失效。
$session->getFlashBag()->add('key', 'value');
$session->getFlashBag()->get('key');
Symfony - 国际化
国际化 (i18n) 和 本地化 (l10n) 有助于提高 Web 应用程序的客户覆盖率。Symfony 为此提供了一个出色的翻译组件。让我们在本章中学习如何使用翻译组件。
启用翻译
默认情况下,Symfony Web 框架禁用翻译组件。要启用它,请在配置文件 app/config/config.yml 中添加翻译器部分。
framework: translator: { fallbacks: [en] }
翻译文件
翻译组件使用翻译资源文件翻译文本。资源文件可以用 PHP、XML 和 YAML 编写。资源文件的默认位置是 app/Resources/translations。每种语言都需要一个资源文件。让我们为法语编写一个资源文件 messages.fr.yml。
I love Symfony: J'aime Symfony
I love %name%: J'aime %name%
左侧文本为英文,右侧文本为法文。第二行显示占位符的使用。使用翻译时可以动态添加占位符信息。
用法
默认情况下,用户系统的默认语言环境将由 Symfony Web 框架设置。如果 Web 应用程序中未配置默认语言环境,它将回退到英文。也可以在网页的 URL 中设置语言环境。
http://www.somedomain.com/en/index
http://www.somedomain.com/fr/index
让我们在示例中使用基于 URL 的语言环境来轻松理解翻译概念。在 DefaultController (src/AppBundle/Controller/DefaultController.php) 中创建一个新函数 translationSample,路由为 /{_locale}/translation/sample。{_locale} 是 Symfony 中用于指定默认语言环境的特殊关键字。
/**
   * @Route("/{_locale}/translation/sample", name="translation_sample")
*/
public function translationSample() {
   $translated = $this->get('translator')->trans('I love Symfony');
   return new Response($translated);
}
这里,我们使用了翻译方法 trans,它将内容翻译为当前语言环境。在本例中,当前语言环境是 URL 的第一部分。现在,运行应用程序并在浏览器中加载页面 http://localhost:8000/en/translation/sample。
结果将是英文版的"I love Symfony"。现在,在浏览器中加载页面 http://localhost:8000/fr/translation/sample。现在,文本将被翻译成法语,如下所示。

同样,twig 模板有 {% trans %> 块,用于在视图中启用翻译功能。为了检查它,请在app/Resources/views/translate/index.html.twig中添加一个新函数translationTwigSample和相应的视图。
/**
   * @Route("/{_locale}/translation/twigsample", name="translation_twig_sample")
*/
public function translationTwigSample() {
   return $this->render('translate/index.html.twig');
}
查看
{% extends 'base.html.twig' %}
{% block body %}
{% trans with {'%name%': 'Symfony'} from "app" into "fr" %}I love %name% {% endtrans %}
{% endblock %}
此处 trans 块也指定了占位符。页面结果如下。

Symfony - 日志记录
日志记录对于 Web 应用程序非常重要。Web 应用程序一次可由数百到数千个用户使用。要预览 Web 应用程序周围发生的事情,应启用日志记录。如果没有日志记录,开发人员将无法找到应用程序的状态。假设最终客户报告问题或项目堆栈持有者报告性能问题,那么开发人员的第一个工具就是日志记录。通过检查日志信息,可以了解问题的可能原因。
Symfony 通过集成 Monolog 日志记录框架提供了出色的日志记录功能。Monolog 是 PHP 环境中日志记录的事实标准。每个 Symfony Web 应用程序中都启用了日志记录,并以服务形式提供。只需使用基本控制器获取记录器对象,如下所示。
$logger = $this->get('logger');
获取记录器对象后,我们可以使用它记录信息、警告和错误。
$logger->info('Hi, It is just a information. Nothing to worry.');
$logger->warn('Hi, Something is fishy. Please check it.');
$logger->error('Hi, Some error occured. Check it now.');
$logger->critical('Hi, Something catastrophic occured. Hurry up!');
Symfony Web 应用程序配置文件 app/config/config.yml 有一个单独的记录器框架部分。它可用于更新记录器框架的工作。
Symfony - 电子邮件管理
电子邮件功能是 Web 框架中最需要的功能。即使是简单的应用程序也会有一个联系表单,详细信息将通过电子邮件发送给系统管理员。Symfony 集成了 SwiftMailer,这是市场上最好的 PHP 电子邮件模块。SwiftMailer 是一个出色的电子邮件库,它提供了一个选项,可以使用老式的 sendmail 将电子邮件发送到最新的基于云的邮件应用程序。
让我们通过发送一封简单的电子邮件来了解 Symfony 中的邮件概念。在编写邮件功能之前,请在 app/config/parameters.yml 中设置邮件配置详细信息。然后,在 DefaultController 中创建一个新函数 MailerSample 并添加以下代码。
/**
   * @Route("/mailsample/send", name="mail_sample_send")
*/
public function MailerSample() {
   $message = \Swift_Message::newInstance()
      ->setSubject('Hello Email')
      ->setFrom('someone@gmail.com')
      ->setTo('anotherone@gmail.com')
      ->setBody(
      $this->renderView('Emails/sample.html.twig'), 'text/html' );

   $this->get('mailer')->send($message);
   return new Response("Mail send");
}
在这里,我们只是使用 SwiftMailer 组件创建了一条消息,并使用 Twig 模板呈现了消息正文。然后,我们使用键"mailer"从控制器的 get 方法中获取邮件程序组件。最后,我们使用 send 方法发送消息并打印 Mail send 消息。
现在,运行页面 http://localhost:8000/mailsample/send,结果如下。

Symfony - 单元测试
单元测试对于大型项目的持续开发至关重要。单元测试将自动测试应用程序的组件,并在出现问题时提醒您。单元测试可以手动完成,但通常是自动化的。
PHPUnit
Symfony 框架与 PHPUnit 单元测试框架集成。要为 Symfony 框架编写单元测试,我们需要设置 PHPUnit。如果未安装 PHPUnit,请下载并安装它。如果安装正确,您将看到以下响应。
phpunit
PHPUnit 5.1.3 由 Sebastian Bergmann 和贡献者开发
单元测试
单元测试是针对单个 PHP 类(也称为单元)的测试。
在 AppBundle 的 Libs/ 目录中创建一个 Student 类。它位于 "src/AppBundle/Libs/Student.php"。
Student.php
namespace AppBundle\Libs;

class Student {
   public function show($name) {
      return $name. " , Student name is tested!";
   }
}
现在,在"tests/AppBundle/Libs"目录中创建一个StudentTest文件。
StudentTest.php
namespace Tests\AppBundle\Libs;
use AppBundle\Libs\Student;

class StudentTest extends \PHPUnit_Framework_TestCase {
   public function testShow() {
      $stud = new Student();
      $assign = $stud->show('stud1');
      $check = "stud1 , Student name is tested!";
      $this->assertEquals($check, $assign);
   }
}
运行测试
要在目录中运行测试,请使用以下命令。
$ phpunit
执行上述命令后,您将看到以下响应。
PHPUnit 5.1.3 by Sebastian Bergmann and contributors.
Usage: phpunit [options] UnitTest [UnitTest.php]
   phpunit [options] <directory>
Code Coverage Options:
   --coverage-clover <file>  Generate code coverage report in Clover XML format.
   --coverage-crap4j <file>  Generate code coverage report in Crap4J XML format.
   --coverage-html <dir>     Generate code coverage report in HTML format.
现在,按如下方式运行 Libs 目录中的测试。
$ phpunit tests/AppBundle/Libs
结果
Time: 26 ms, Memory: 4.00Mb
OK (1 test, 1 assertion)
Symfony - 高级概念
在本章中,我们将了解 Symfony 框架中的一些高级概念。
HTTP 缓存
Web 应用程序中的缓存可提高性能。例如,购物车 Web 应用程序中的热门产品可以缓存一段有限的时间,以便可以快速呈现给客户,而无需访问数据库。以下是缓存的一些基本组件。
缓存项
缓存项是存储为键/值对的单个信息单元。键 应为字符串,值 可以是任何 PHP 对象。PHP 对象通过序列化存储为字符串,并在读取项目时转换回对象。
缓存适配器
缓存适配器是将项目存储在商店中的实际机制。存储可以是内存、文件系统、数据库、redis 等。缓存组件提供了一个 AdapterInterface,适配器可以通过该接口将缓存项存储在后端存储中。有许多内置的缓存适配器可用。其中一些如下 −
数组缓存适配器 - 缓存项存储在 PHP 数组中。
文件系统缓存适配器 - 缓存项存储在文件中。
PHP 文件缓存适配器 - 缓存项存储为 php 文件。
APCu 缓存适配器 - 使用 PHP APCu 扩展将缓存项存储在共享内存中。
Redis 缓存适配器 - 缓存项存储在 Redis 服务器中。
PDO 和 Doctrine DBAL 缓存适配器 - 缓存项存储在数据库中。
链式缓存适配器 - 结合多个缓存适配器以实现复制目的。
代理缓存适配器 - 使用第三方缓存项适配器,实现 CacheItemPoolInterface。
缓存池
缓存池是缓存项的逻辑存储库。缓存池由缓存适配器实现。
简单应用程序
让我们创建一个简单的应用程序来了解缓存概念。
步骤 1 − 创建一个新应用程序,cache-example。
cd /path/to/app
mkdir cache-example
cd cache-example
步骤 2 − 安装缓存组件。
composer require symfony/cache
步骤 3 − 创建文件系统适配器。
require __DIR__ . '/vendor/autoload.php';
use Symfony\Component\Cache\Adapter\FilesystemAdapter;
$cache = new FilesystemAdapter();
步骤 4 − 使用适配器的 getItem 和 set 方法创建缓存项。getItem 使用其键获取缓存项。如果键不存在,则创建一个新项。 set 方法存储实际数据。
$usercache = $cache->getitem('item.users');
$usercache->set(['jon', 'peter']);
$cache->save($usercache);
步骤 5 − 使用 getItem、isHit 和 get 方法访问缓存项。isHit 告知缓存项的可用性,get 方法提供实际数据。
$userCache = $cache->getItem('item.users');
if(!$userCache->isHit()) {
   echo "item.users is not available";
} else {
   $users = $userCache->get();
   var_dump($users);
}
步骤 6 − 使用 deleteItem 方法删除缓存项。
$cache->deleteItem('item.users');
完整代码清单如下。
<?php
   require __DIR__ . '/vendor/autoload.php';
   use Symfony\Component\Cache\Adapter\FilesystemAdapter;

   $cache = new FilesystemAdapter();
   $usercache = $cache->getitem('item.users');
   $usercache->set(['jon', 'peter']);
   $cache->save($usercache);
   $userCache = $cache->getItem('item.users');

   if(!$userCache->isHit()) {
      echo "item.users is not available";
   } else {
      $users = $userCache->get();
      var_dump($users);
   }
   $cache->deleteItem('item.users');
?>
结果
array(2) {
   [0]=>
   string(3) "jon"
   [1]=>
   string(5) "peter"
}
调试
调试是开发应用程序时最常见的活动之一。Symfony 提供了一个单独的组件来简化调试过程。我们只需调用 Debug 类的 enable 方法即可启用 Symfony 调试工具。
use Symfony\Component\Debug\Debug
Debug::enable()
Symfony 提供了两个类,ErrorHandler 和 ExceptionHandler 用于调试目的。ErrorHandler 捕获 PHP 错误并将其转换为异常、ErrorException 或 FatalErrorException,而 ExceptionHandler 捕获未捕获的 PHP 异常并将其转换为有用的 PHP 响应。默认情况下,ErrorHandler 和 ExceptionHandler 是禁用的。我们可以使用注册方法启用它。
使用 Symfony\Component\Debug\ErrorHandler;
使用 Symfony\Component\Debug\ExceptionHandler;
ErrorHandler::register();
ExceptionHandler::register();
在 Symfony Web 应用程序中,调试环境由 DebugBundle 提供。在 AppKernel 的 registerBundles 方法中注册该包以启用它。
if (in_array($this->getEnvironment(), ['dev', 'test'], true)) {
   $bundles[] = new Symfony\Bundle\DebugBundle\DebugBundle();
}
分析器
应用程序的开发需要世界一流的分析工具。分析工具收集有关应用程序的所有运行时信息,例如执行时间、各个模块的执行时间、数据库活动所用的时间、内存使用情况等。除了上述指标之外,Web 应用程序还需要更多信息,例如请求时间、创建响应所用的时间等。
Symfony 默认在 Web 应用程序中启用所有此类信息。Symfony 为 Web 分析提供了一个单独的包,称为 WebProfilerBundle。通过在 AppKernel 的 registerBundles 方法中注册包,可以在 Web 应用程序中启用 Web 分析器包。
if (in_array($this->getEnvironment(), ['dev', 'test'], true)) {
   $bundles[] = new Symfony\Bundle\WebProfilerBundle\WebProfilerBundle();
}
可以在应用程序配置文件 app/config/config.xml 的 web_profile 部分 下配置 Web 配置文件组件。
web_profiler:
   toolbar:      false
   position:     bottom
Symfony 应用程序将分析数据作为单独的部分显示在页面底部。
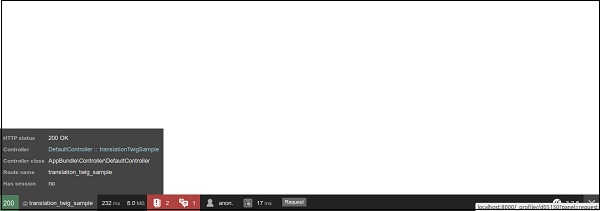
Symfony 还提供了一种简单的方法,可以使用 DataCollectorInterface 接口 和 twig 模板在分析数据中添加有关页面的自定义详细信息。简而言之,Symfony 通过相对轻松地提供出色的分析框架,使 Web 开发人员能够创建世界一流的应用程序。
安全性
如前所述,Symfony 通过其安全组件提供了强大的安全框架。安全组件分为以下四个子组件。
- symfony/security-core - 核心安全功能。
- symfony/security-http - HTTP 协议中的集成安全功能。
- symfony/security-csrf - 保护 Web 应用程序中的跨站点请求伪造。
- symfony/security-acl - 基于高级访问控制列表的安全框架。
简单的身份验证和授权
让我们使用一个简单的演示应用程序来学习身份验证和授权的概念。
步骤 1 − 使用以下命令创建一个新的 Web 应用程序 securitydemo。
symfony new securitydemo
步骤 2 −使用安全配置文件在应用程序中启用安全功能。安全相关配置放在单独的文件 security.yml 中。默认配置如下。
security:
   providers:
      in_memory:
         memory: ~
   firewalls:
      dev:
         pattern: ^/(_(profiler|wdt)|css|images|js)/
         security: false
   main:
      anonymous: ~
      #http_basic: ~
      #form_login: ~
默认配置启用基于内存的安全提供程序和对所有页面的匿名访问。防火墙部分将与模式 ^/(_(profiler|wdt)|css|images|js)/ 匹配的文件排除在安全框架之外。默认模式包括样式表、图像和 JavaScript(以及像 profiler 这样的开发工具)。
步骤 3 − 通过在主部分中添加 http_basic 选项来启用基于 HTTP 的安全身份验证系统,如下所示。
security:
   # ...
   firewalls:
      # ...
      main:
         anonymous: ~
         http_basic: ~
         #form_login: ~
步骤 4 − 在内存提供者部分添加一些用户。此外,为用户添加角色。
security:
   providers:
      in_memory:
         memory:
            users:
               myuser:
                  password: user
                  roles: 'ROLE_USER'
                     myadmin:
                        password: admin
                        roles: 'ROLE_ADMIN'
我们添加了两个用户,user 属于角色 ROLE_USER,admin 属于角色 ROLE_ADMIN。
步骤 5 − 添加编码器以获取当前登录用户的完整详细信息。编码器的目的是从 Web 请求中获取当前用户对象的完整详细信息。
security:
   # ...
   encoders:
      Symfony\Component\Security\Core\User\User: bcrypt
      # ...
Symfony 提供了一个接口 UserInterface 来获取用户详细信息,例如用户名、角色、密码等。我们需要根据需求实现该接口并在编码器部分对其进行配置。
例如,假设用户详细信息在数据库中。然后,我们需要创建一个新的 User 类并实现 UserInterface 方法以从数据库中获取用户详细信息。一旦数据可用,安全系统就会使用它来允许/拒绝用户。Symfony 为内存提供程序提供了一个默认的 User 实现。算法用于解密用户密码。
步骤 6 − 使用 bcrypt 算法加密用户密码并将其放置在配置文件中。由于我们使用了 bcrypt 算法,User 对象会尝试解密配置文件中指定的密码,然后尝试与用户输入的密码进行匹配。 Symfony 控制台应用程序提供了一个简单的命令来加密密码。
php bin/console security:encode-password admin
Symfony Password Encoder Utility
================================
------------------ -----------------------------------
Key   Value
------------------ ------------------------------------
Encoder used       Symfony\Component\Security\Core\Encoder\BCryptPasswordEncoder
Encoded password
$2y$12$0Hy6/.MNxWdFcCRDdstHU.hT5j3Mg1tqBunMLIUYkz6..IucpaPNO
------------------ ------------------------------------
! [NOTE] Bcrypt encoder used: the encoder generated its own built-in salt.
[OK] Password encoding succeeded
步骤 7 − 使用命令生成加密密码并在配置文件中更新。
# 要开始使用安全性,请查看文档:
# http://symfony.com/doc/current/security.html
   security:
      # http://symfony.com/doc/current/security.html#b-configuring-how-users-are-loaded
      providers:
         in_memory:
            memory:
               users:
                  user:
                     password: $2y$13$WsGWNufreEnVK1InBXL2cO/U7WftvfNvH
                     Vb/IJBH6JiYoDwVN4zoi
                     roles: 'ROLE_USER'
                     admin:
                        password: $2y$13$jQNdIeoNV1BKVbpnBuhKRuOL01NeMK
                        F7nEqEi/Mqlzgts0njK3toy
                        roles: 'ROLE_ADMIN'

         encoders:
            Symfony\Component\Security\Core\User\User: bcrypt
         firewalls:
            # 禁用资产和分析器的身份验证,
            # 根据您的需要进行调整
         dev:
            pattern: ^/(_(profiler|wdt)|css|images|js)/
         security: false
         main:
            anonymous: ~
            # activate different ways to authenticate
            # http://symfony.com/doc/current/security.html#a-co
            nfiguring-howyour-users-will-authenticate
            http_basic: ~
            # http://symfony.com/doc/current/cookbook/security/
            form_login_setup.html
            #form_login: ~
步骤 8 − 现在,将安全性应用于应用程序的某些部分。例如,将管理部分限制为角色 ROLE_ADMIN 中的用户。
security:
   # ...
      firewalls:
         # ...
      default:
         # ...
      access_control:
         # require ROLE_ADMIN for /admin*
         - { path: ^/admin, roles: 'ROLE_ADMIN' }
Step 9 − Add an admin page in DefaultController as follows.
/**
   * @Route("/admin")
*/
public function adminLandingAction() {
   return new Response('<html><body>This is admin section.</body></html>');
}
步骤 10 − 最后,访问管理页面以在浏览器中检查安全配置。浏览器将要求输入用户名和密码,并且只允许配置的用户。
结果
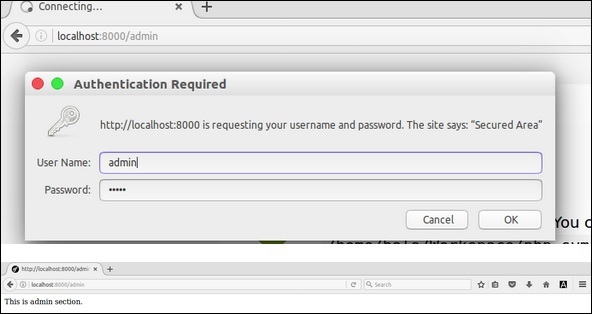
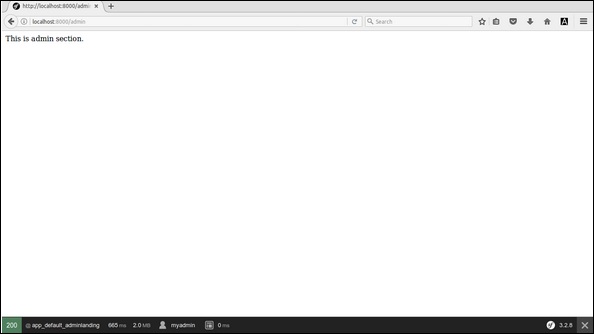
工作流
工作流是一个在许多企业应用程序中都有使用的高级概念。在电子商务应用程序中,产品交付过程是一个工作流。产品首先开票(订单创建),从商店采购并包装(包装/准备发货),然后发送给用户。如果有任何问题,产品将从用户那里退回,订单将被恢复。行动流程的顺序非常重要。例如,没有账单我们就无法交付产品。
Symfony 组件提供了一种面向对象的方式来定义和管理工作流。流程中的每个步骤称为位置,从一个位置移动到另一个位置所需的操作称为转换。创建工作流的位置和转换的集合称为工作流定义。
让我们通过创建一个简单的休假管理应用程序来了解工作流的概念。
步骤 1 − 创建一个新的应用程序,workflow-example。
cd /path/to/dev
mkdir workflow-example

cd workflow-example
composer require symfony/workflow
步骤 2 − 创建一个新类 Leave,其具有 applied_by、leave_on 和 status 属性。
class Leave {
   public $applied_by;
   public $leave_on;
   public $status;
}
此处,applyed_by 指的是想要休假的员工。leave_on 指的是休假日期。status 指的是休假状态。
步骤 3 − 休假管理有四个位置,applyed、in_process 和 approved/rejected。
use Symfony\Component\Workflow\DefinitionBuilder;
use Symfony\Component\Workflow\Transition;
use Symfony\Component\Workflow\Workflow;
use Symfony\Component\Workflow\MarkingStore\SingleStateMarkingStore;
use Symfony\Component\Workflow\Registry;
use Symfony\Component\Workflow\Dumper\GraphvizDumper;

$builder = new DefinitionBuilder();
$builder->addPlaces(['applied', 'in_process', 'approved', 'rejected']);
在这里,我们使用 DefinitionBuilder 创建了一个新定义,并使用 addPlaces 方法添加了地点。
步骤 4 − 定义从一个地点移动到另一个地点所需的操作。
$builder->addTransition(new Transition('to_process', 'applied', 'in_process'));
$builder->addTransition(new Transition('approve', 'in_process', 'approved'));
$builder->addTransition(new Transition('reject', 'in_process', 'rejected'));
在这里,我们有三个转换,to_process、approve 和 reject。 to_process 转换接受请假申请,并将位置从 applied 移至 in_process。approve 转换批准请假申请,并将位置移至 approved。类似地,reject 转换拒绝请假申请,并将位置移至 denied。我们已经使用 addTransition 方法创建了所有转换。
步骤 5 − 使用 build 方法构建定义。
$definition = $builder->build();
步骤 6 − 或者,可以将定义转储为 graphviz dot 格式,可以将其转换为图像文件以供参考。
$dumper = new GraphvizDumper();
echo $dumper->dump($definition);

步骤 7 − 创建一个标记存储,用于存储对象的当前位置/状态。
$marking = new SingleStateMarkingStore('status');
在这里,我们使用 SingleStateMarkingStore 类来创建标记,并将当前状态标记为对象的 status 属性。在我们的示例中,该对象是 Leave 对象。
步骤 8 − 使用定义和标记创建工作流。
$leaveWorkflow = new Workflow($definition, $marking);
在这里,我们使用 Workflow 类来创建工作流。
步骤 9 − 使用 Registry 类将工作流添加到工作流框架的注册表中。
$registry = new Registry();
$registry->add($leaveWorkflow, Leave::class);
步骤 10 − 最后,使用工作流查找是否使用 can 方法应用了给定的转换,如果是,则使用 apply 方法 apply 转换。应用转换后,对象的状态会从一个地方移动到另一个地方。
$workflow = $registry->get($leave);
echo "Can we approve the leave now? " . $workflow->can($leave, 'approve') . "
";
echo "Can we approve the start process now? " . $workflow->can($leave, 'to_process') . "
";

$workflow->apply($leave, 'to_process');
echo "Can we approve the leave now? " . $workflow->can($leave, 'approve') . "
";
echo $leave->status . "
";

$workflow->apply($leave, 'approve');
echo $leave->status . "
";
完整编码如下 −
<?php
   require __DIR__ . '/vendor/autoload.php';

   use Symfony\Component\Workflow\DefinitionBuilder;
   use Symfony\Component\Workflow\Transition;
   use Symfony\Component\Workflow\Workflow;
   use Symfony\Component\Workflow\MarkingStore\SingleStateMarkingStore;
   use Symfony\Component\Workflow\Registry;
   use Symfony\Component\Workflow\Dumper\GraphvizDumper;

   class Leave {
      public $applied_by;
      public $leave_on;
      public $status;
   }
   $builder = new DefinitionBuilder();
   $builder->addPlaces(['applied', 'in_process', 'approved', 'rejected']);
   $builder->addTransition(new Transition('to_process', 'applied', 'in_process'));
   $builder->addTransition(new Transition('approve', 'in_process', 'approved'));
   $builder->addTransition(new Transition('reject', 'in_process', 'rejected'));
   $definition = $builder->build();

   // $dumper = new GraphvizDumper();
   // echo $dumper->dump($definition);

   $marking = new SingleStateMarkingStore('status');
   $leaveWorkflow = new Workflow($definition, $marking);
   $registry = new Registry();
   $registry->add($leaveWorkflow, Leave::class);

   $leave = new Leave();
   $leave->applied_by = "Jon";
   $leave->leave_on = "1998-12-12";
   $leave->status = 'applied';

   $workflow = $registry->get($leave);
   echo "Can we approve the leave now? " . $workflow->can($leave, 'approve') . "
";
   echo "Can we approve the start process now? " . $workflow->can($leave, 'to_process') . "
";

   $workflow->apply($leave, 'to_process');
   echo "Can we approve the leave now? " . $workflow->can($leave, 'approve') . "
";
   echo $leave->status . "
";

   $workflow->apply($leave, 'approve');
   echo $leave->status . "
";
?>
结果
Can we approve the leave now?
Can we approve the start process now? 1
Can we approve the leave now? 1
in_process
approved
Symfony - REST 版本
在任何现代应用程序中,REST 服务都是核心基本构建块之一。无论是基于 Web 的应用程序还是精巧的移动应用程序,前端通常都是为后端 REST 服务精心设计的界面。Symfony REST 版本提供了一个现成的模板来启动我们基于 REST 的 Web 应用程序。
让我们学习如何使用 Symfony REST 版本安装模板 REST 应用程序。
步骤 1 − 使用以下命令下载 Symfony REST 版本。
composer create-project gimler/symfony-rest-edition --stability=dev path/to/install
这将下载 Symfony REST 版本。
步骤 2 − 尝试通过询问一些问题来配置它。对于所有问题,请选择除数据库之外的默认答案。对于数据库,请选择 pdo_sqlite。如果尚未安装 PHP 的 sqlite 扩展,则可能需要启用它。
步骤 3 − 现在,使用以下命令运行应用程序。
php app/console server:run
步骤 4 − 最后,使用 http://localhost:8000/ 在浏览器中打开应用程序。
它将产生以下结果 −
Symfony - CMF 版本
内容管理系统是 Web 应用程序场景中最大的市场之一。内容管理系统有许多可用的框架,几乎涵盖了所有语言。大多数框架对于最终客户来说都很容易使用,但对于开发人员来说却很难使用,反之亦然。
Symfony 为开发人员提供了一个简单易用的框架。它还具有最终客户所期望的所有基本功能。简而言之,开发人员有责任为最终客户提供良好的体验。
让我们看看如何使用 Symfony CMF 版本安装 CMS 应用程序模板。
步骤 1 −使用以下命令下载 Symfony CMF 沙盒。
composer create-project symfony-cmf/sandbox cmf-sandbox
这将下载 Symfony CMF。
步骤 2 − 尝试通过询问一些问题来配置它。对于所有问题,请选择除数据库之外的默认答案。对于数据库,请选择 pdo_sqlite。如果尚未安装 PHP 的 sqlite 扩展,则可能需要启用它。
步骤 3 − 使用控制台应用程序创建演示数据库,如下所示。
php app/console doctrine:database:create
步骤 4 −使用以下命令将演示数据加载到数据库中。
php app/console doctrine:phpcr:init:dbal --force
php app/console doctrine:phpcr:repository:init
php app/console doctrine:phpcr:fixtures:load -n
步骤 5 − 现在,使用以下命令运行应用程序。
php app/console server:run
步骤 6 − 最后,使用 http://localhost:8000/ 在浏览器中打开应用程序。
它将产生以下输出 −
Symfony - 工作示例
在本章中,我们将学习如何在 Symfony 框架中创建一个完整的基于 MVC 的 BookStore 应用程序。步骤如下。
步骤 1:创建项目
让我们使用以下命令在 Symfony 中创建一个名为"BookStore"的新项目。
symfony new BookStore
步骤 2:创建控制器和路由
在"src/AppBundle/Controller"目录中创建一个 BooksController。其定义如下。
BooksController.php
<?php
namespace AppBundle\Controller;

use Sensio\Bundle\FrameworkExtraBundle\Configuration\Route;
use Symfony\Bundle\FrameworkBundle\Controller\Controller;
use Symfony\Component\HttpFoundation\Response;

class BooksController {
   /**
      * @Route("/books/author")
   */
   public function authorAction() {
      return new Response('Book store application!');
   }
}
现在,我们已经创建了一个 BooksController,接下来创建一个视图来呈现操作。
步骤 3:创建视图
让我们在"app/Resources/views/"目录中创建一个名为"Books"的新文件夹。在该文件夹中,创建文件"author.html.twig"并添加以下更改。
author.html.twig
<h3> Simple book store application</h3>
现在,在 BooksController 类中呈现视图。它定义如下。
BooksController.php
<?php
namespace AppBundle\Controller;

use Sensio\Bundle\FrameworkExtraBundle\Configuration\Route;
use Symfony\Bundle\FrameworkBundle\Controller\Controller;
use Symfony\Component\HttpFoundation\Response;

class BooksController extends Controller {
   /**
      * @Route("/books/author")
   */
   public function authorAction() {
      return $this->render('books/author.html.twig');
   }
}
到目前为止,我们已经创建了一个基本的 BooksController,并且结果已呈现。您可以使用 URL"http://localhost:8000/books/author"在浏览器中检查结果。
步骤 4:数据库配置
在"app/config/parameters.yml"文件中配置数据库。
打开文件并添加以下更改。
parameter.yml
# This file is auto-generated during the composer install
parameters:
   database_driver: pdo_mysql
   database_host: localhost
   database_port: 3306
   database_name: booksdb
   database_user: <database_username>
   database_password: <database_password>
   mailer_transport: smtp
   mailer_host: 127.0.0.1
   mailer_user: null
   mailer_password: null
   secret: 0ad4b6d0676f446900a4cb11d96cf0502029620d

   doctrine:
      dbal:
      driver:   pdo_mysql
      host:     '%database_host%'
      dbname:   '%database_name%'
      user:     '%database_user%'
      password: '%database_password%'
      charset: utf8mb4
现在,Doctrine 可以连接到您的数据库"booksdb"。
步骤 5:创建数据库
发出以下命令生成"booksdb"数据库。此步骤用于在 Doctrine 中绑定数据库。
php bin/console doctrine:database:create
执行命令后,它会自动生成一个空的"booksdb"数据库。您可以在屏幕上看到以下响应。
它会产生以下结果 −
Created database `booksdb` for connection named default
步骤 6:映射信息
在位于"src/AppBundle/Entity"的 Entity 目录中创建一个 Book 实体类。
您可以使用注释直接传递 Book 类。其定义如下。
Book.php
在文件中添加以下代码。
<?php
namespace AppBundle\Entity;
use Doctrine\ORM\Mapping as ORM;

/**
   * @ORM\Entity
   * @ORM\Table(name = "Books")
*/
class Book {
   /**
      * @ORM\Column(type = "integer")
      * @ORM\Id
      * @ORM\GeneratedValue(strategy = "AUTO")
   */
   private $id;

   /**
      * @ORM\Column(type = "string", length = 50)
   */
   private $name;

   /**
      * @ORM\Column(type = "string", length = 50)
   */

   private $author;
   /**
      * @ORM\Column(type = "decimal", scale = 2)
   */
   private $price;
}
此处,表名称是可选的。
如果未指定表名称,则将根据实体类的名称自动确定。
步骤 7:绑定实体
Doctrine 为您创建简单的实体类。它可以帮助您构建任何实体。
发出以下命令以生成实体。
php bin/console doctrine:generate:entities AppBundle/Entity/Book
然后您将看到以下结果,并且实体将被更新。
Generating entity "AppBundle\Entity\Book"
   > backing up Book.php to Book.php~
   > generating AppBundle\Entity\Book
Book.php
<?php
namespace AppBundle\Entity;

use Doctrine\ORM\Mapping as ORM;
/**
   * @ORM\Entity
   * @ORM\Table(name = "Books")
*/
class Book {
   /**
      * @ORM\Column(type = "integer")
      * @ORM\Id
      * @ORM\GeneratedValue(strategy = "AUTO")
   */
   private $id;

   /**
      * @ORM\Column(type = "string", length = 50)
   */
   private $name;

   /**
      * @ORM\Column(type = "string", length = 50)
   */
   private $author;

   /**
      * @ORM\Column(type = "decimal", scale = 2)
   */
   private $price;

   /**
      * Get id
      *
      * @return integer
   */
   public function getId() {
      return $this->id;
   }

   /**
      * Set name
      *
      * @param string $name
      *
      * @return Book
   */
   public function setName($name) {
      $this->name = $name;
      return $this;
   }

   /**
      * Get name
      *
      * @return string
   */
   public function getName() {
      return $this->name;
   }

   /**
      * Set author
      *
      * @param string $author
      *
      * @return Book
   */
   public function setAuthor($author) {
      $this->author = $author;
      return $this;
   }

   /**
      * Get author
      *
      * @return string
   */
   public function getAuthor() {
      return $this->author;
   }

   /**
      * Set price
      *
      * @param string $price
      *
      * @return Book
   */
   public function setPrice($price) {
      $this->price = $price;
      return $this;
   }

   /**
      * Get price
      *
      * @return string
   */
   public function getPrice() {
      return $this->price;
   }
}
步骤 8:映射验证
创建实体后,您应该使用以下命令验证映射。
php bin/console doctrine:schema:validate
它将产生以下结果 −
[Mapping]  OK - The mapping files are correct
[Database] FAIL - The database schema is not in sync with the current mapping file.
由于我们尚未创建 Books 表,因此实体不同步。让我们在下一步中使用 Symfony 命令创建 Books 表。
步骤 9:创建架构
Doctrine 可以自动创建 Book 实体所需的所有数据库表。这可以使用以下命令完成。
php bin/console doctrine:schema:update --force
执行命令后,您将看到以下响应。
Updating database schema...
Database schema updated successfully! "1" query was executed
现在,再次使用以下命令验证架构。
php bin/console doctrine:schema:validate
它会产生以下结果 −
[Mapping]  OK - The mapping files are correct.
[Database] OK - The database schema is in sync with the mapping files.
步骤 10:Getter 和 Setter
如绑定实体部分所示,以下命令为 Book 类生成所有 getter 和 setter。
$ php bin/console doctrine:generate:entities AppBundle/Entity/Book
步骤 11:从数据库获取对象
在 BooksController 中创建一个将显示书籍详细信息的方法。
BooksController.php
/**
   * @Route("/books/display", name="app_book_display")
*/
public function displayAction() {
   $bk = $this->getDoctrine()
   ->getRepository('AppBundle:Book')
   ->findAll();
   return $this->render('books/display.html.twig', array('data' => $bk));
}
步骤 12:创建视图
让我们创建一个指向显示操作的视图。移至 views 目录并创建文件"display.html.twig"。在文件中添加以下更改。
display.html.twig
{% extends 'base.html.twig' %}
{% block stylesheets %}
   <style>
      .table { border-collapse: collapse; }
      .table th, td {
         border-bottom: 1px solid #ddd;
         width: 250px;
         text-align: left;
         align: left;
      }
   </style>
{% endblock %}
{% block body %}
   <h2>Books database application!</h2>
   <table class = "table">
      <tr>
         <th>Name</th>
         <th>Author</th>
         <th>Price</th>
      </tr>
      {% for x in data %}
      <tr>
         <td>{{ x.Name }}</td>
         <td>{{ x.Author }}</td>
         <td>{{ x.Price }}</td>
      </tr>
      {% endfor %}
   </table>
{% endblock %}
您可以通过在浏览器中请求 URL"http://localhost:8000/books/display"来获取结果。
结果
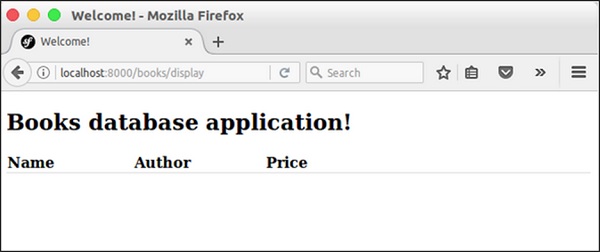
步骤 13:添加图书表单
让我们创建一个将图书添加到系统中的功能。在 BooksController 中创建一个新页面,newAction 方法如下。
// use section
use Symfony\Component\HttpFoundation\Request;
use Symfony\Component\Form\Extension\Core\Type\TextType;
use Symfony\Component\Form\Extension\Core\Type\SubmitType;

// methods section
/**
   * @Route("/books/new")
*/

public function newAction(Request $request) {
   $stud = new StudentForm();
      $form = $this->createFormBuilder($stud)
         ->add('name', TextType::class)
         ->add('author', TextType::class)
         ->add('price', TextType::class)
         ->add('save', SubmitType::class, array('label' => 'Submit'))
         ->getForm();
   return $this->render('books/new.html.twig', array('form' => $form->createView(),));
}
步骤 14:为图书表单创建视图
让我们创建一个指向新操作的视图。转到 views 目录并创建文件"new.html.twig"。在文件中添加以下更改。
{% extends 'base.html.twig' %}
{% block stylesheets %}
   <style>
      #simpleform {
         width:600px;
         border:2px solid grey;
         padding:14px;
      }
      #simpleform label {
         font-size:14px;
         float:left;
         width:300px;
         text-align:right;
         display:block;
      }
      #simpleform span {
         font-size:11px;
         color:grey;
         width:100px;
         text-align:right;
         display:block;
      }
      #simpleform input {
         border:1px solid grey;
         font-family:verdana;
         font-size:14px;
         color:light blue;
         height:24px;
         width:250px;
         margin: 0 0 10px 10px;
      }
      #simpleform textarea {
         border:1px solid grey;
         font-family:verdana;
         font-size:14px;
         color:light blue;
         height:120px;
         width:250px;
         margin: 0 0 20px 10px;
      }
      #simpleform select {
         margin: 0 0 20px 10px;
      }
      #simpleform button {
         clear:both;
         margin-left:250px;
         background: grey;
         color:#FFFFFF;
         border:solid 1px #666666;
         font-size:16px;
      }
   </style>
{% endblock %}
{% block body %}
   <h3>Book details:</h3>
   <div id = "simpleform">
      {{ form_start(form) }}
      {{ form_widget(form) }}
      {{ form_end(form) }}
   </div>
{% endblock %}
它将生成以下屏幕作为输出 −

步骤 15:收集图书信息并存储
让我们更改 newAction 方法并包含处理表单提交的代码。此外,将图书信息存储到数据库中。
/**
   * @Route("/books/new", name="app_book_new")
*/
public function newAction(Request $request) {
   $book = new Book();
   $form = $this->createFormBuilder($book)
      ->add('name', TextType::class)
      ->add('author', TextType::class)
      ->add('price', TextType::class)
      ->add('save', SubmitType::class, array('label' => 'Submit'))
      ->getForm();

   $form->handleRequest($request);

   if ($form->isSubmitted() && $form->isValid()) {
      $book = $form->getData();
      $doct = $this->getDoctrine()->getManager();

      // 告诉 Doctrine 你想要保存产品
      $doct->persist($book);

      //执行查询(即 INSERT 查询)
      $doct->flush();

      return $this->redirectToRoute('app_book_display');
   } else {
      return $this->render('books/new.html.twig', array(
         'form' => $form->createView(),
      ));
   }
}
将书籍存储到数据库后,重定向到书籍显示页面。
步骤 16:更新书籍
要更新书籍,请创建一个操作 updateAction,并添加以下更改。
/**
   * @Route("/books/update/{id}", name = "app_book_update" )
*/
public function updateAction($id, Request $request) {
   $doct = $this->getDoctrine()->getManager();
   $bk = $doct->getRepository('AppBundle:Book')->find($id);

   if (!$bk) {
      throw $this->createNotFoundException(
         'No book found for id '.$id
      );
   }
   $form = $this->createFormBuilder($bk)
      ->add('name', TextType::class)
      ->add('author', TextType::class)
      ->add('price', TextType::class)
      ->add('save', SubmitType::class, array('label' => 'Submit'))
      ->getForm();

   $form->handleRequest($request);

   if ($form->isSubmitted() && $form->isValid()) {
      $book = $form->getData();
      $doct = $this->getDoctrine()->getManager();

      // 告诉 Doctrine 你想要保存产品
      $doct->persist($book);

      //执行查询(即 INSERT 查询)
      $doct->flush();
      return $this->redirectToRoute('app_book_display');
   } else {
      return $this->render('books/new.html.twig', array(
         'form' => $form->createView(),
      ));
   }
}
在这里,我们处理两个功能。如果请求仅包含 id,则我们从数据库中提取它并将其显示在图书表单中。并且,如果请求包含完整的图书信息,则我们更新数据库中的详细信息并重定向到图书显示页面。
步骤 17:删除对象
删除对象需要调用实体(doctrine)管理器的 remove() 方法。
这可以使用以下代码完成。
/**
* @Route("/books/delete/{id}", name="app_book_delete")
*/
public function deleteAction($id) {
$doct = $this->getDoctrine()->getManager();
$bk = $doct->getRepository('AppBundle:Book')->find($id);
if (!$bk) {
throw $this->createNotFoundException('No book found for id '.$id);
}
$doct->remove($bk);
$doct->flush();
return $this->redirectToRoute('app_book_display');
}
在这里,我们删除了这本书并重定向到书籍显示页面。
步骤 18:在显示页面中包含添加/编辑/删除功能
现在,更新显示视图中的主体块并包含添加/编辑/删除链接,如下所示。
{% block body %}
<h2>Books database application!</h2>
<div>
<a href = "{{ path('app_book_new') }}">Add</a>
</div>
<table class = "table">
<tr>
<th>Name</th>
<th>Author</th>
<th>Price</th>
<th></th>
<th></th>
</tr>
{% for x in data %}
<tr>
<td>{{ x.Name }}</td>
<td>{{ x.Author }}</td>
<td>{{ x.Price }}</td>
<td><a href = "{{ path('app_book_update', { 'id' : x.Id }) }}">Edit</a></td>
<td><a href = "{{ path('app_book_delete', { 'id' : x.Id }) }}">Delete</a></td>
</tr>
{% endfor %}
</table>
{% endblock %}
它将产生以下屏幕作为输出 −
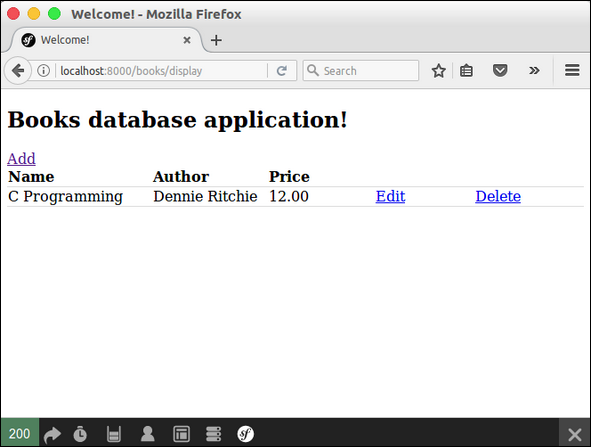
Symfony 由一组 PHP 组件、一个应用程序框架、一个社区和一个理念组成。Symfony 非常灵活,能够满足高级用户、专业人士的所有需求,是所有 PHP 初学者的理想选择。


