如何使用 OpenCV Python 模糊图像中的脸部?
要模糊图像中的脸部,首先我们使用 haar 级联分类器检测脸部。OpenCV 为我们提供了不同类型的经过训练的 haarcascades 用于对象检测。我们使用 haarcascade_frontalface_alt.xml 作为 haarcascade xml 文件。为了模糊面部区域,我们应用了cv2.GaussianBlur()。
如何下载 Haarcascade?
您可以在 GitHub 网站地址后找到不同的 haarcascades −
https://github.com/opencv/opencv/tree/master/data/haarcascades要下载用于面部检测的 haarcascade,请单击 haarcascade_frontalface_alt.xml 文件。以原始格式打开它,右键单击并保存。
步骤
您可以按照以下步骤模糊图像中的脸部 -
导入所需的库。在以下所有示例中,所需的 Python 库都是 OpenCV。确保您已经安装了它。
使用 cv2.imread() 读取输入图像。指定完整的图像路径。
启动 Haar 级联分类器进行人脸检测,即 face_cascade = cv2.CascadeClassifier()。 提供 haar 级联 xml 文件的完整路径。您可以使用 haarcascade_frontalface_alt.xml 来检测图像中的脸部。
使用 face_cascade.detectMultiScale() 检测输入图像中的脸部。它以 (x,y,w,h) 格式返回检测到的脸部的坐标。
将检测到的脸部的 roi 定义为 image[y:y+h, x:x+w],并对 roi 应用高斯模糊。将模糊的脸部添加到原始图像以获得最终图像。
打印带有模糊脸部的图像。
让我们看一些例子以便更清楚地理解。
注意:在正确的文件夹中拥有"haar 级联 XML 文件"非常重要。这里我们将 XML 文件放在名为"haarcascades"的文件夹中。
示例
在此示例中,我们对输入图像中检测到的脸部进行模糊处理。
# import required libraries
import cv2

# Read the input image
image = cv2.imread('man3.jpg')

# define haar cascade for face detection
face_cascade =
cv2.CascadeClassifier('haarcascades/haarcascade_frontalface_alt.xml')
faces = face_cascade.detectMultiScale(image, 1.3, 5)
print("Face detected in the image:", len(faces))

# Loop over all the detected faces in the image
for (x, y, w, h) in faces:
   roi = image[y:y+h, x:x+w]

   # apply gaussian blur to face rectangle
   roi = cv2.GaussianBlur(roi, (17, 17), 30)

   # add blurred face on original image to get final image
   image[y:y+roi.shape[0], x:x+roi.shape[1]] = roi

# Display the output
cv2.imshow('Blur Face', image)
cv2.waitKey(0)
cv2.destroyAllWindows()
输入图像
将以下图像视为上例中使用的输入图像"man3.jpg"。

输出
执行时,将产生以下输出 −
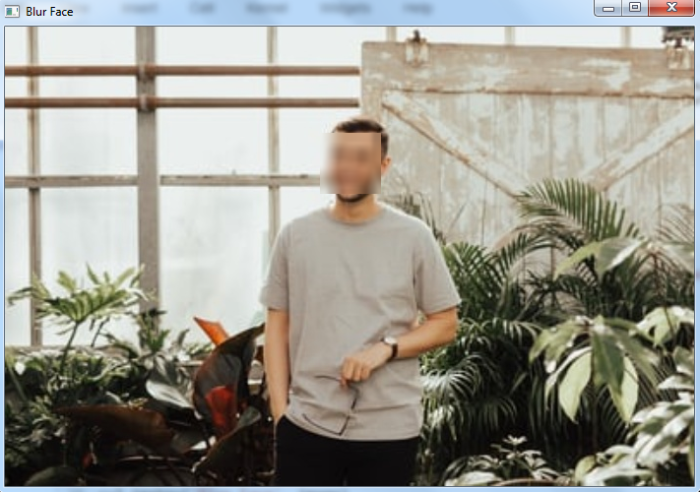
Face detected in the image: 1
我们得到下面的窗口,显示图像中的模糊脸部-
示例
下面的 Python 程序演示了如何模糊输入图像中的面部。
# import required libraries
import cv2

# Read the input image
image = cv2.imread('faces.jpg')

# define haar cascade for face detection
face_cascade =
cv2.CascadeClassifier('haarcascades/haarcascade_frontalface_alt.xml')
faces = face_cascade.detectMultiScale(image, 1.1, 2)
print("Face detected in the image:", len(faces))

# Loop over all the detected faces in the image
for (x, y, w, h) in faces:
   roi = image[y:y+h, x:x+w]

   # apply gaussian blur to face rectangle
   roi = cv2.GaussianBlur(roi, (15, 15), 30)

   # add blurred face on original image to get final image
   image[y:y+roi.shape[0], x:x+roi.shape[1]] = roi

# Display the output
cv2.imshow('Blur Face', image)
cv2.waitKey(0)
cv2.destroyAllWindows()
输入图像
我们将使用以下图像作为此程序的输入文件 −

执行后,将产生以下输出:
Face detected in the image: 15
我们得到以下窗口,显示输入图像中的模糊脸部请注意,所有 15 张脸部大小不同。所有不同的脸部都是模糊的。
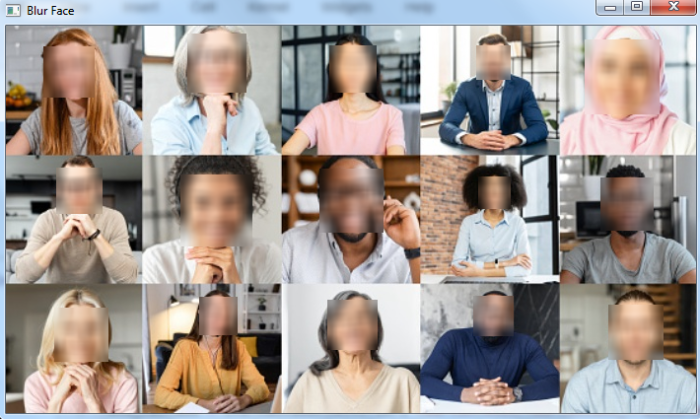
我们得到下面的窗口,显示输入图像中的模糊面孔。请注意,所有 15 张面孔的大小都不同。所有不同的面孔都是模糊的。
注意 - 为了更好地进行人脸检测,请调整 detectMultiScale() 函数中使用的第二和第三个参数。


