如何在 OpenCV Python 中对图像应用仿射变换?
在仿射变换中,原始图像中的所有平行线在输出图像中仍将平行。要对图像应用仿射变换,我们需要输入图像上的三个点和输出图像上的对应点。因此,首先,我们定义这些点并传递给函数 cv2.getAffineTransform()。它将创建一个 2×3 矩阵,我们将其称为变换矩阵 M。
我们可以使用以下语法−
找到变换矩阵 MM = cv2.getAffineTransform(pts1,pts2)
其中 pts1 是输入图像上的三个点的数组,pts2 是输出图像上对应三个点的数组。平移矩阵 M 是 np.float64 类型的 numpy 数组。
我们将 M 作为参数传递给 cv2.warpAffine() 函数。请参阅下面给出的语法−
cv2.warpAffine(img,M,(cols,rows))
其中,
img − 要进行仿射变换的图像。
M − 上面定义的仿射变换矩阵。
(cols, rows) − 仿射变换后图像的宽度和高度。
步骤
要执行图像仿射变换,您可以按照下面给出的步骤−
导入所需的库。在以下所有 Python 示例中,所需的 Python 库都是 OpenCV。确保您已经安装了它。
import cv2
使用 cv2.imread() 函数读取输入图像。传递输入图像的完整路径。
img = cv2.imread('lines.jpg')
定义 pts1 和 pts2。我们需要输入图像中的三个点以及它们在输出图像中的对应位置。
pts1 = np.float32([[50,50],[200,50],[50,200]])
pts2 = np.float32([[10,100],[200,50],[100,250]])
使用 cv2.getAffineTransform(pts1, pts2)函数计算仿射变换矩阵M 。
M = cv2.getAffineTransform(pts1, pts2)
使用 cv2.warpAffine()方法变换图像。 cols 和 rows 是变换后图像所需的宽度和高度。
dst = cv2.warpAffine(img,M,(cols,rows))
显示仿射变换后的图像。
cv2.imshow("Affine Transform", dst)
cv2.waitKey(0)
cv2.destroyAllWindows()
让我们看一些例子,以便清楚地了解如何在图像上应用仿射变换
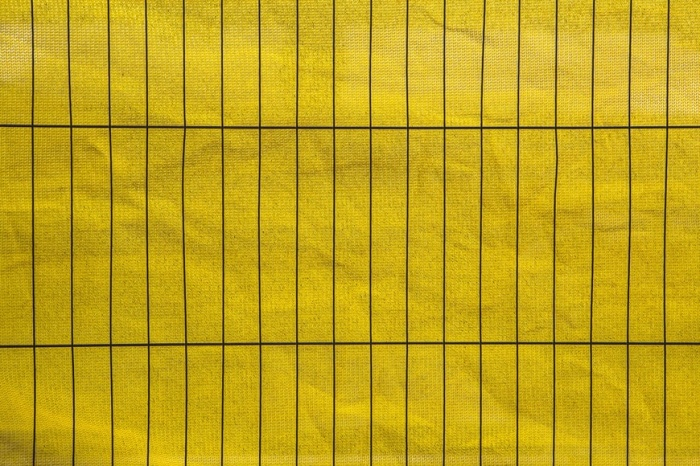
输入图像
我们将在下面的例子中使用以下图像作为输入文件 -
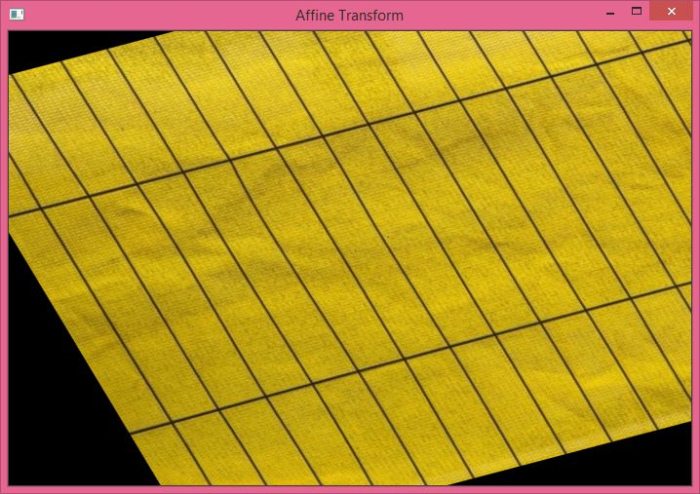
示例 1
在此程序中,我们将了解如何对输入图像执行仿射变换。
# import required libraries
import cv2
import numpy as np

# read the input image
img = cv2.imread('lines.jpg')

# access the image height and width
rows,cols,_ = img.shape

# define at three point on input image
pts1 = np.float32([[50,50],[200,50],[50,200]])

# define three points corresponding location to output image
pts2 = np.float32([[10,100],[200,50],[100,250]])

# get the affine transformation Matrix
M = cv2.getAffineTransform(pts1,pts2)

# apply affine transformation on the input image
dst = cv2.warpAffine(img,M,(cols,rows))
cv2.imshow("Affine Transform", dst)
cv2.waitKey(0)
cv2.destroyAllWindows()
输出
上述 Python 程序将产生以下输出窗口 -
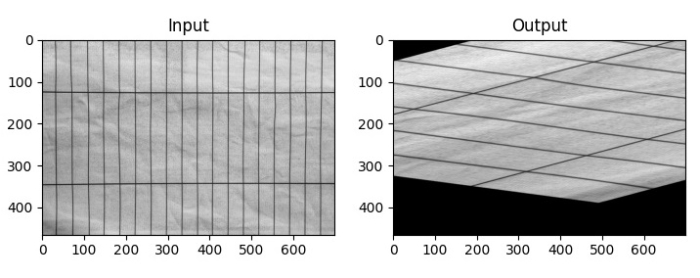
示例 2
在此 Python 程序中,我们将图像加载为灰度,定义与输入和输出图像相对应的两个点,获取变换矩阵,最后应用warpAffine()方法对输入图像执行仿射变换。
import cv2
import numpy as np
import matplotlib.pyplot as plt

img = cv2.imread('lines.jpg', 0)
rows,cols = img.shape

pts1 = np.float32([[150,50],[200,50],[50,200]])
pts2 = np.float32([[10,100],[200,50],[10,250]])

M = cv2.getAffineTransform(pts1,pts2)
dst = cv2.warpAffine(img,M,(cols,rows))

plt.subplot(121), plt.imshow(img, cmap='gray' ), plt.title('Input')
plt.subplot(122), plt.imshow(dst, cmap='gray'), plt.title('Output')
plt.show()
输出
执行时,它将产生以下输出窗口 -