iText - 将图像添加到表格
在本章中,我们将了解如何使用 iText 库将图像添加到 PDF 文档中的表格。
将图像添加到表格
您可以通过实例化 Document 类来创建一个空的 PDF 文档。在实例化此类时,您需要将 PdfDocument 对象作为参数传递给其构造函数。然后,要将表格添加到文档中,您需要实例化 Table 类,并使用 add() 方法将此对象添加到文档中。
要将图像添加到此表格中,您需要实例化 Cell 类,创建需要添加的图像的对象,然后使用 Cell 类的 add() 方法将图像添加到 cell 对象中。
以下是将图像插入表格单元格的步骤。
步骤 1:创建 PdfWriter 对象
PdfWriter 类代表 PDF 的 Doc Writer,此类属于包 com.itextpdf.kernel.pdf。此类的构造函数接受一个字符串,表示要创建 PDF 的文件的路径。
通过将表示需要创建 PDF 的路径的字符串值传递给其构造函数来实例化 PdfWriter 类,如下所示。
// 创建 PdfWriter
String dest = "C:/itextExamples/addingImage.pdf";
PdfWriter writer = new PdfWriter(dest);
当将此类型的对象传递给 PdfDocument(类)时,添加到此文档的每个元素都将写入指定的文件。
步骤 2:创建 PdfDocument 对象
PdfDocument 类是 iText 中表示 PDF 文档的类。此类属于包 com.itextpdf.kernel.pdf。要实例化此类(在写入模式下),您需要将类 PdfWriter 的对象传递给其构造函数。
通过将上面创建的 PdfWriter 对象传递给其构造函数来实例化 PdfDocument 类,如下所示。
// 创建 PdfDocument
PdfDocument pdfDoc = new PdfDocument(writer);
一旦创建了 PdfDocument 对象,您就可以使用其类提供的相应方法添加各种元素,如页面、字体、文件附件和事件处理程序。
步骤 3:创建 Document 对象
包 com.itextpdf.layout 的 Document 类是创建自给自足 PDF 时的根元素。此类的构造函数之一接受 PdfDocument 类的对象。
通过传递在前面步骤中创建的 PdfDocument 类的对象来实例化 Document 类,如下所示。
// 创建文档
Document document = new Document(pdfDoc);
步骤 4:创建 Table 对象
Table 类表示一个二维网格,其中填充了按行和列排列的单元格。它属于 com.itextpdf.layout.element 包。
实例化 Table 类,如下所示。
// 创建表格
float [] pointColumnWidths = {200F, 200F};
Table table = new Table(pointColumnWidths);
步骤 5:创建单元格
通过实例化包 com.itextpdf.layout 的 Cell 类来创建 cell 对象,如下所示。
// 将单元格添加到表格
Cell cell = new Cell(); // 创建单元格
步骤 6:创建图像
要创建 image 对象,首先,使用 ImageDataFactory 类的 create() 方法创建 ImageData 对象。作为此方法的参数,传递一个表示图像路径的字符串参数,如下所示。
// 创建 ImageData 对象
String imageFile = "C:/itextExamples/javafxLogo.jpg";
ImageData data = ImageDataFactory.create(imageFile);
现在,实例化 com.itextpdf.layout.element 包的 Image 类。实例化时,将上面创建的 ImageData 对象作为参数传递给其构造函数,如下所示。
// 创建 Image 对象
Image img = new Image(data);
使用 cell 类的 add() 方法将 image 对象添加到单元格,如下所示。
// 将图像添加到单元格
cell.add(img.setAutoScale(true));
步骤 7:将单元格添加到表格
最后,要将此单元格添加到表格,请调用 Table 类的 addCell() 方法,并将 cell 对象作为参数传递给此方法,如下所示。
table.addCell(cell);
步骤 8:向文档添加表格
使用 Document 类的 add() 方法添加上一步中创建的 table 对象,如下所示。
// 向文档添加列表
document.add(table);
步骤 9:关闭文档
使用 Document 类的 close() 方法关闭文档,如下所示。
// 关闭文档
document.close();
示例
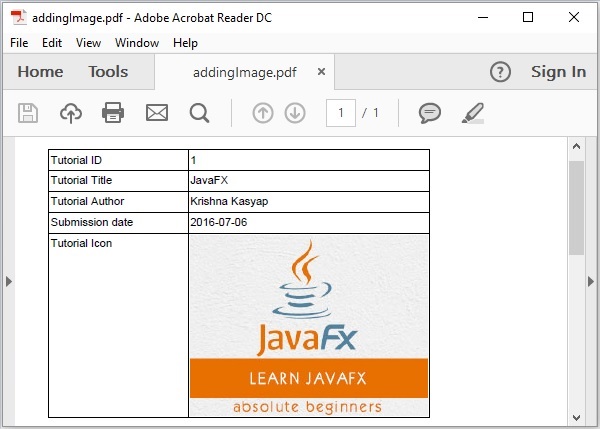
以下 Java 程序演示如何使用 iText 库向 PDF 文档中表格的单元格添加图像。它创建一个名为 addingImage.pdf 的 PDF 文档,向其中添加一个表格,将图像 (javafxLogo.jpg) 插入到其中一个单元格中,并将其保存在路径 C:/itextExamples/ 中。
将此代码保存在名为 AddingImageToTable.java 的文件中。
import com.itextpdf.io.image.ImageData;
import com.itextpdf.io.image.ImageDataFactory;

import com.itextpdf.kernel.pdf.PdfDocument;
import com.itextpdf.kernel.pdf.PdfWriter;

import com.itextpdf.layout.Document;
import com.itextpdf.layout.element.Cell;
import com.itextpdf.layout.element.Image;
import com.itextpdf.layout.element.Table;

public class a3AddingImageToTable {
   public static void main(String args[]) throws Exception {
        // 创建 PdfWriter 对象
        String dest = "C:/itextExamples/addingImage.pdf";
        PdfWriter writer = new PdfWriter(dest);

        // 创建 PdfDocument 对象
        PdfDocument pdfDoc = new PdfDocument(writer);

        // 创建 Document 对象
        Document doc = new Document(pdfDoc);

        // 创建表格
        float [] pointColumnWidths = {150f, 150f};
        Table table = new Table(pointColumnWidths);

        // 填充第 1 行并将其添加到表格中
        Cell cell1 = new Cell();
        cell1.add("Tutorial ID");
        table.addCell(cell1);

        Cell cell2 = new Cell();
        cell2.add("1");
        table.addCell(cell2);

        // 填充第 2 行并将其添加到表格中
        Cell cell3 = new Cell();
        cell3.add("教程标题");
        table.addCell(cell3);

        Cell cell4 = new Cell();
        cell4.add("JavaFX");
        table.addCell(cell4);

        // 填充第 3 行并将其添加到表中
        Cell cell5 = new Cell();
        cell5.add("教程作者");
        table.addCell(cell5);

        Cell cell6 = new Cell();
        cell6.add("Krishna Kasyap");
        table.addCell(cell6);

        // 填充第 4 行并将其添加到表中
        Cell cell7 = new Cell();
        cell7.add("提交日期");
        table.addCell(cell7);

        Cell cell8 = new Cell();
        cell8.add("2016-07-06");
        table.addCell(cell8);

        // 填充第 5 行并将其添加到表中
        Cell cell9 = new Cell();
        cell9.add("教程图标");
        table.addCell(cell9);

        // 创建 cell10
        Cell cell10 = new Cell();

        // 创建 ImageData 对象
        String imageFile = "C:/itextExamples/javafxLogo.jpg";
        ImageData data = ImageDataFactory.create(imageFile);

        // 创建图像
        Image img = new Image(data);

        // 将图像添加到 cell10
        cell10.add(img.setAutoScale(true));

        // 将 cell110 添加到表格
        table.addCell(cell10);

        // 将表格添加到文档
        doc.add(table);

        // 关闭文档
        doc.close();

        System.out.println("图像已成功添加到表格中..");
   }
}
使用以下命令从命令提示符编译并执行保存的 Java 文件 −
javac AddingImageToTable.java
java AddingImageToTable
执行后,上述程序将创建一个 PDF 文档,并显示以下消息。
图像已成功添加到表格中..
如果验证指定的路径,则可以找到创建的PDF文档,如下所示。