使用 OpenCV Python 检测白点和黑点
OpenCV python 是 python 中的图像处理库之一,它使用 Numpy 数组存储图像数据,以便所有图像数组都表示为 ndarray 类型。
python OpenCV 模块中的 cv2.findContours() 方法用于检测二值图像中的对象。在下面的文章中,我们将使用此方法检测图像中的白点和黑点(对象)。以下是该方法的语法 –
cv2.findContours(image, mode, method[, contours[, Hierarchy[, offset]]])
其中,
Image 是 8 位单通道图像(二进制图像)。
Contours 是检测到的轮廓。
方法
我们将按照以下步骤使用 OpenCV 模块检测/计算图像中的黑白点。
加载图像。
将图像转换为灰度。
应用中间模糊来平滑图像。
定义阈值。
查找轮廓
遍历轮廓并使用轮廓区域进行过滤
使用 cv2.findContours() 方法
除了 cv2.findContours() 方法,我们还将使用以下方法 -
cv2.medianBlur():平滑输入图像。
cv2.cvtColor():将彩色图像转换为灰度图像。
cv2.threshold():定义阈值。
cv2.contourArea():根据区域
示例
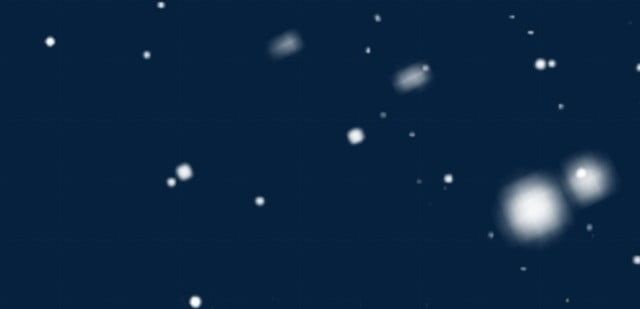
我们以输入图像"WhiteDots2.jpg"为例,检测深色背景图像上的白点。
import cv2

image = cv2.imread('Images/WhiteDots2.jpg')
blur = cv2.medianBlur(image, 5)
gray = cv2.cvtColor(blur, cv2.COLOR_BGR2GRAY)
thresh = cv2.threshold(gray,200,255, cv2.THRESH_BINARY)[1]

cnts = cv2.findContours(thresh, cv2.RETR_EXTERNAL, cv2.CHAIN_APPROX_SIMPLE)
cnts = cnts[0] if len(cnts) == 2 else cnts[1]

min_area = 0.1
white_dots = []
for c in cnts:
   area = cv2.contourArea(c)
   if area > min_area:
      cv2.drawContours(image, [c], -1, (36, 255, 12), 2)
      white_dots.append(c)

print("White Dots count is:",len(white_dots))
cv2.imshow('image', image)
cv2.waitKey()
输出
White Dots count is: 11
输入图像
输出图像
在上面的例子中,我们成功地在输入图像上检测到了 16 个白点,并且所有白点都以绿色突出显示。
示例
在此示例中,我们将使用输入图像"black-doted-butterflies.jpg"来检测白色背景图像上的黑点。
import cv2

img = cv2.imread('Images/black-doted-butterflies.jpg')
blur = cv2.medianBlur(img, 5)
gray = cv2.cvtColor(blur, cv2.COLOR_BGR2GRAY)
thresh = cv2.threshold(gray,100,255, cv2.THRESH_BINARY_INV)[1]

cnts = cv2.findContours(thresh, cv2.RETR_EXTERNAL, cv2.CHAIN_APPROX_SIMPLE)
cnts = cnts[0] if len(cnts) == 2 else cnts[1]

min_area = 10
black_dots = []
for c in cnts:
   area = cv2.contourArea(c)
   if area > min_area:
      cv2.drawContours(img, [c], -1, (36, 255, 12), 2)
      black_dots.append(c)

print("Black Dots Count is:",len(black_dots))
cv2.imshow('Output image', img)
cv2.waitKey()
输出
Black Dots Count is: 25
输入图像

输出图像
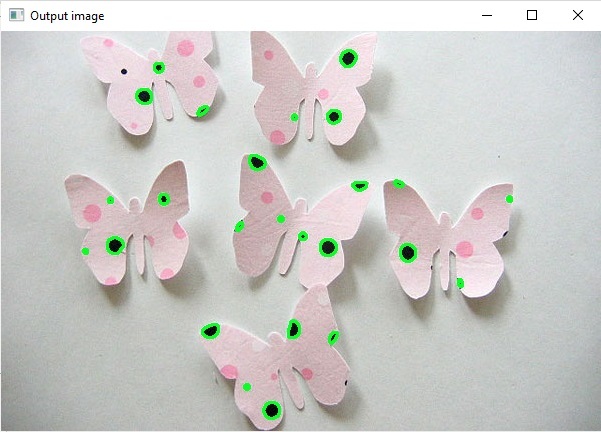
通过使用 cv2.findContours() 方法,我们已成功检测到蝴蝶图像上的 25 个黑点。检测到的黑点以绿色突出显示。
示例
在此示例中,我们将采用输入图像"BlackAndWhite.jpg"来检测单个图像中的黑点和白点。
import cv2
img = cv2.imread('Images/BlackAndWhite.jpg')
blur = cv2.medianBlur(img, 5)
gray = cv2.cvtColor(blur, cv2.COLOR_BGR2GRAY)
thresh_for_black_dots = cv2.threshold(gray,100,255, cv2.THRESH_BINARY_INV)[1]
thresh_for_white_dots = cv2.threshold(gray,200,255, cv2.THRESH_BINARY)[1]
cnts_for_black_dots = cv2.findContours(thresh_for_black_dots, cv2.RETR_EXTERNAL, cv2.CHAIN_APPROX_SIMPLE)
cnts_for_white_dots = cv2.findContours(thresh_for_white_dots, cv2.RETR_EXTERNAL, cv2.CHAIN_APPROX_SIMPLE)
cnts_for_black_dots = cnts_for_black_dots[0] if len(cnts_for_black_dots) == 2 else cnts_for_black_dots[1]
cnts_for_white_dots = cnts_for_white_dots[0] if len(cnts_for_white_dots) == 2 else cnts_for_white_dots[1]
min_area = 1
black_dots = []
white_dots = []
for c in cnts_for_white_dots:
area = cv2.contourArea(c)
if area > min_area:
cv2.drawContours(img, [c], -1, (36, 255, 12), 2)
black_dots.append(c)
white_dots.append(c)
for c in cnts_for_black_dots:
area = cv2.contourArea(c)
if area > min_area:
cv2.drawContours(img, [c], -1, (36, 255, 12), 2)
black_dots.append(c)
print("Black Dots Count is:",len(black_dots))
print("White Dots count is:",len(white_dots))
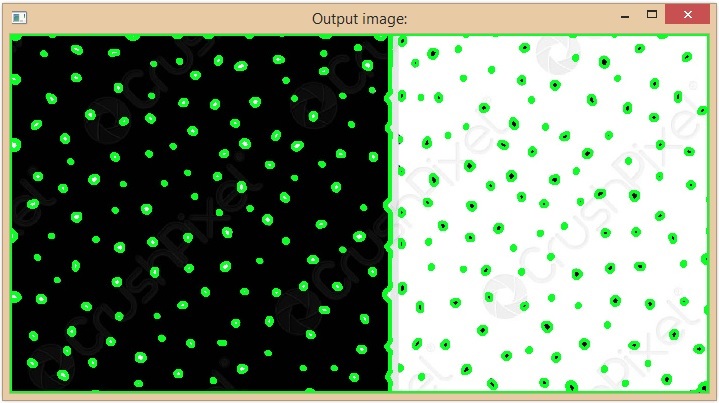
cv2.imshow('Output image:', img)
cv2.waitKey()
输出
Black Dots Count is: 249
White Dots count is: 134
我们已使用 Python OpenCV 库以不同方法成功检测到黑点和白点。
输入图像

输出图像
使用 SimpleBlobDetector
在 OpenCV 中,SimpleBlobDetector 是一个用于从图像中提取斑点的类。 cv2.SimpleBlobDetector_create() 方法根据 SimpleBlobDetector 算法创建一个检测器,用于检测给定图像上的斑点点。
示例
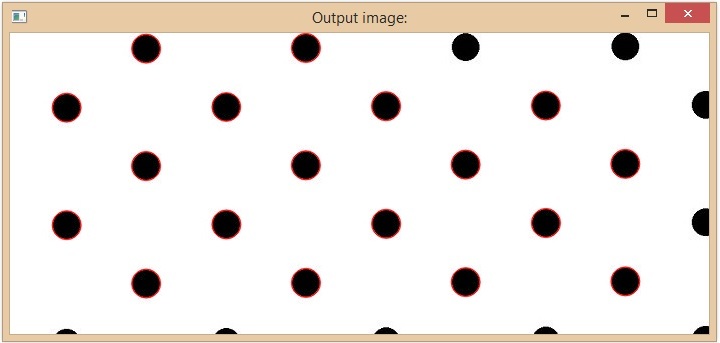
在此示例中,我们将使用 cv2.SimpleBlobDetector_create() 方法检测白色背景图像上的黑点。
import cv2
import numpy as np;

im = cv2.imread("Images/BlackDots.jpg", cv2.IMREAD_GRAYSCALE)
# 使用默认参数创建检测器。
detector = cv2.SimpleBlobDetector_create()

# 检测点。
keypoints = detector.detect(im)

print("黑点数为:",len(keypoints))

# 将检测到的斑点绘制为红色圆圈。
im_with_keypoints = cv2.drawKeypoints(im, keypoints, np.array([]), (0,0,250), cv2.DRAW_MATCHES_FLAGS_DRAW_RICH_KEYPOINTS)

cv2.imshow("输出图像:", im_with_keypoints)
cv2.waitKey(0)
输出
黑点数为:18
在上面的代码中,使用 cv2.DRAW_MATCHES_FLAGS_DRAW_RICH_KEYPOINTS 确保圆的大小与 blob 的大小相对应。在输出中我们可以看到给定图像中的黑点总数为 49。
输入图像

输出图像