Espresso 测试框架 - WebView
WebView 是 Android 提供的一种特殊视图,用于在应用程序内显示网页。WebView 不提供像 chrome 和 firefox 这样的成熟浏览器应用程序的所有功能。但是,它提供了对要显示的内容的完全控制,并公开了要在网页内调用的所有 Android 功能。它启用了 WebView 并提供了一个特殊的环境,在该环境中,可以使用 HTML 技术和相机和拨打联系人等本机功能轻松设计 UI。此功能集使 WebView 能够提供一种称为 混合应用程序 的新型应用程序,其中 UI 以 HTML 完成,业务逻辑以 JavaScript 或通过外部 API 端点完成。
通常,测试 WebView 需要是一项挑战,因为它使用 HTML 技术作为其用户界面元素,而不是本机用户界面/视图。 Espresso 在这一领域表现出色,它提供了一组新的 Web 匹配器和 Web 断言,这些匹配器和断言有意与原生视图匹配器和视图断言相似。同时,它还包含基于 Web 技术的测试环境,提供了一种均衡的方法。
Espresso Web 建立在 WebDriver Atom 框架之上,用于查找和操作 Web 元素。Atom 类似于视图操作。Atom 将在网页内执行所有交互。WebDriver 公开了一组预定义的方法,如 findElement()、getElement(),用于查找 Web 元素并返回相应的原子(在网页中执行操作)。
标准的 Web 测试语句如下所示,
onWebView()
   .withElement(Atom)
   .perform(Atom)
   .check(WebAssertion)
这里,
onWebView() − 与 onView() 类似,它公开了一组 API 来测试 WebView。
withElement() − 使用 Atom 在网页内定位 Web 元素的几种方法之一,并返回 WebInteration 对象,类似于 ViewInteraction。
perform() − 使用 Atom 在网页内执行操作并返回 WebInteraction。
check() − 这使用 WebAssertion 执行必要的断言。
示例 Web 测试代码如下,
onWebView()
   .withElement(findElement(Locator.ID, "apple"))
   .check(webMatches(getText(), containsString("Apple")))
这里,
findElement() 定位一个元素并返回一个 Atom
webMatches 与 matches 方法类似
编写示例应用程序
让我们基于 WebView 编写一个简单应用程序,并使用 onWebView() 方法编写测试用例。按照以下步骤编写示例应用程序 −
启动 Android Studio。
按照前面讨论的方式创建新项目并将其命名为 MyWebViewApp。
使用 Refactor 将应用程序迁移到 AndroidX 框架 → 迁移到 AndroidX 选项菜单。
在 AndroidManifest.xml 文件中添加以下配置选项以授予访问 Internet 的权限。
<uses-permission android:name = "android.permission.INTERNET" />
Espresso web 作为单独的插件提供。因此,在 app/build.gradle 中添加依赖项并同步它。
dependencies {
   androidTestImplementation 'androidx.test:rules:1.1.1'
   androidTestImplementation 'androidx.test.espresso:espresso-web:3.1.1'
}
在主活动中移除默认设计并添加WebView。activity_main.xml内容如下,
<?xml version = "1.0" encoding = "utf-8"?>
<RelativeLayout xmlns:android = "http://schemas.android.com/apk/res/android"
   xmlns:app = "http://schemas.android.com/apk/res-auto"
   xmlns:tools = "http://schemas.android.com/tools"
   android:layout_width = "match_parent"
   android:layout_height = "match_parent"
   tools:context = ".MainActivity">
   <WebView
      android:id = "@+id/web_view_test"
      android:layout_width = "fill_parent"
      android:layout_height = "fill_parent" />
</RelativeLayout>
创建一个新类 ExtendedWebViewClient,扩展 WebViewClient,并覆盖 shouldOverrideUrlLoading 方法,以在同一个 WebView 中加载链接操作;否则,它将在应用程序外部打开一个新的浏览器窗口。将其放在 MainActivity.java 中。
private class ExtendedWebViewClient extends WebViewClient {
   @Override
   public boolean shouldOverrideUrlLoading(WebView view, String url) {
      view.loadUrl(url);
      return true;
   }
}
现在,在MainActivity的onCreate方法中添加以下代码。该代码的目的是找到WebView,对其进行适当的配置,然后最终加载目标url。
// 查找web view
WebView webView = (WebView) findViewById(R.id.web_view_test);

// 设置web view客户端
webView.setWebViewClient(new ExtendedWebViewClient());

// 清除缓存
webView.clearCache(true);

// 加载Url
webView.loadUrl("http://<your domain or IP>/index.html");
这里,
index.html的内容如下 −
<html>
   <head>
      <title>Android Web View Sample</title>
   </head>
   <body>
      <h1>Fruits</h1>
      <ol>
         <li><a href = "apple.html" id = "apple">Apple</a></li>
         <li><a href = "banana.html" id = "banana">Banana</a></li>
         </ol>
   </body>
</html>
index.html中引用的apple.html文件内容如下 −
<html>
   <head>
      <title>Android Web View Sample</title>
   </head>

   <body>
      <h1>Apple</h1>
   </body>
</html>
banana.html中引用的banana.html文件内容如下,
<html>
   <head>
      <title>Android Web View Sample</title>
   </head>

   <body>
      <h1>Banana</h1>
   </body>
</html>
将 index.html、apple.html 和 banana.html 放置在 Web 服务器中
将 loadUrl 方法中的 url 替换为您配置的 url。
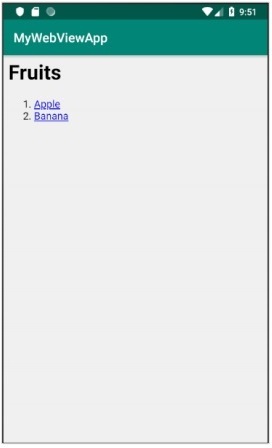
现在,运行应用程序并手动检查一切是否正常。以下是 WebView 示例应用程序 的屏幕截图 −
现在,打开 ExampleInstrumentedTest.java 文件并添加以下规则 −
@Rule
public ActivityTestRule<MainActivity> mActivityRule =
   new ActivityTestRule<MainActivity>(MainActivity.class, false, true) {
   @Override
   protected void afterActivityLaunched() {
      onWebView(withId(R.id.web_view_test)).forceJavascriptEnabled();
   }
};
在这里,我们找到了 WebView,并启用了 WebView 的 JavaScript,因为 espresso 网络测试框架专门通过 JavaScript 引擎来识别和操作网络元素。
现在,添加测试用例来测试我们的 WebView 及其行为。
@Test
public void webViewTest(){
   onWebView()
      .withElement(findElement(Locator.ID, "apple"))
      .check(webMatches(getText(), containsString("Apple")))
      .perform(webClick())
      .withElement(findElement(Locator.TAG_NAME, "h1"))
      .check(webMatches(getText(), containsString("Apple")));
}
此处,测试按以下顺序进行:
通过 findElement() 方法和 Locator.ID 枚举,使用其 id 属性找到链接 apple。
使用 webMatches() 方法检查链接的文本
对链接执行点击操作。它打开 apple.html 页面。
再次使用 findElement() 方法和 Locator.TAG_NAME 枚举找到 h1 元素。
最后再次使用 webMatches() 方法检查 h1 标签的文本。
最后,使用 android studio 上下文菜单运行测试用例。


